Sesto al Reghena - Tour Itinerary

Plain
GENERAL INFORMATION
LAST INSPECTION DATE
27/10/2022
PLANNED ITINERARY
Sesto al Reghena - Tour Itinerary
LENGTH
2000 meters
DEPARTURE
Parking in via Zanardini (near the Reghena river)
The tour can take place at any time of the year.
Departure from the car park of Via Zanardini-Riva Schiavoni. There is a relatively uniform surface of asphalt, and in the last section, there are fifteen parking spaces reserved for vehicles, two of which are reserved for people with disability, which are only signposted horizontally (Photograph 1). The pavement, made of porphyry, is inaccessible due to the narrowing of the pavement down to 40 centimetres (Photograph 2); it is, therefore, necessary to continue on the roadway, taking into account, however, that since it is a dead-end street and a service road to the car park, traffic and speed are very limited, and therefore the itinerary is quite safe. The first section of the car park has another ten or so parking spaces reserved for vehicles, two of which are reserved for people with disability, which are well signposted both vertically and horizontally.
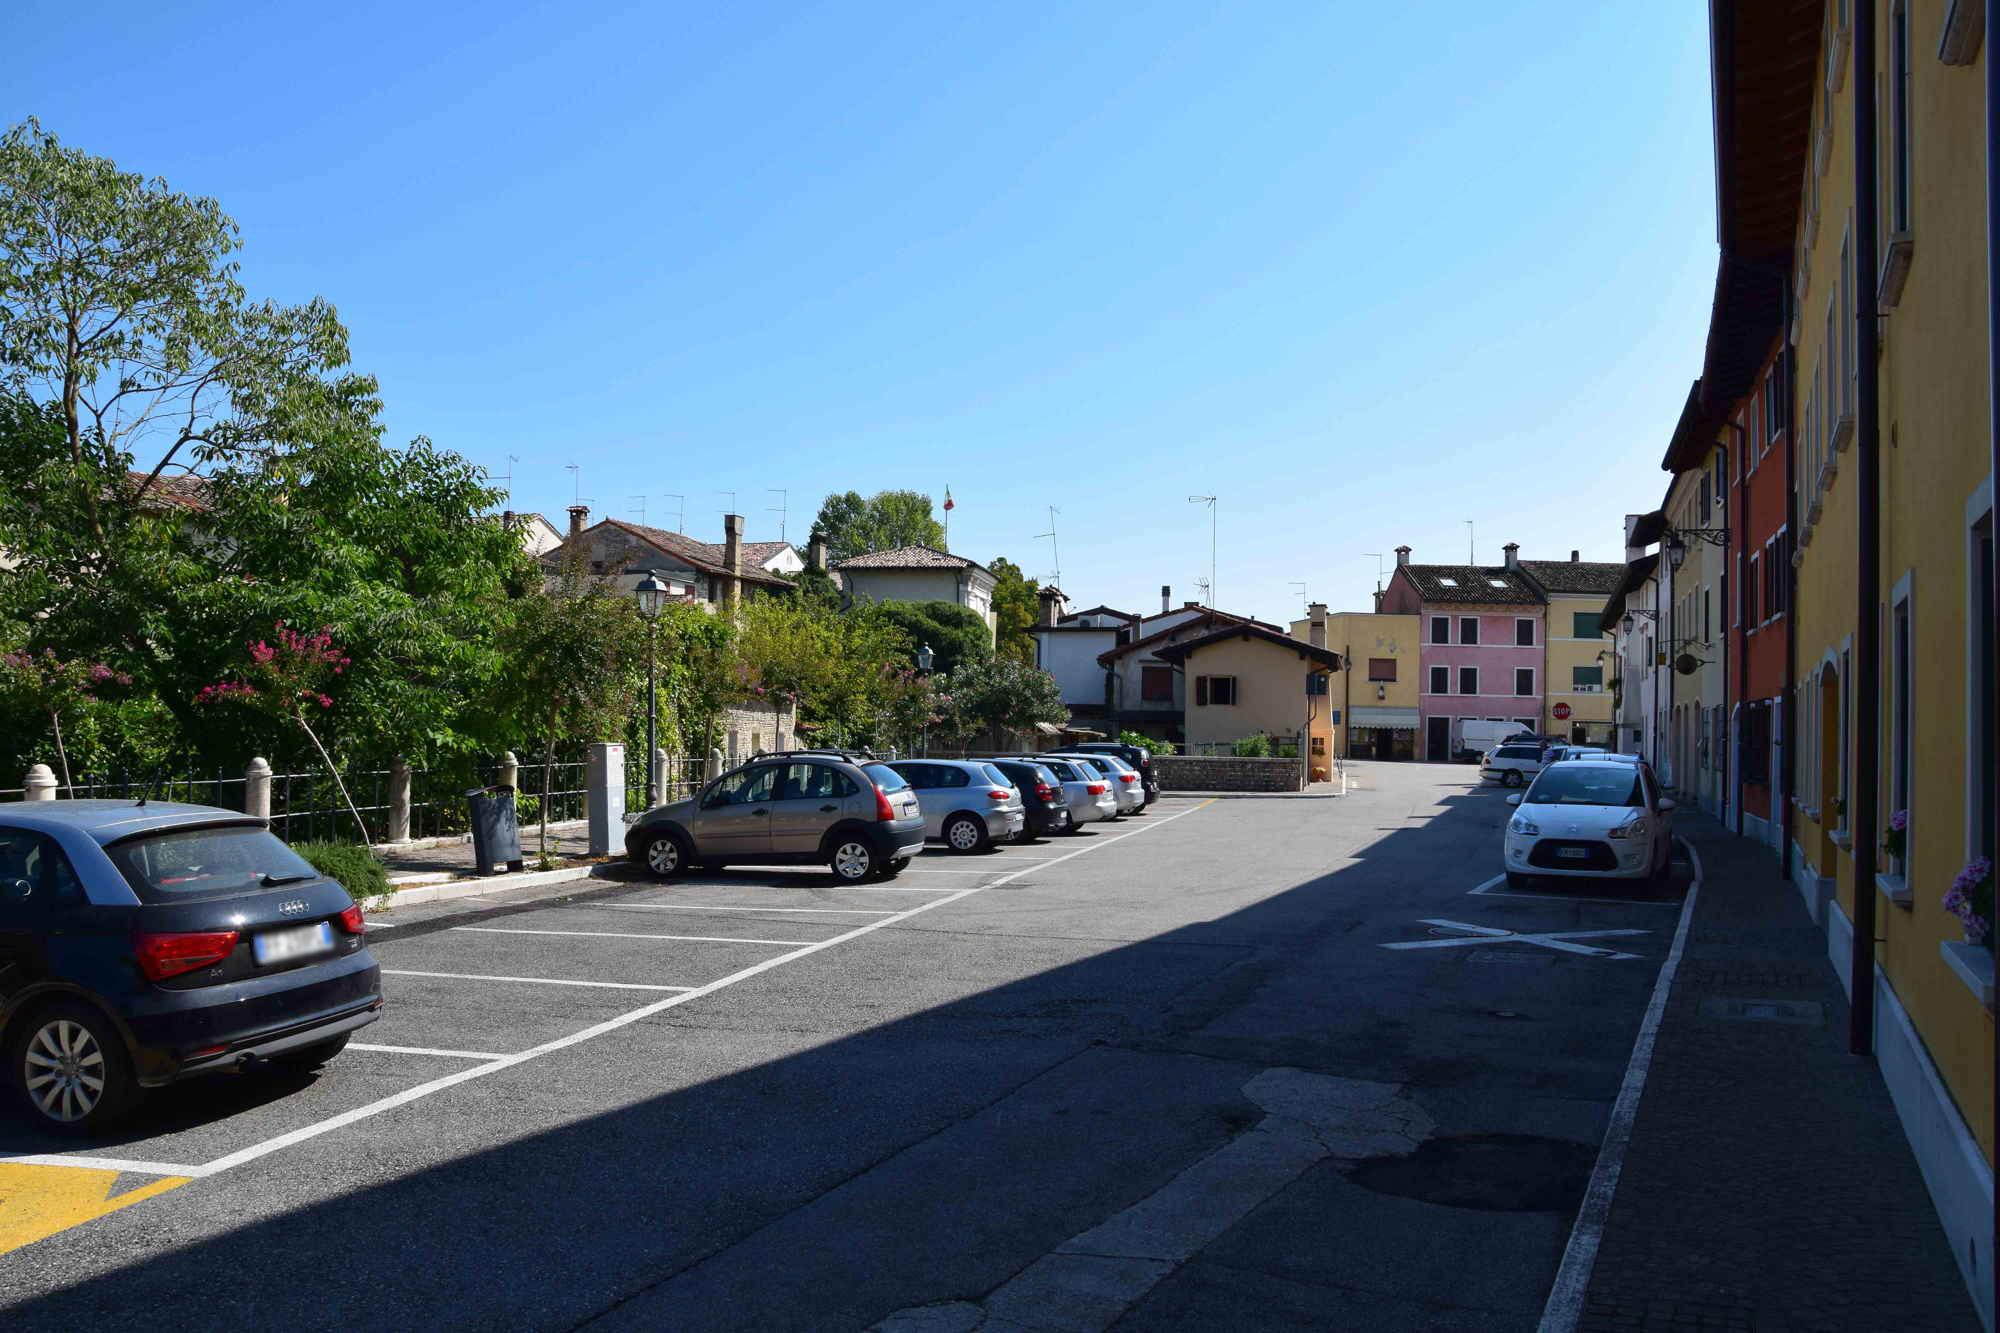
Photo 1 - Via Zanardini-Riva Schiavoni car park
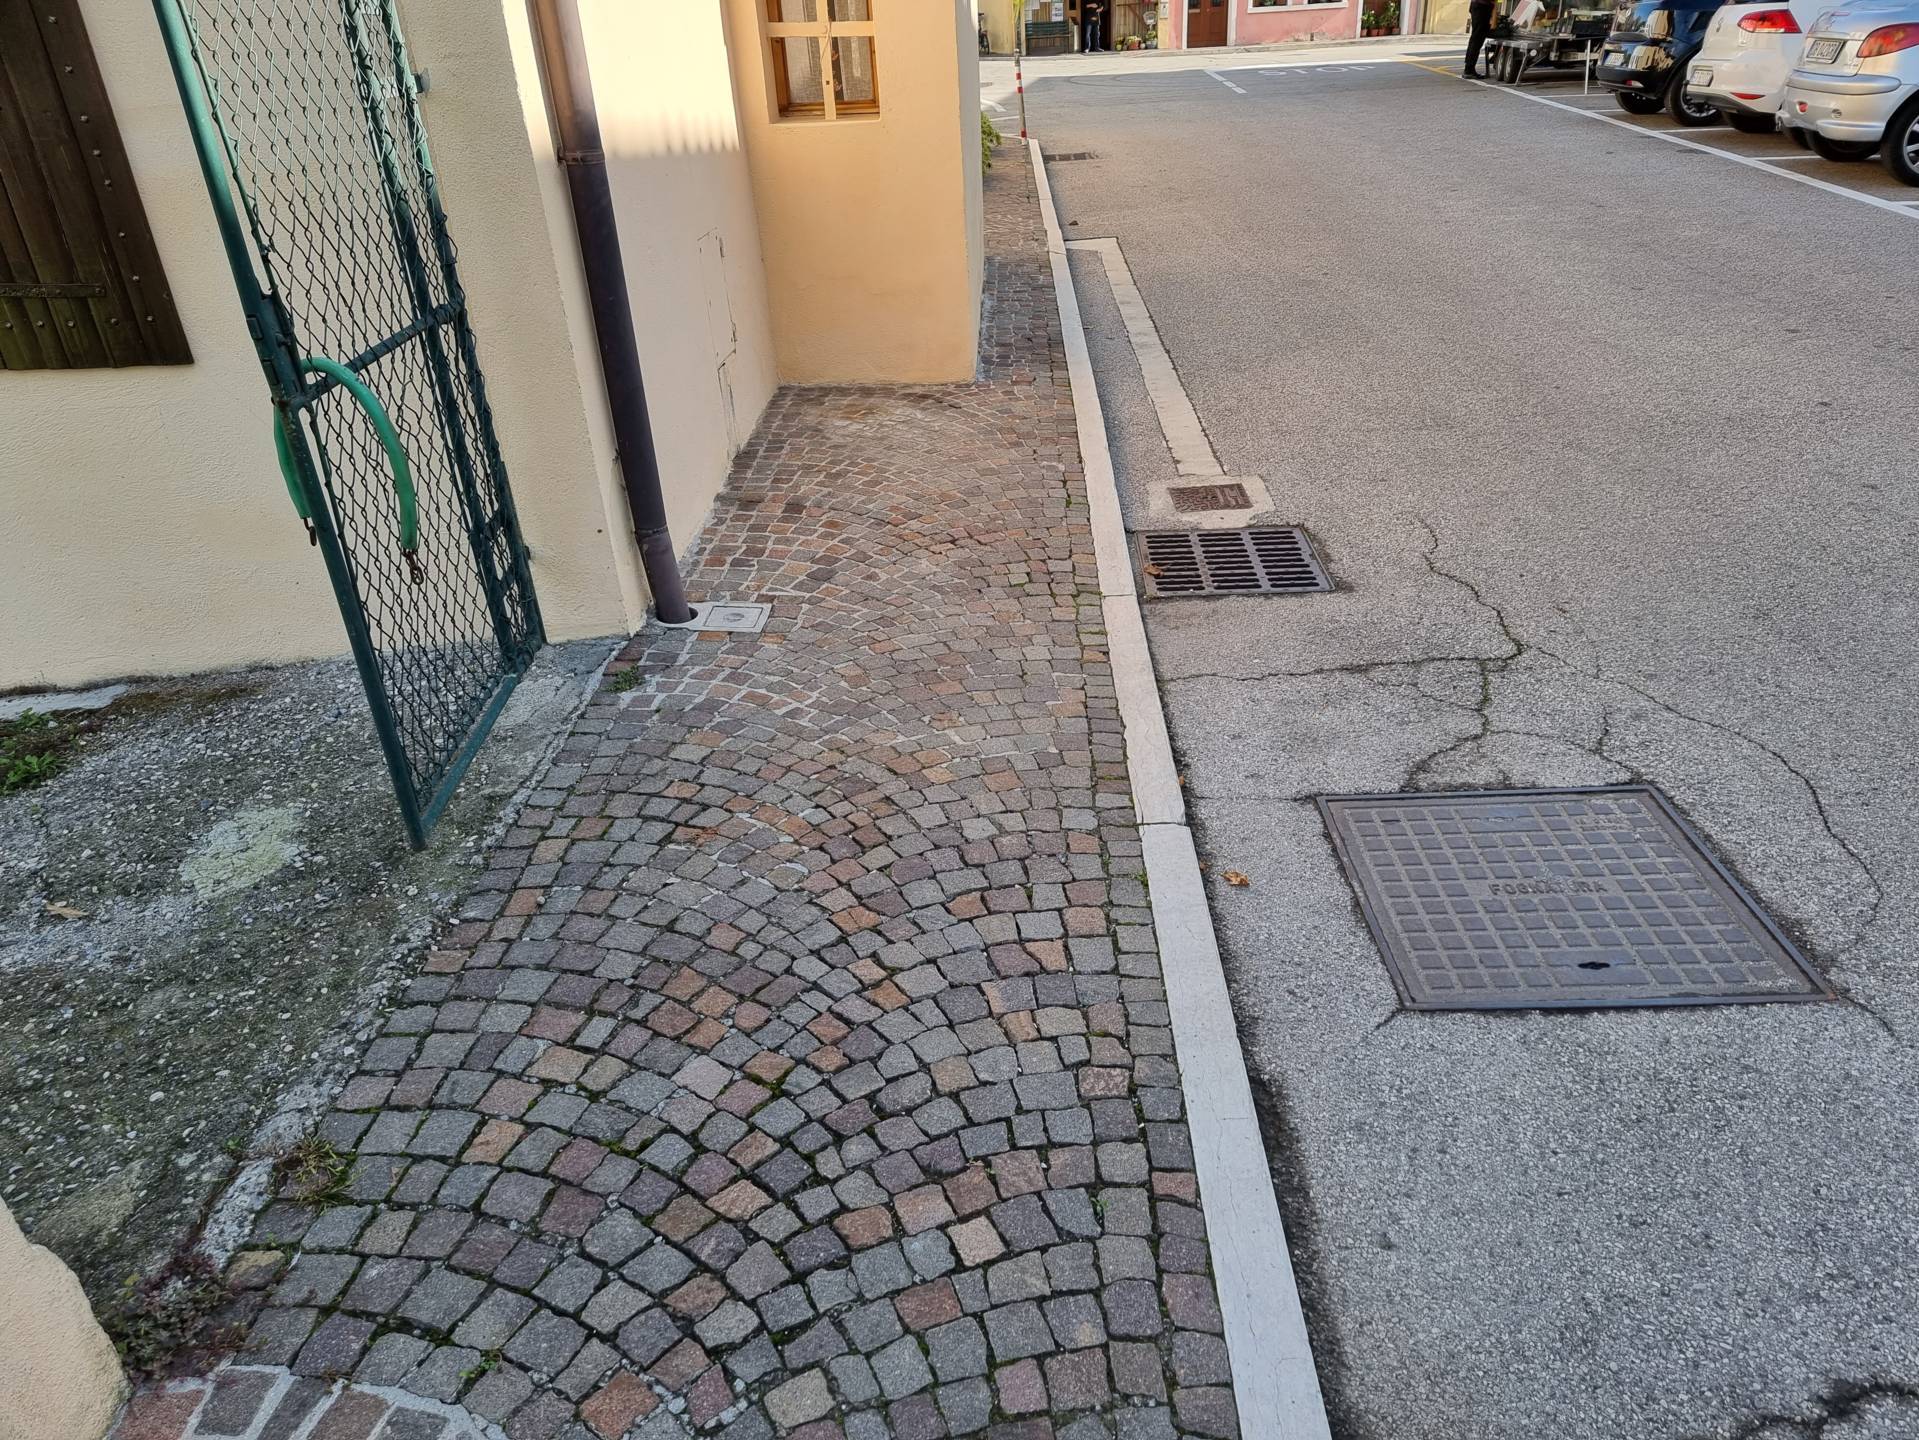
Photo 2 - pavement narrowing
The intersection of Via Zanardini and Via Roma (which begins with an arched gateway) is located at the end of the street. The route continues uphill on the paved road along Via Roma, which represents the only possible solution because the existing pavement, covered with porphyry cubes, on one side (towards the car park in Via Zanardini) and level with the roadway, ends near the archway entrance on Via Roma with a height differential of approximately 40 centimetres (Photograph 3). Via Roma features porphyry cube paving and stone block pavements, which are inaccessible because a step of 12-15 centimetres is necessary for access (Photograph 4).

Photo 3 - Arched portal towards via Roma
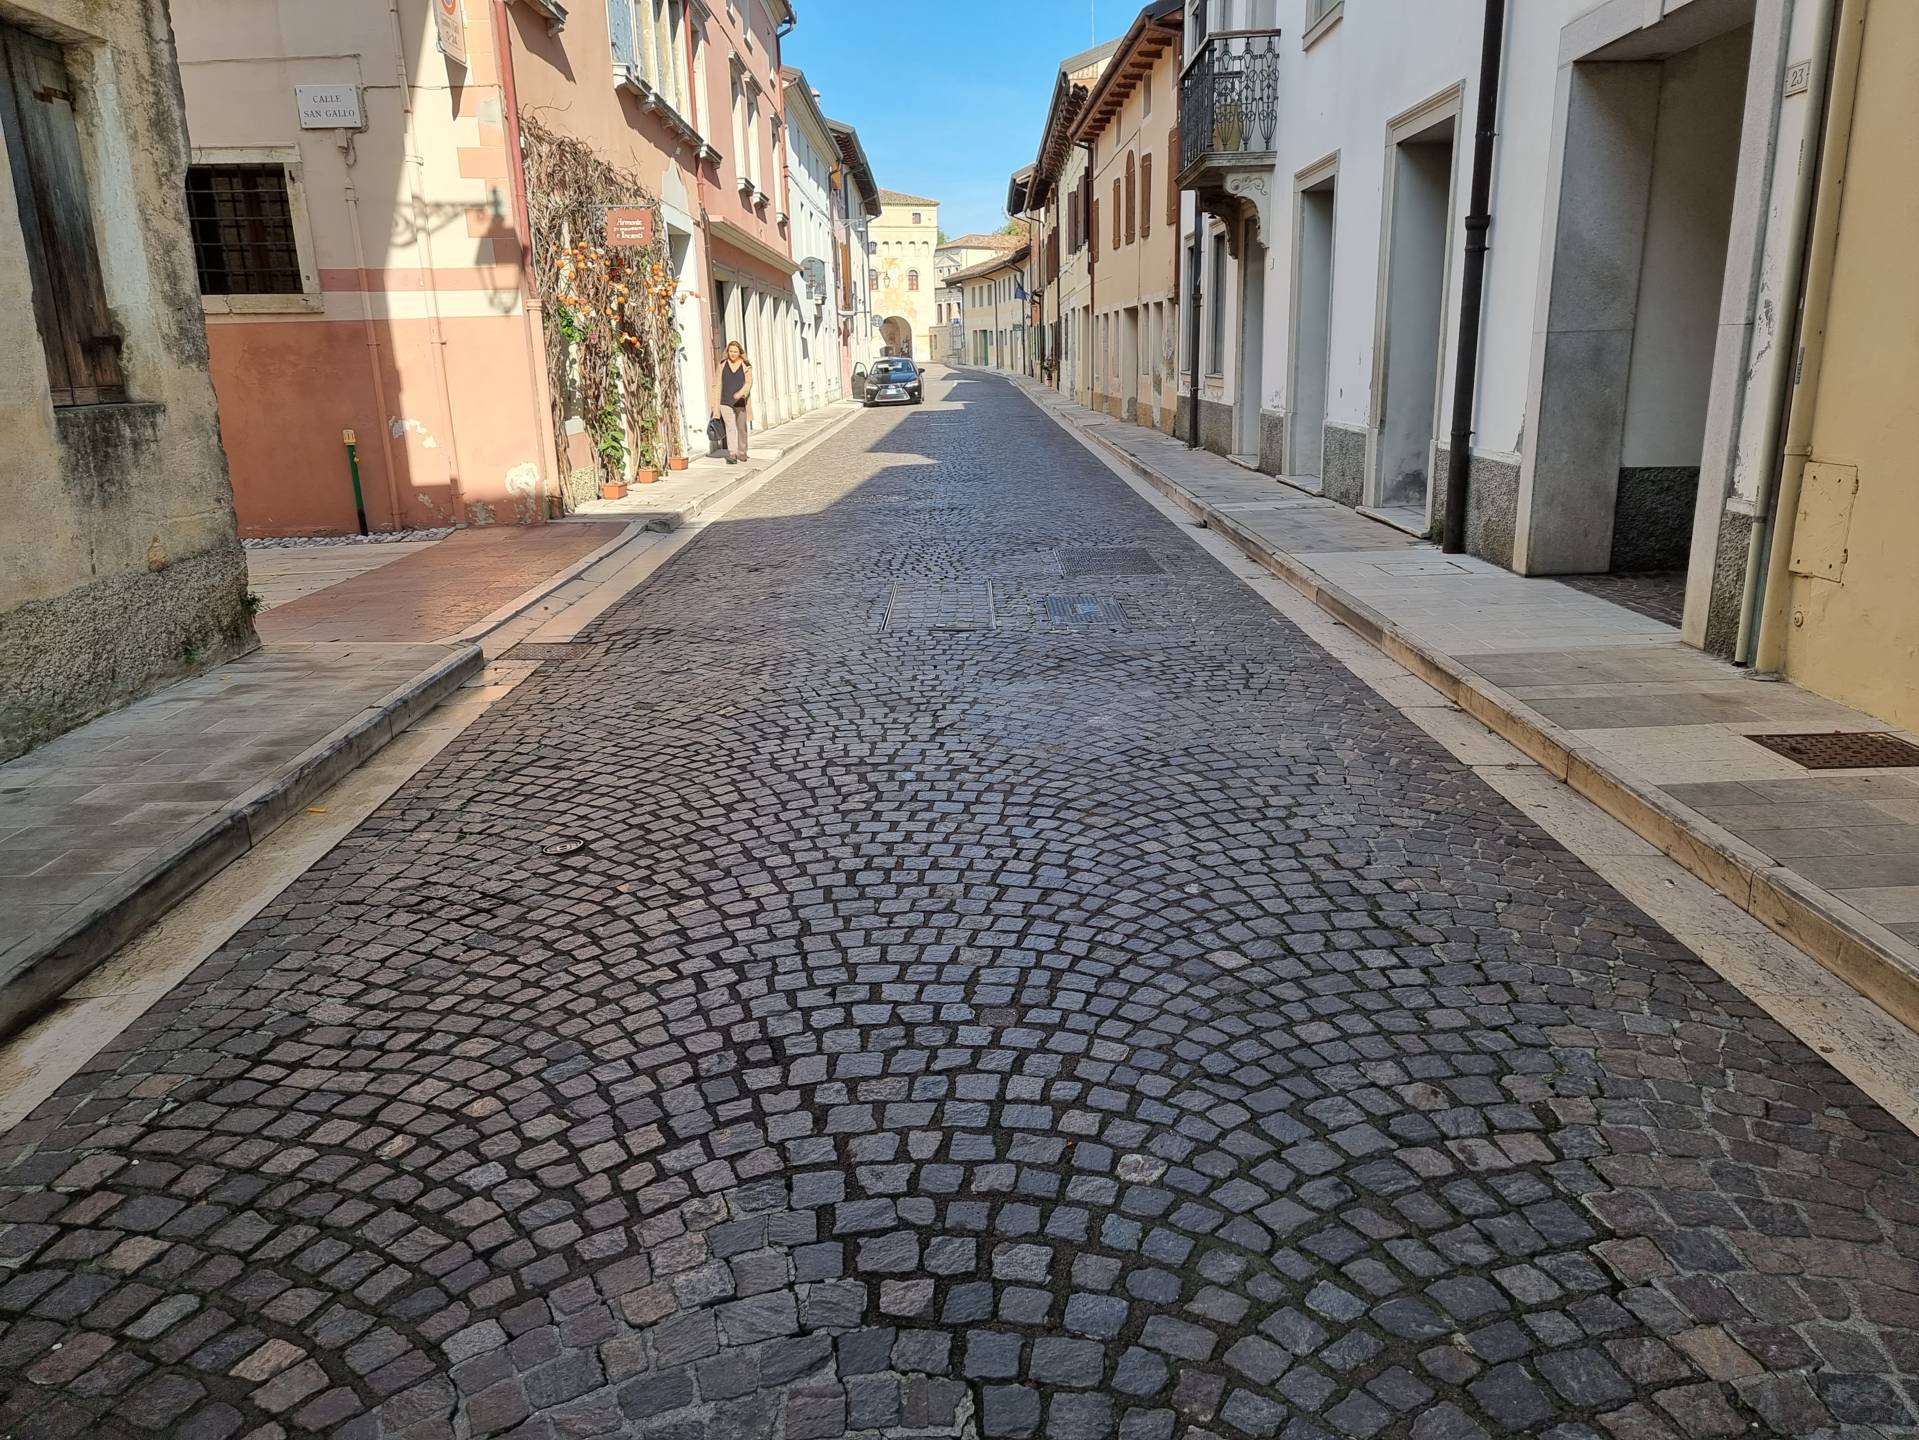
Photo 4 -Itinerary along via Roma
The itinerary continues by turning left along Calle San Gallo. The pavement is made of stone blocks, it has a fairly even surface, a slight slope of 0.6% and a width of approximately 3.50 metres. The last section, towards the small wooden bridge over the Reghena River, narrows and is uphill with a gradient of 7%.
A stopover area (Photograph 5) is located just before the bridge, to the left, along the bank of the Reghena River, with wooden benches and trees, and regular, even stone paving. From here it is possible to descend to the small lay-by below, on the river, via a stone stairway with handrails (Photographs 6-7).
The wooden plank bridge over the Reghena River is 2.10 metres wide, about ten metres long, has a slope of 14.5%, and is equipped with a handrail (Photograph 8). The descent from the bridge (Photograph 9) is on a gravel surface.
Photo 5 - lay-by
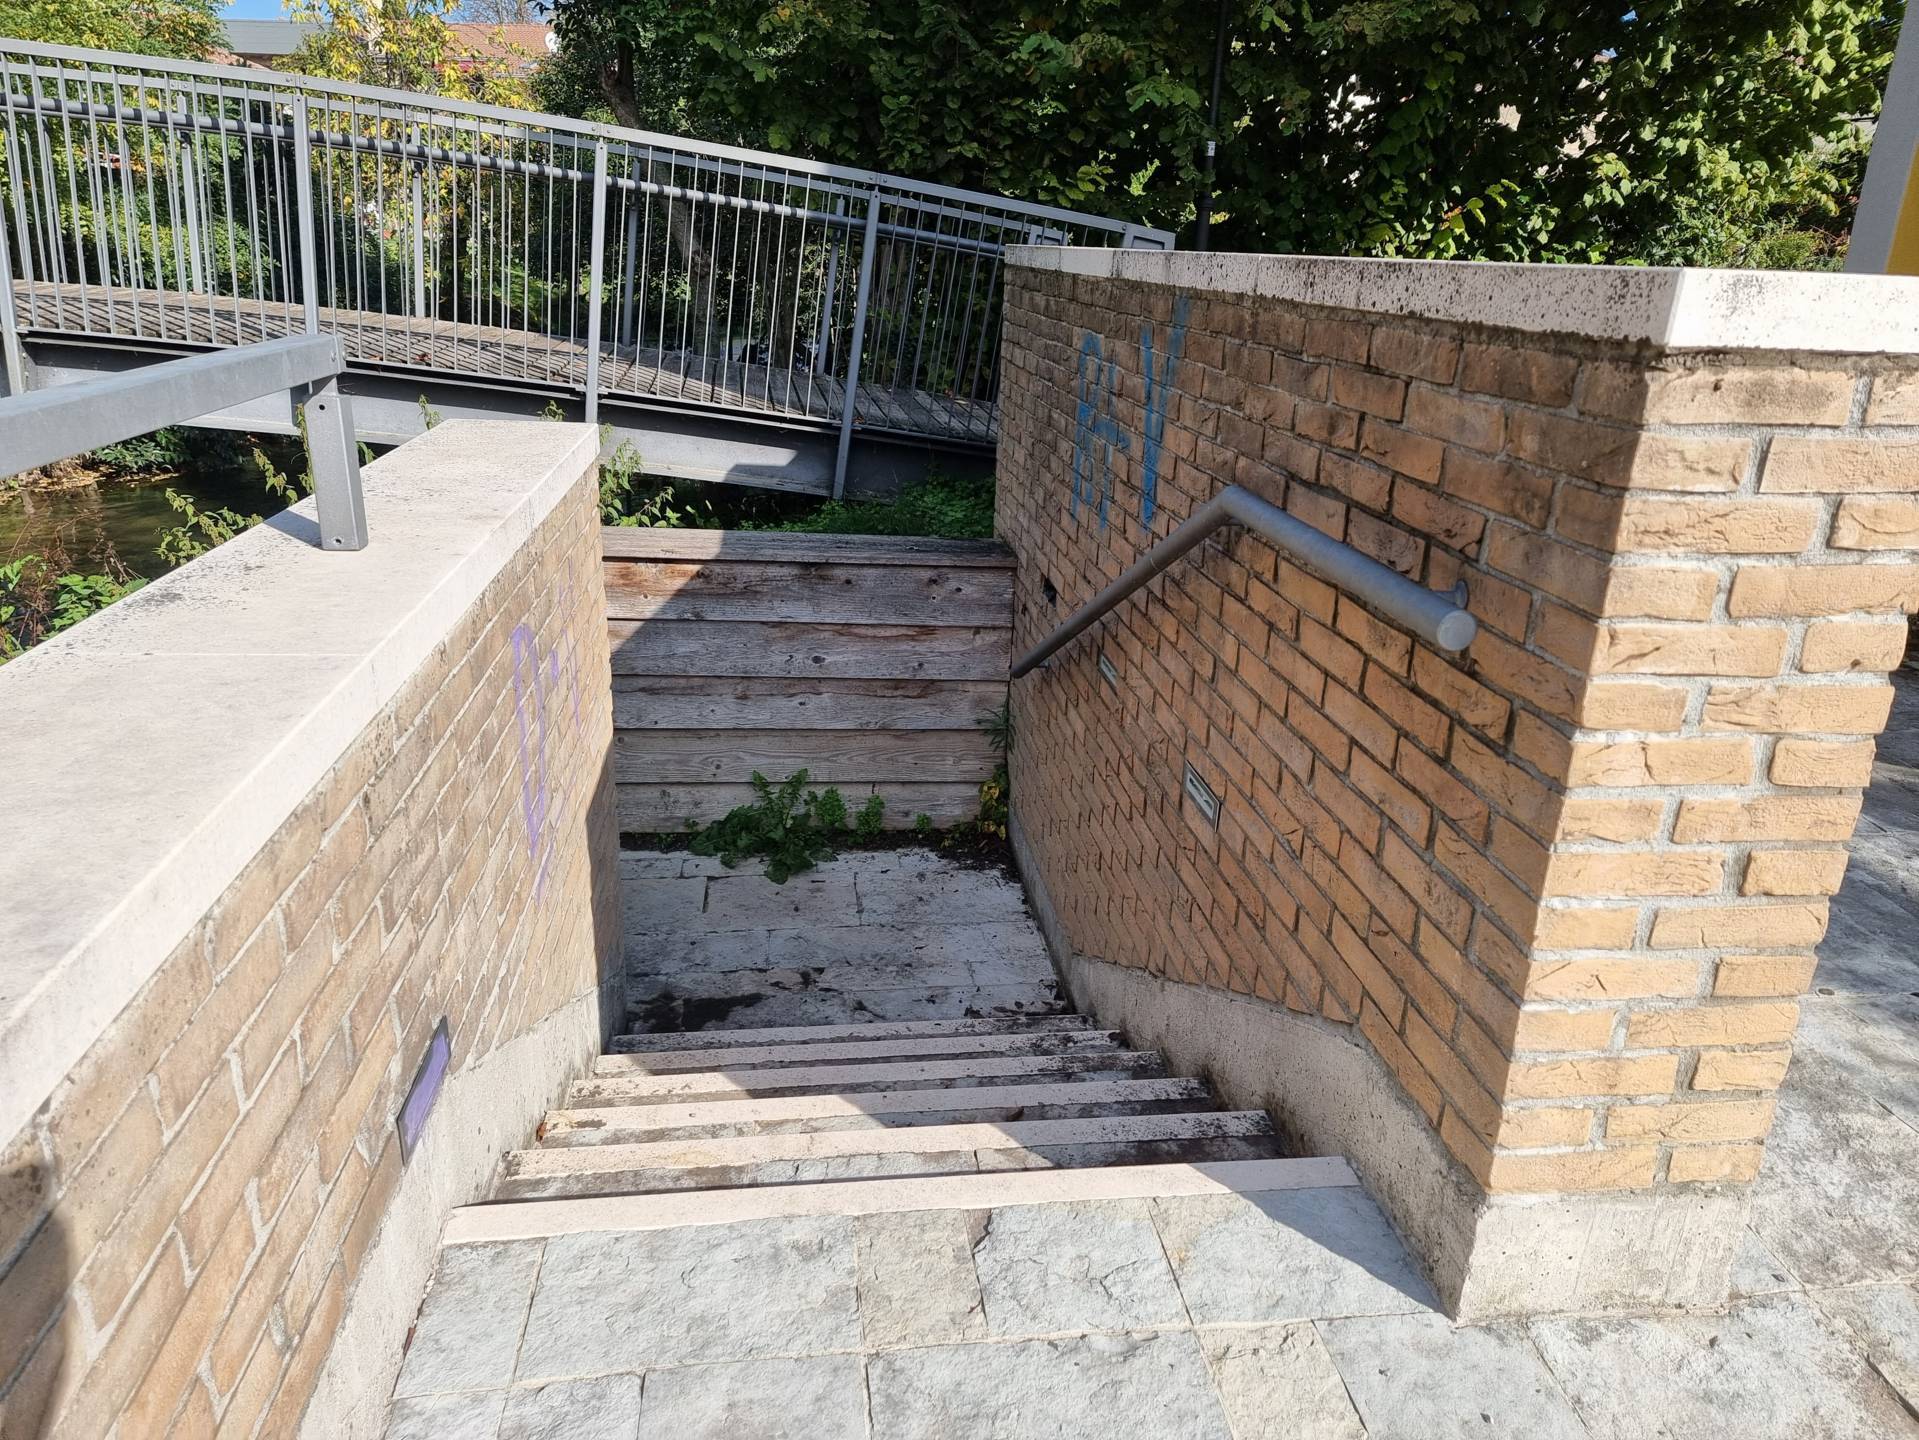
Photo 6 - stone steps

Photo 7 - riverside lay-by
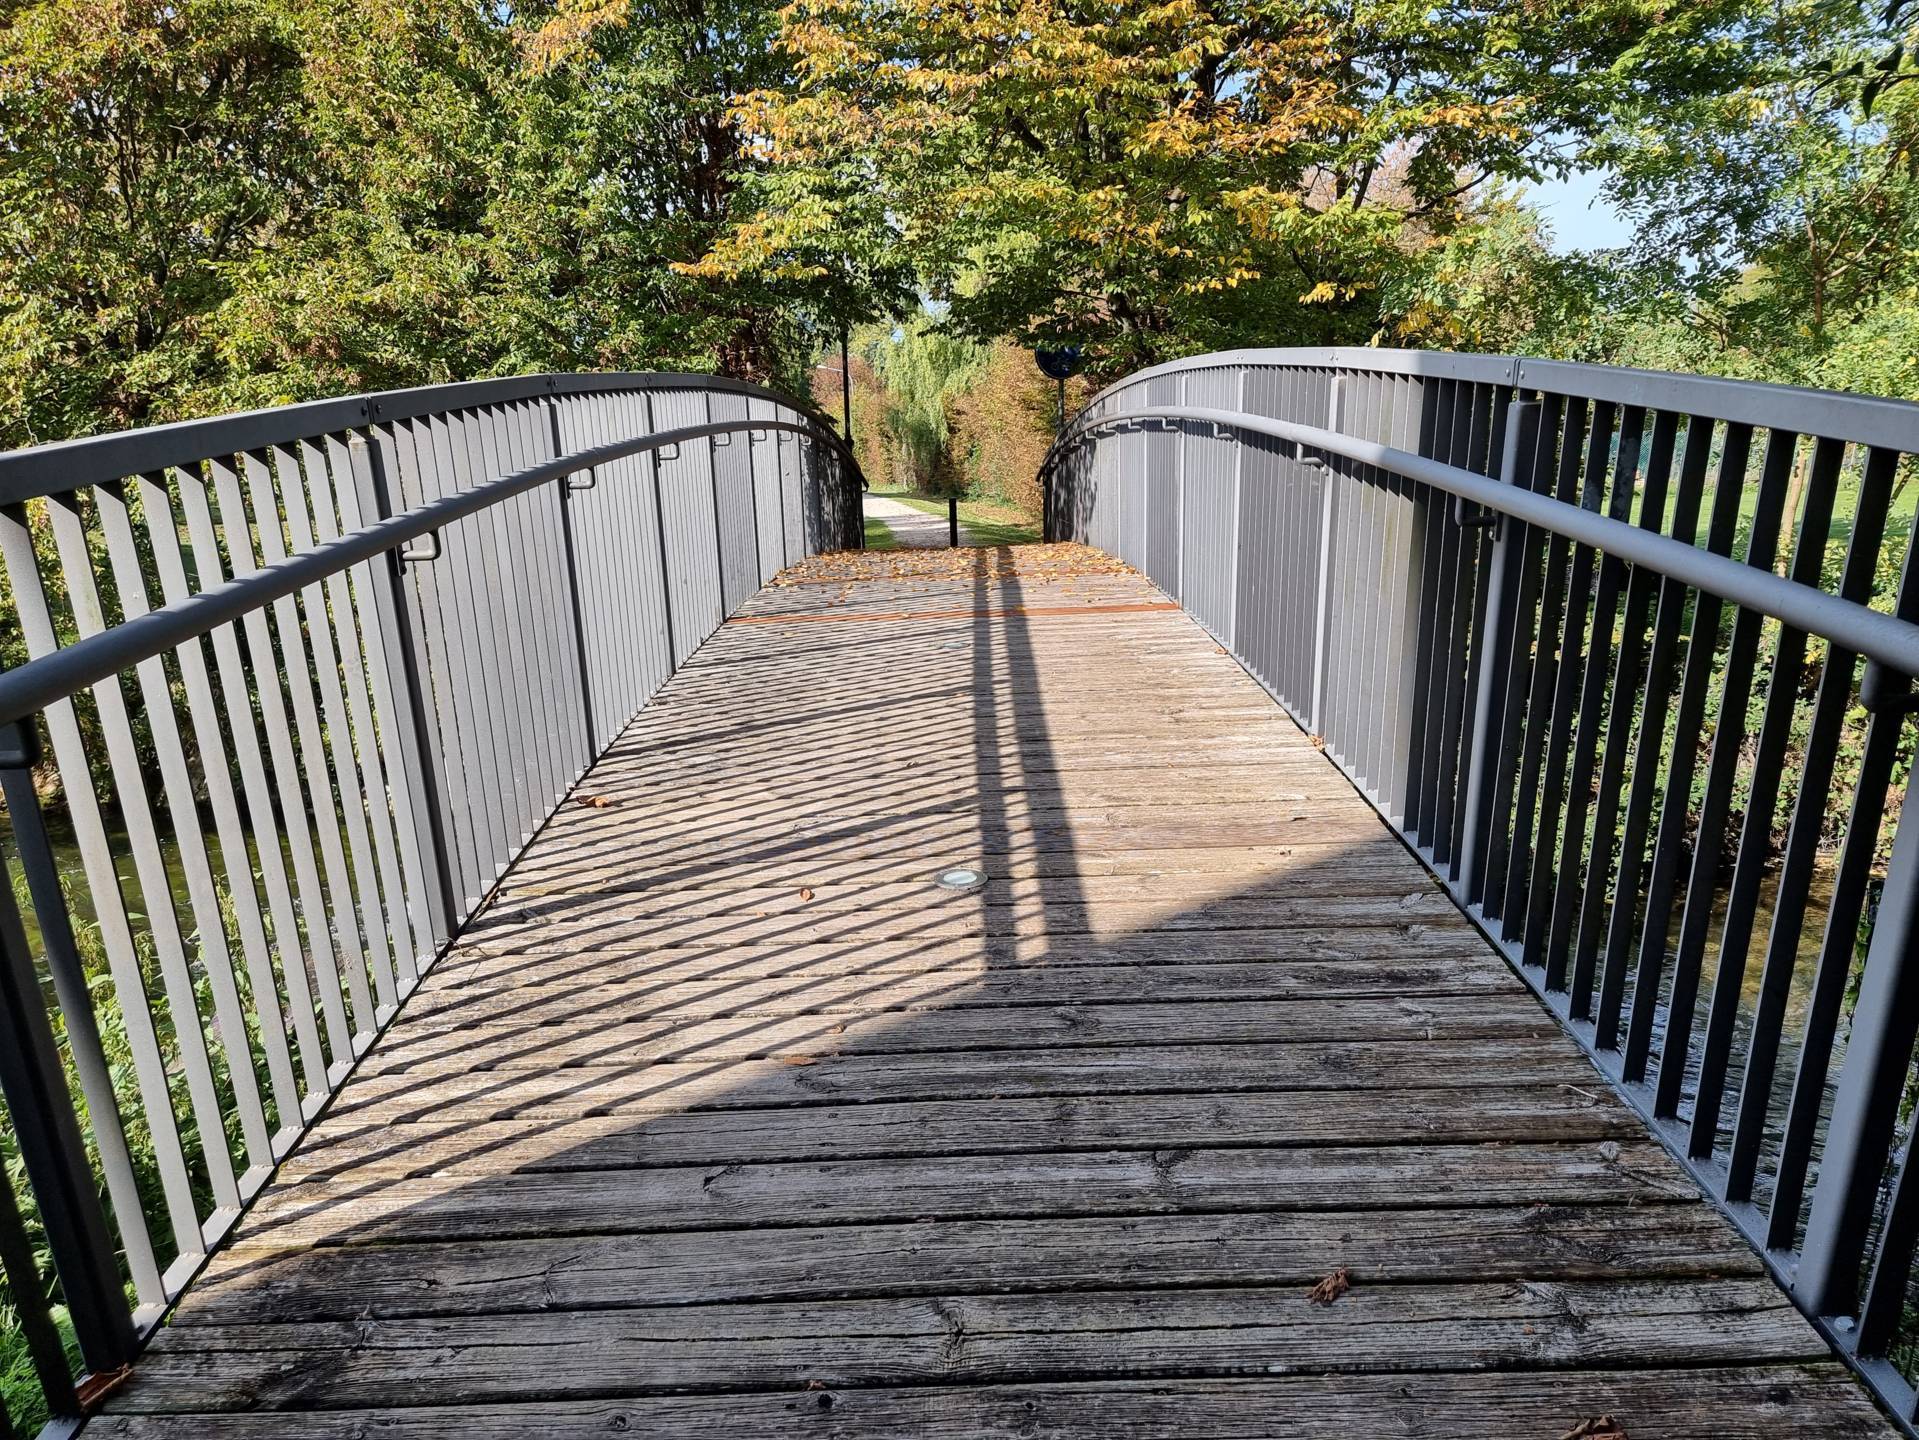
Photo 8 - bridge itinerary
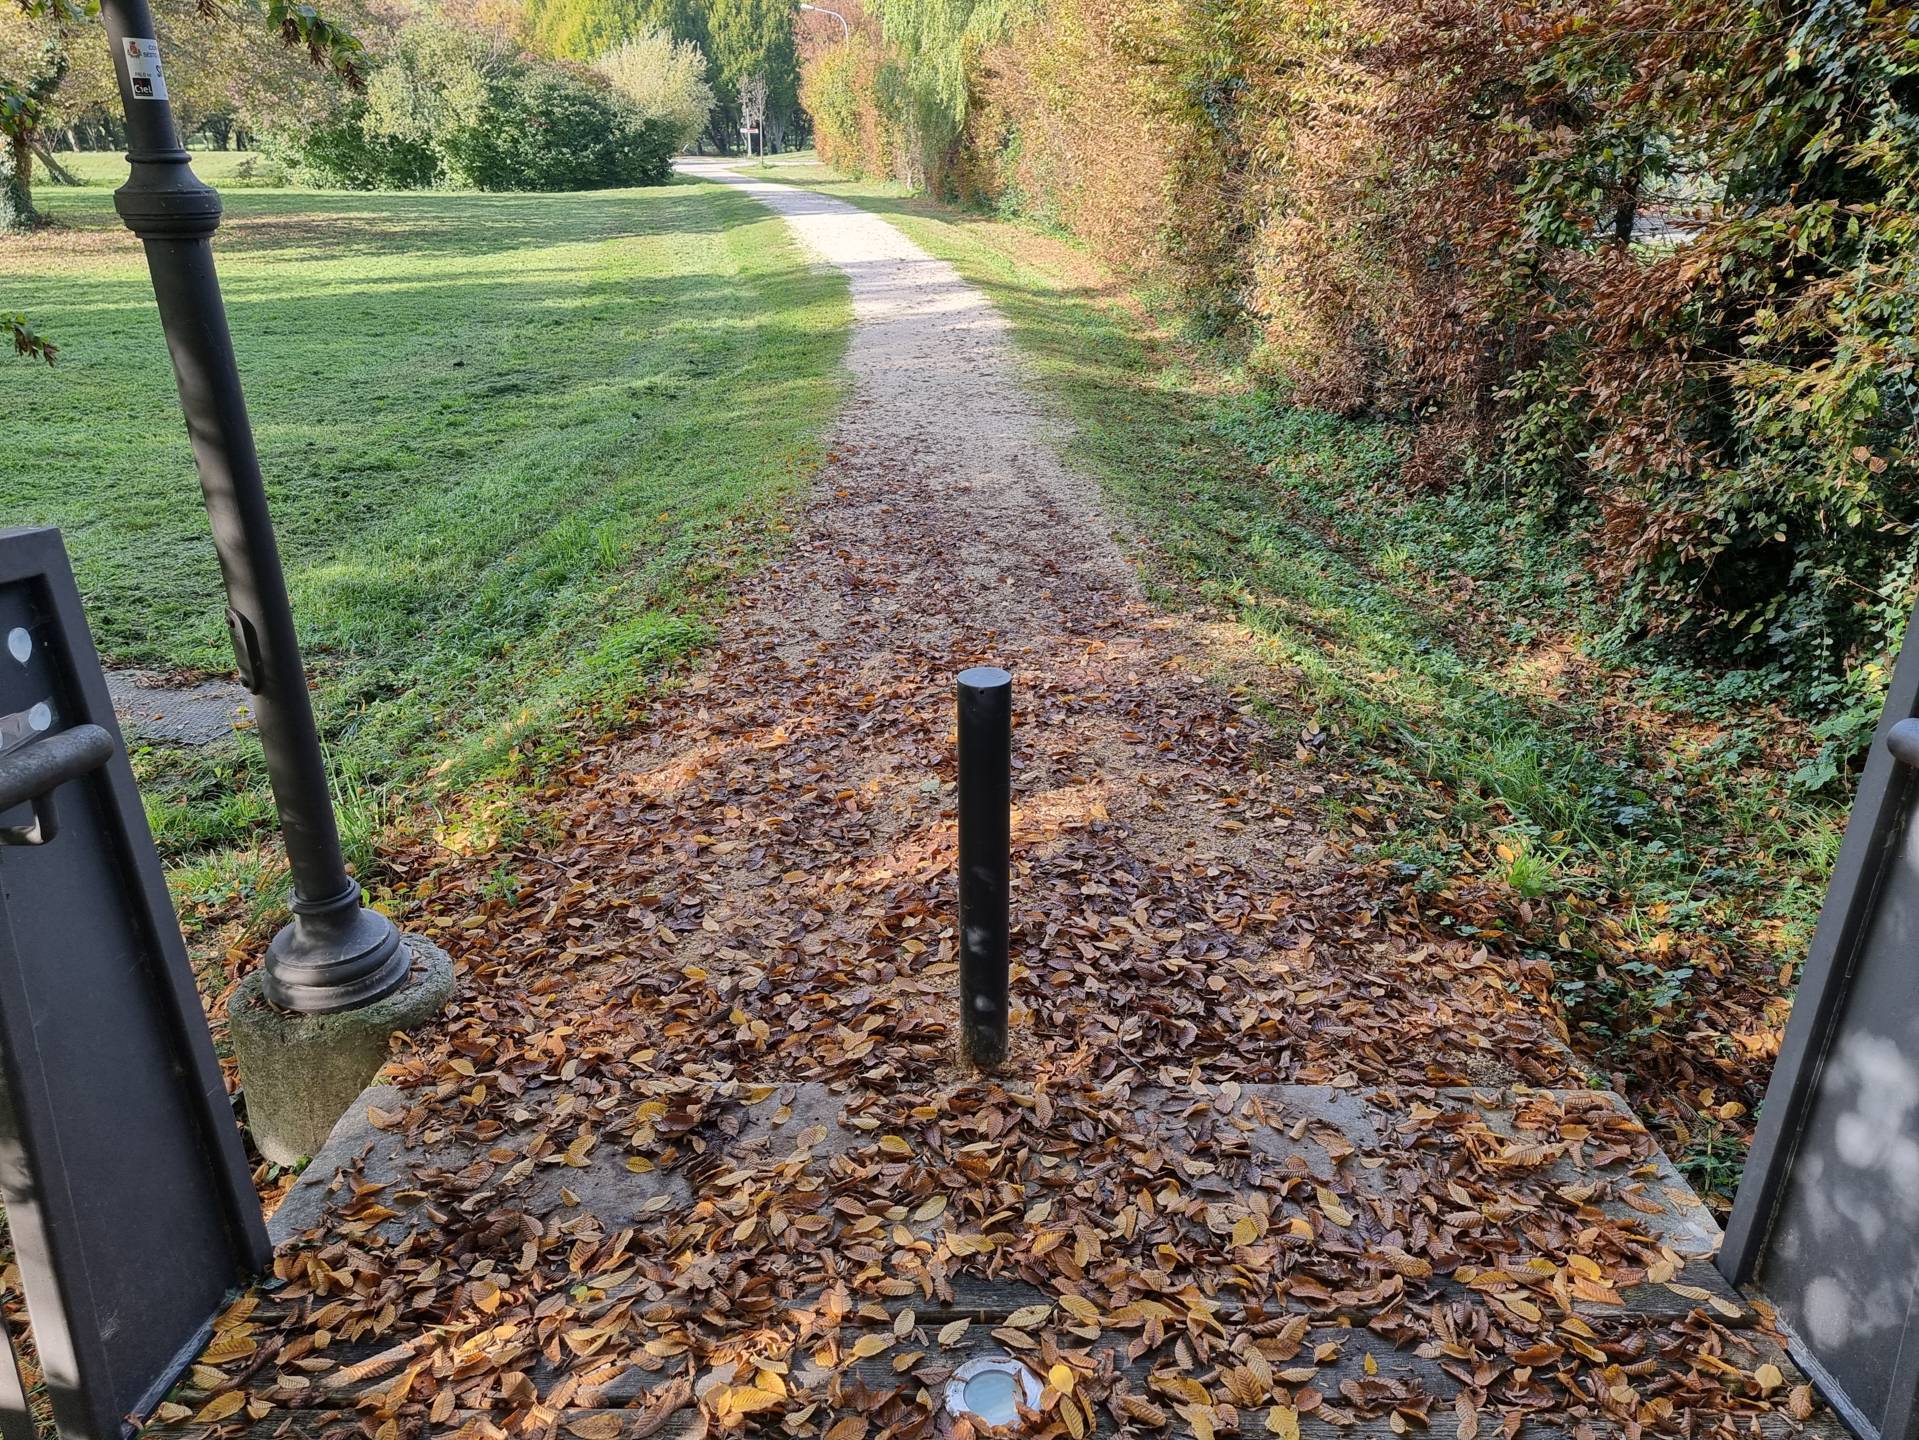
Photo 9 - descent on gravel
After the bridge, there is a dirt country path (Photograph 10), which is reserved for pedestrians and bicycles and continues to the junction with Via Giotto di Bondone. The pavement along Via Giotto di Bondone is made of compacted gravel, the surface is relatively even and the width measures 1.50 metres.
From the junction described previously, it is possible to continue either to the right (as recommended by the signs displayed - Itinerary 1), or to the left towards Via degli Olmi (Photograph 11).
In order to follow itinerary 1, it is necessary to walk along the pavement of Via Giotto di Bondone (the last section is in porphyry) (Photograph 12), which ends level with the road, and from here cross the road and continue to the left (Photograph 13) on the roadway (following the directions of itinerary 1). These sections of the road are mostly serving the car parks of existing buildings, so although there are no safe pedestrian crossings and although the itinerary has to continue along the road, the limited vehicular traffic combined with the width of the road, therefore, does not make this section of the itinerary very dangerous (Photograph 14). The bridge (Photograph 15) over the Reghena Canal, which is level and 3.50 metres in width, is located further on.
Next, on the left is a paved lay-by (Photograph 16), which is equipped with a wooden bench, while a wide gravel road (5-6 metres in width, with no pavement) is located on the right, and this leads to Via Giotto di Bondone (Photograph 17). This is where an inclined, metal-supported signpost indicates the position and points of interest in the area (Prati Burovich), which is now completely illegible due to weathering.

Photo 10 - Dirt country path
Photo 11 - Itinerary to the left towards via degli Olmi

Photo 12 - Itinerary 1 - right-hand pavement via Giotto di Bondone

Photo 13 - crossing on road surface
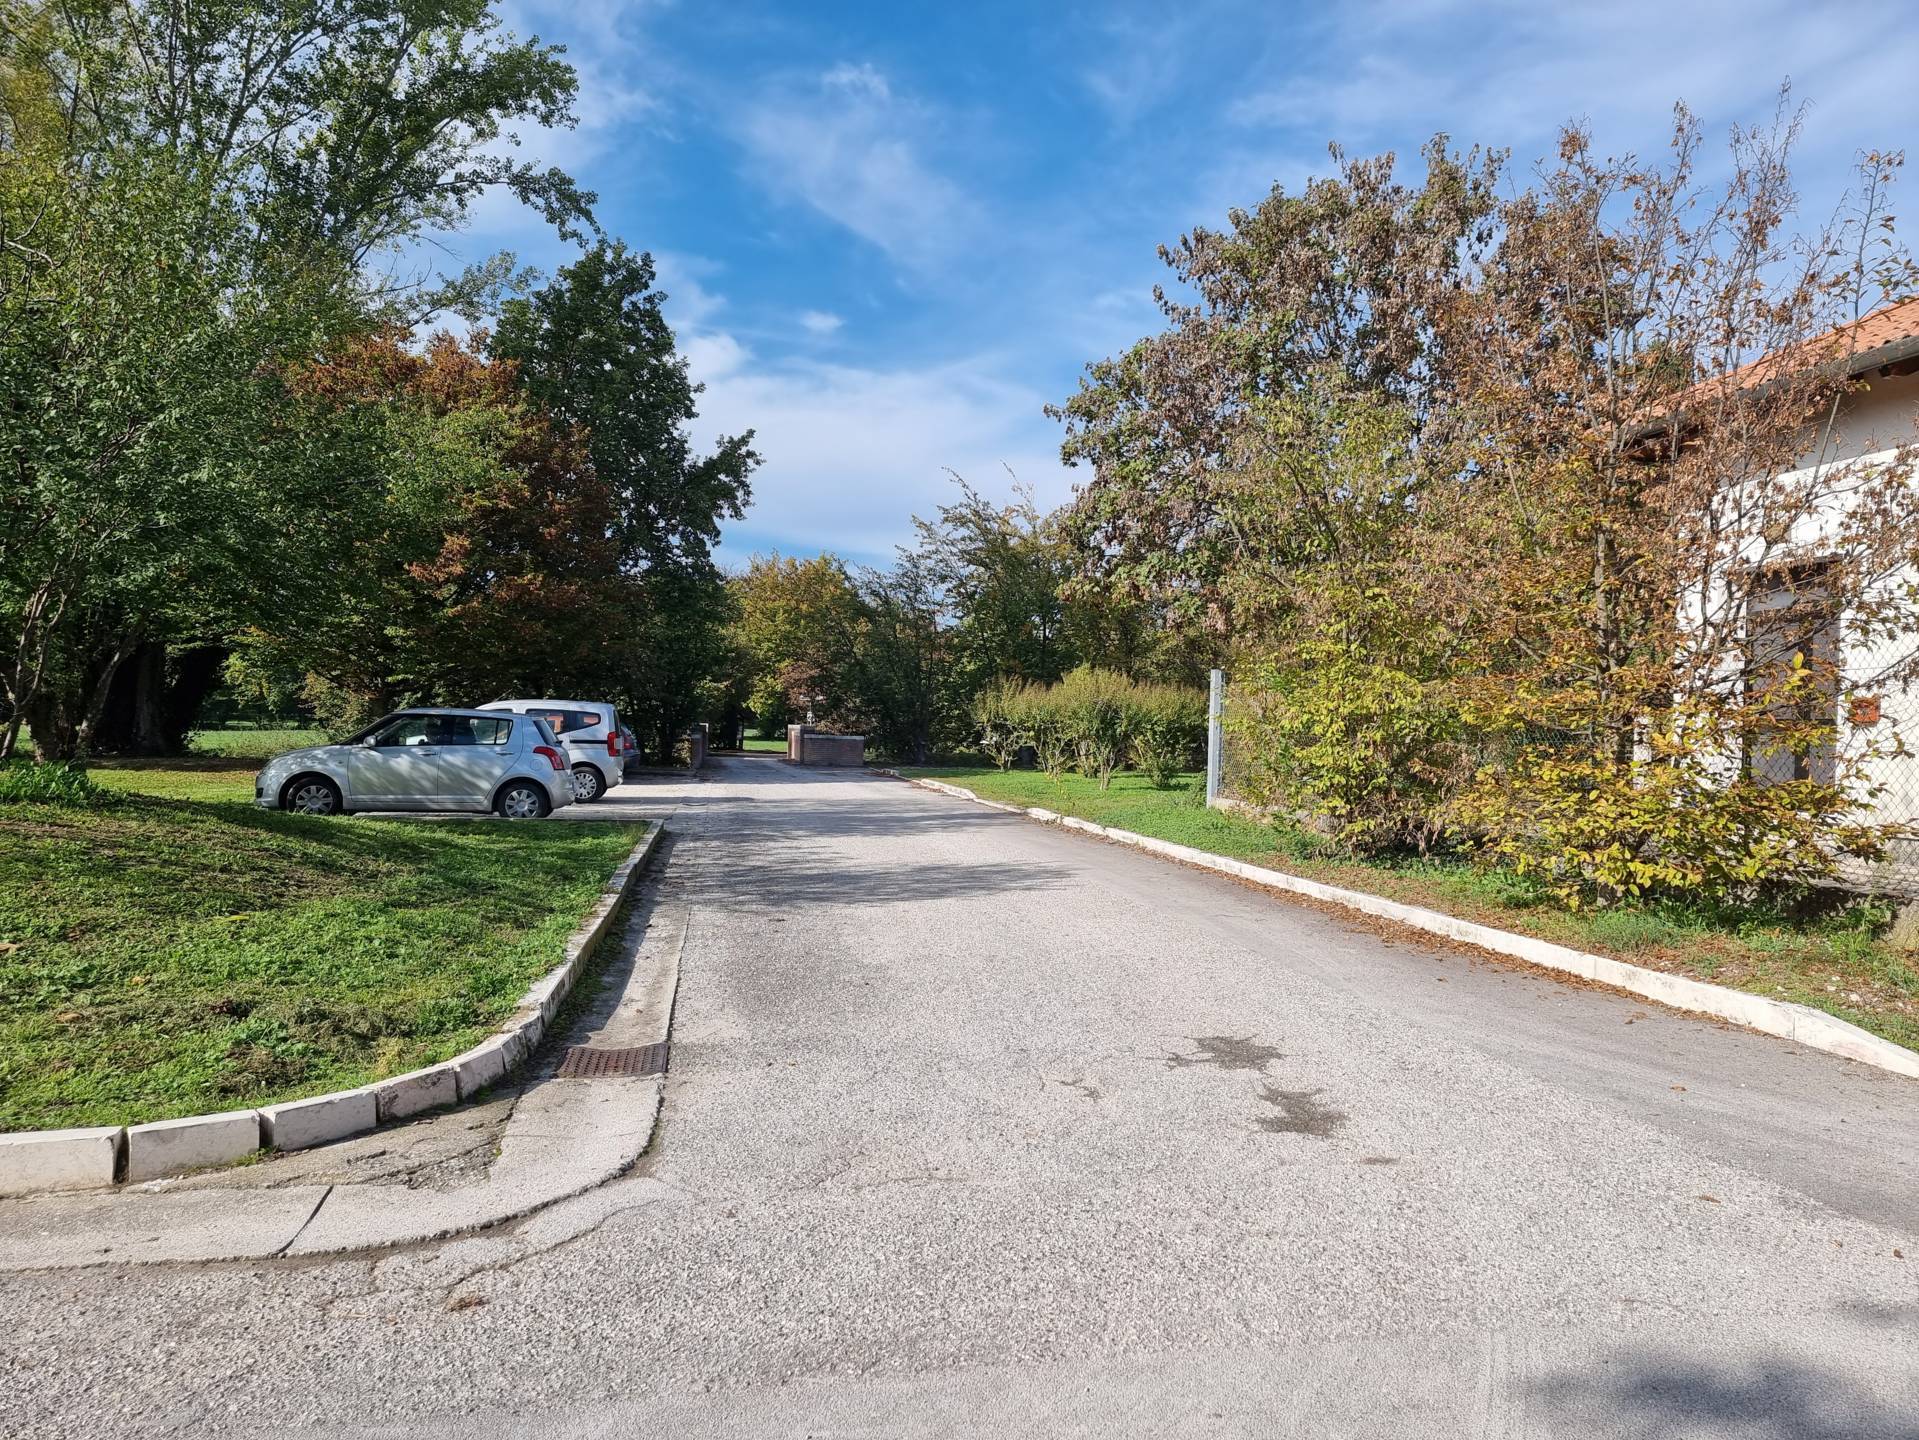
Photo 14 - itinerary continues to the left towards the bridge

Photo 15 - Bridge over the Reghena

Photo 16 - lay-by
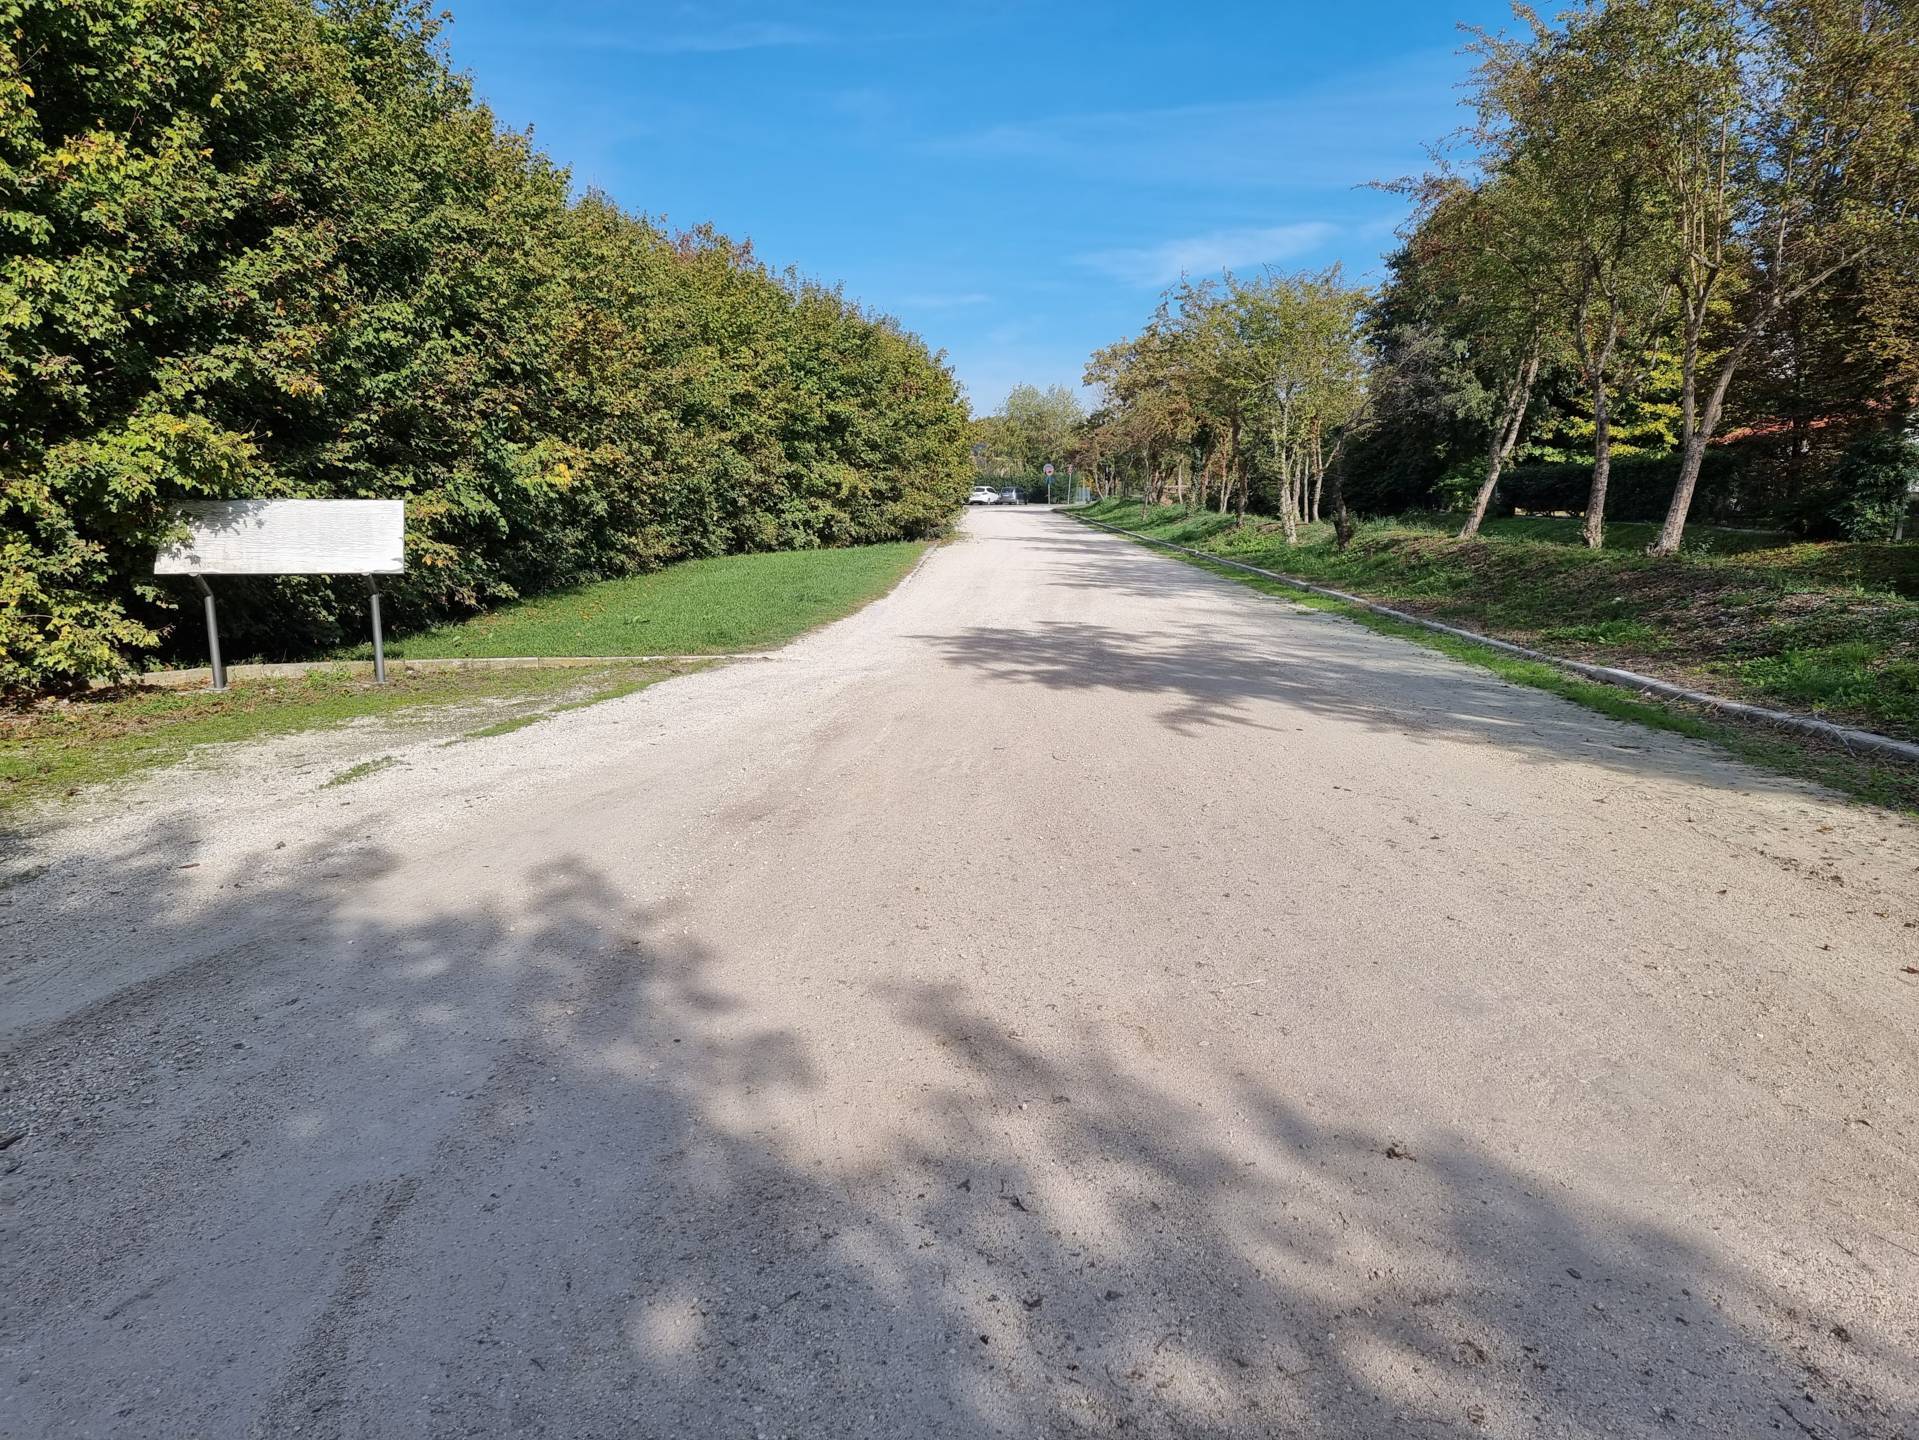
Photo 17 - Gravel itinerary to via Giotto di Bondone
By crossing the lay-by, you are located at the beginning of the itinerary inside Prati Burovich and, continuing straight ahead, you will find a small field road, on packed earth (Photograph 18), which is difficult for wheelchair users to travel because of the uneven and disconnected surface. There is a board at the beginning of the field road displaying a map, indications of the plant and animal life found there and some images describing the characteristics of Prati Burovich (Photograph 19). The panel is vertical on a wooden support, white, the lettering is in black, quite legible. Visiting Prati Burovich and continuing along the itinerary, you will find Premarine Lake. Due to the length of the itinerary and the condition of the terrain, this section of the route is very difficult for people with disability. An ideal condition would be to cross the meadows and reach the lake using a vehicle.
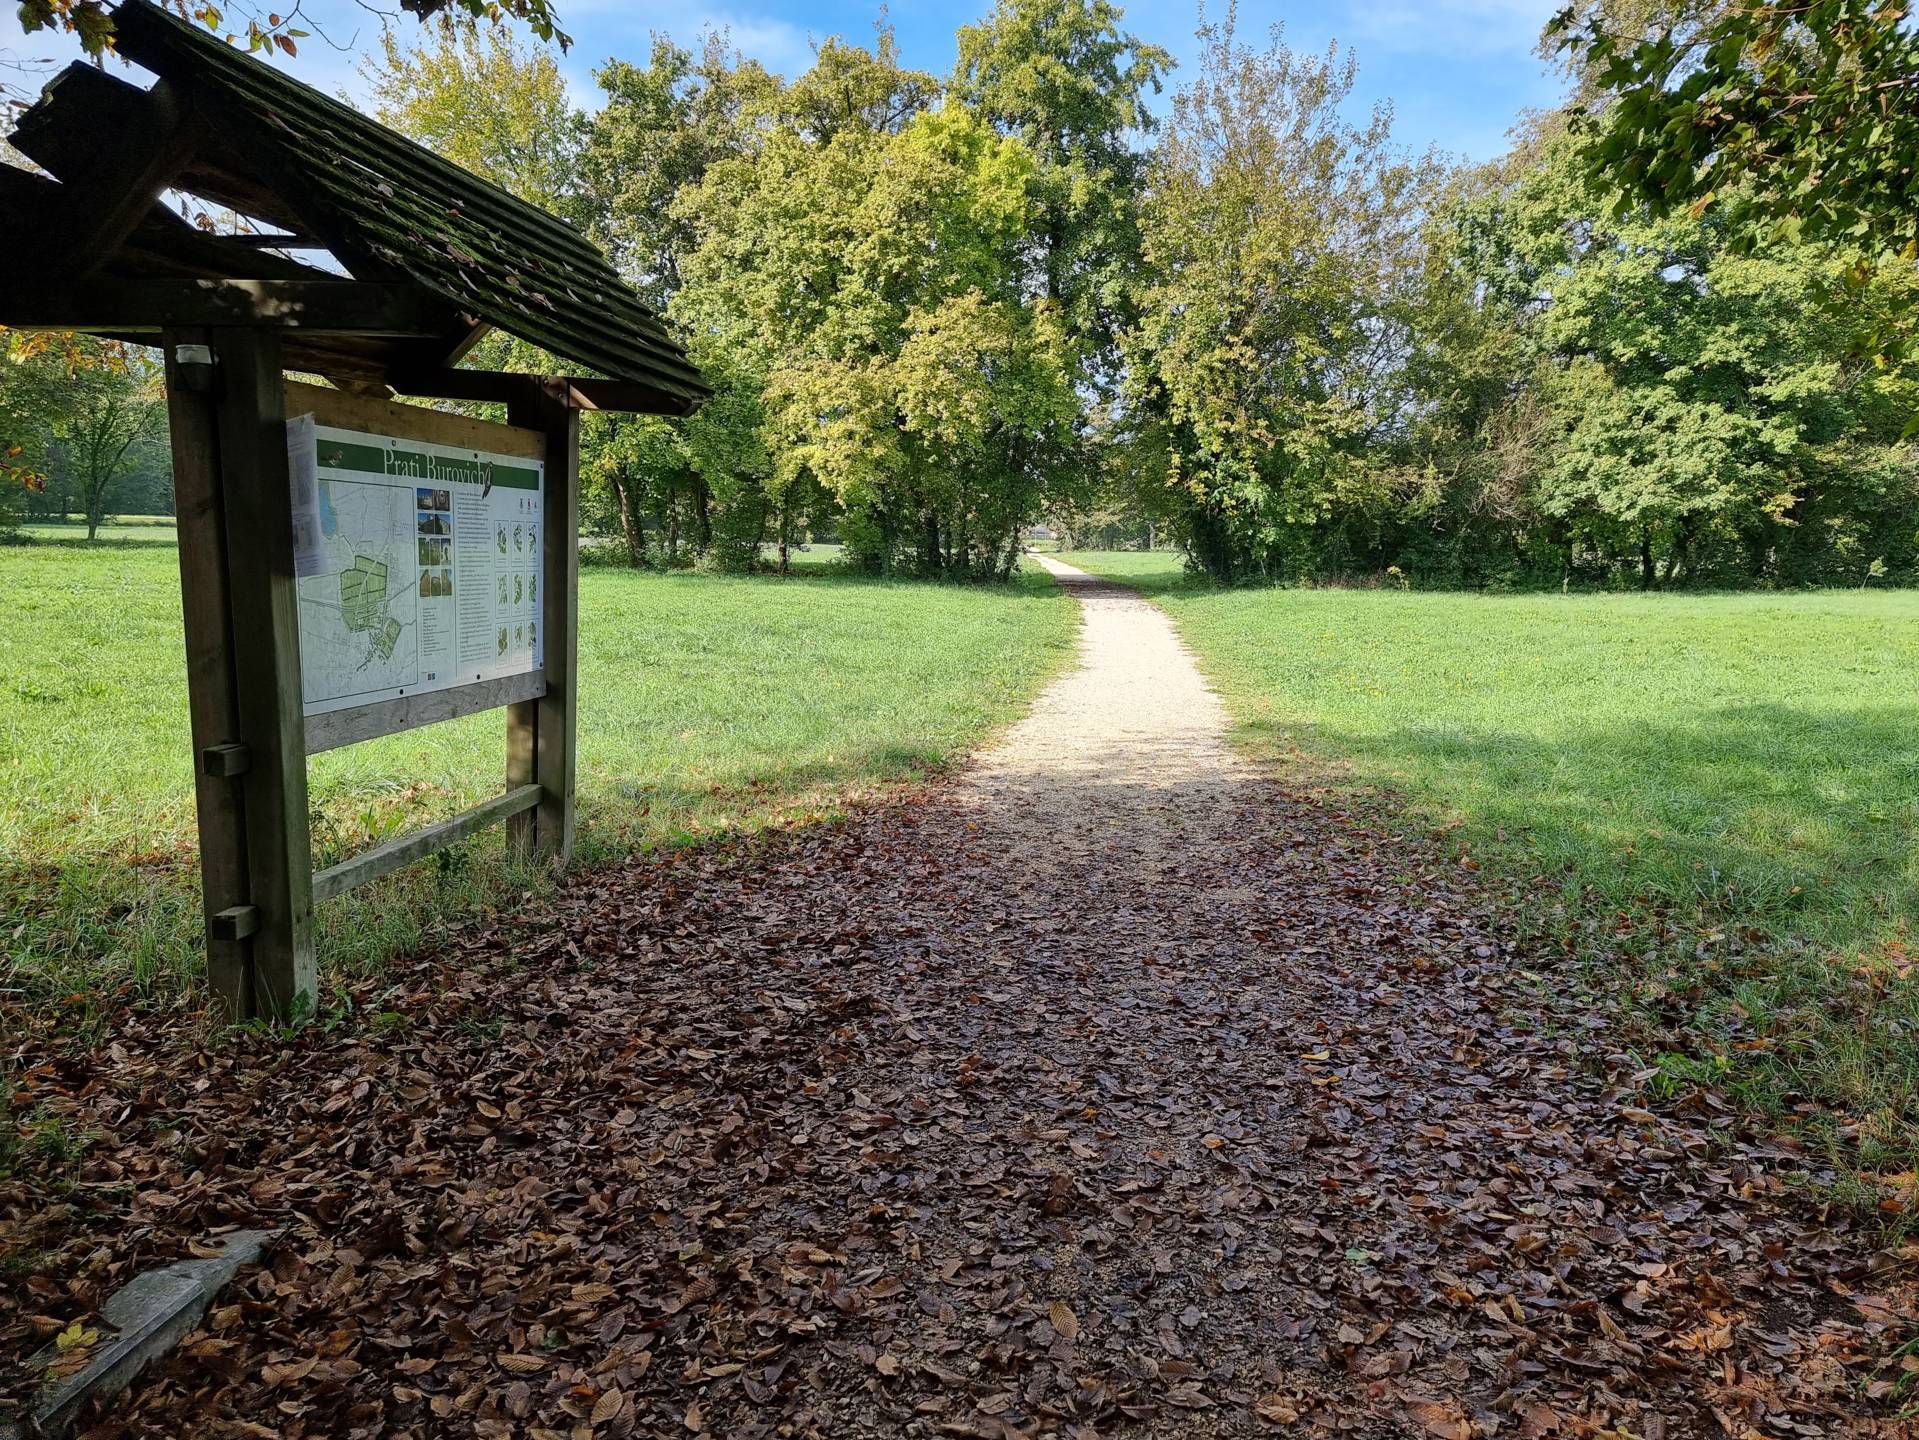
Photo 18 - Entrance to Prati Burovich
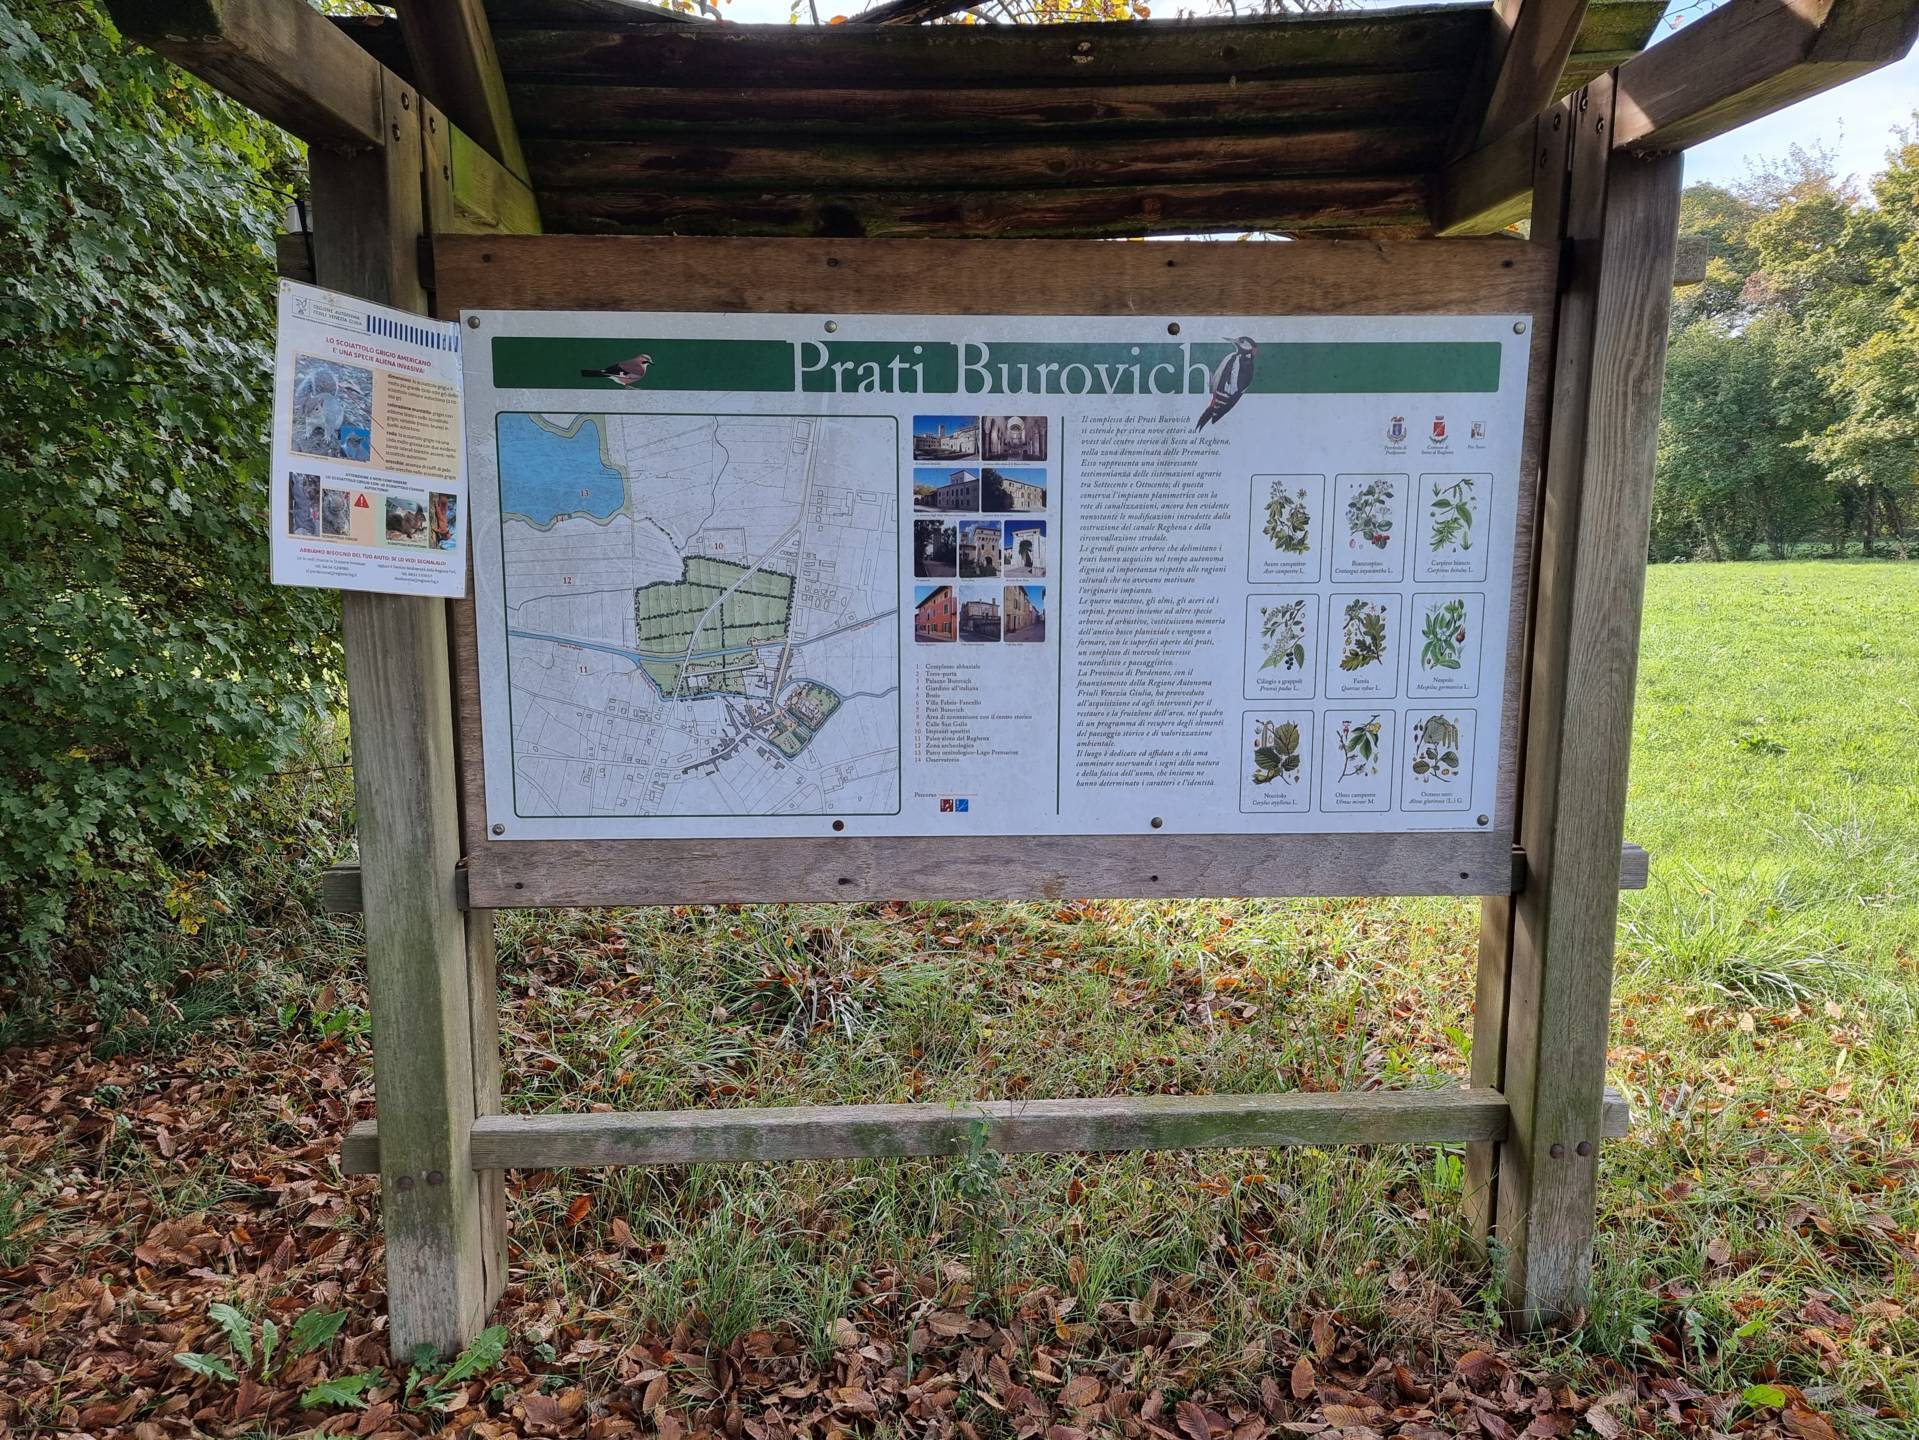
Photo 19 - information panel
IInstead, the itinerary to the left along Via Giotto di Bondone ends near the picnic area for camper vans and from here continues for a stretch on the road along Via degli Olmi (Photograph 20). It is necessary to cross Via degli Olmi (which is not safe) to reach the itinerary on the field road that joins the other side of Prati Burovich and continues, in the same way, with various differences in height, small wooden bridges and a somewhat uneven surface, towards Premarine Lake (Photo 21). This section is therefore difficult to access.
Returning instead to the junction with Via Giotto di Bondone, we continue along the porphyry itinerary, 3.90 metres in width, on a level ground limited to pedestrians and bicycles only, until reaching the underpass (Photograph 22) leading to Via Giotto di Bondone. On the brick fence wall, to the right, there are two signs, with a transparent background (similar to Plexiglas) and black, barely legible lettering, indicating the direction towards the historic centre and the Burovich meadows. A green signpost with white lettering which is 3.88 metres in width is located on the left, indicating the direction to follow to reach the Burovich Meadows and Premarine Lake.
Immediately after leaving the underpass along Via Giotto di Bondone, there is no possibility of climbing up onto the porphyry pavement, which is 1.50 metres in width because there is a 10-centimetre step on both sides (Photograph 23). It is possible to cross the street, but on the other side there is no connecting ramp and there is again a 12-centimetre step to cross (Photograph 24). The only alternative is therefore to continue the route along the road, a situation that is definitely not ideal because there are parking spaces on the right and continuing effectively involves being in the middle of the road, which is also particularly busy (Photograph 25). The first connecting ramp to a driveway is located on the right-hand side and from here it leads to the wooden bridge near Piazza Castello (Photograph 26).
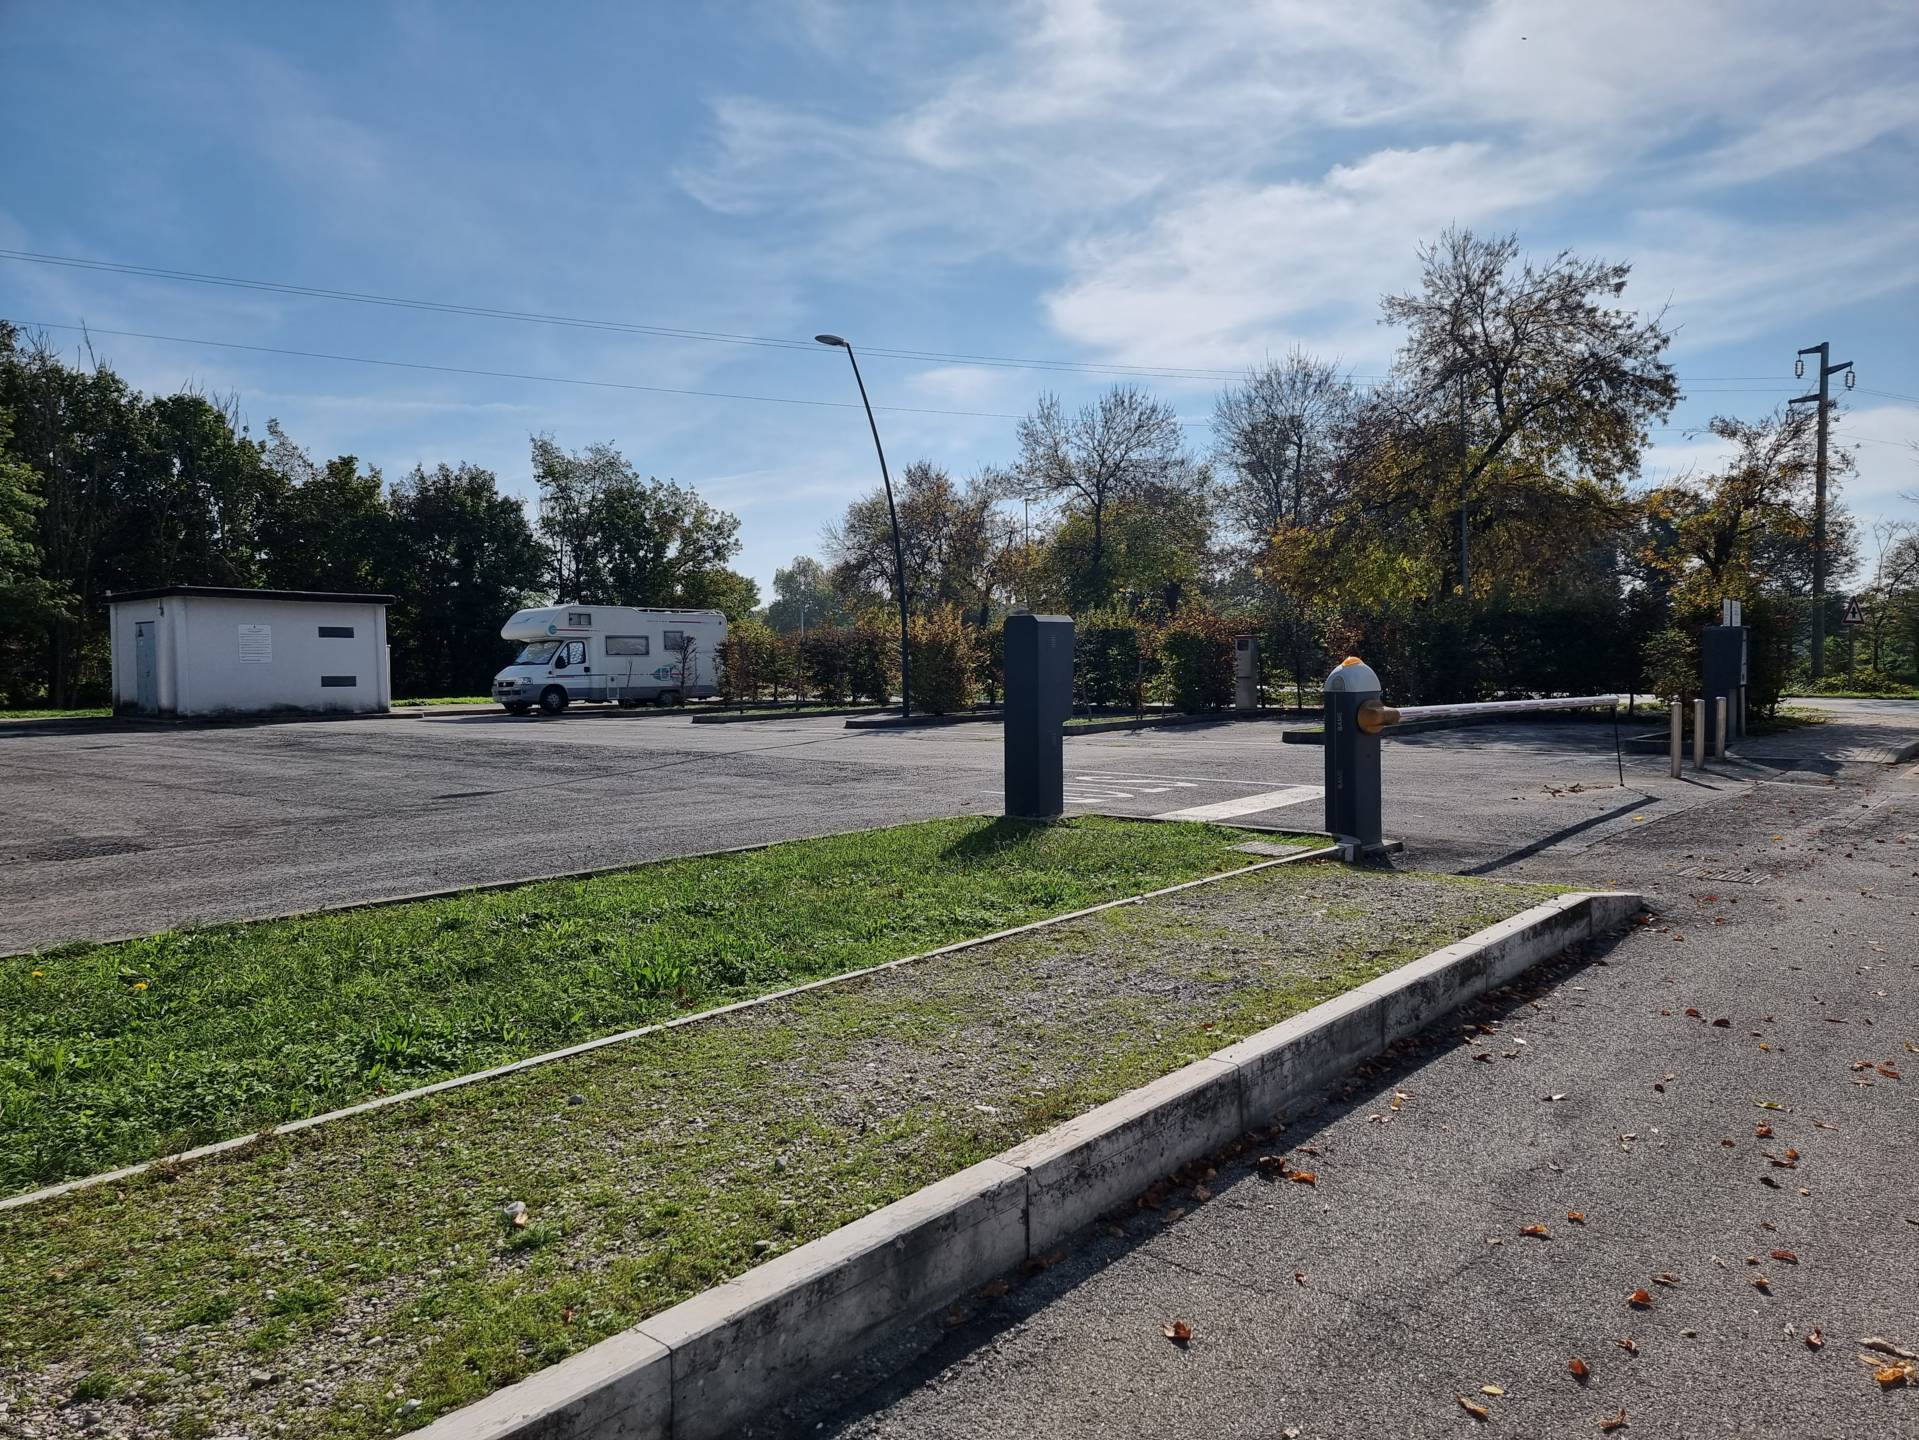
Photo 20 -Itinerary on via Olmi

Photo 21 - Itinerary towards Premarine Lake
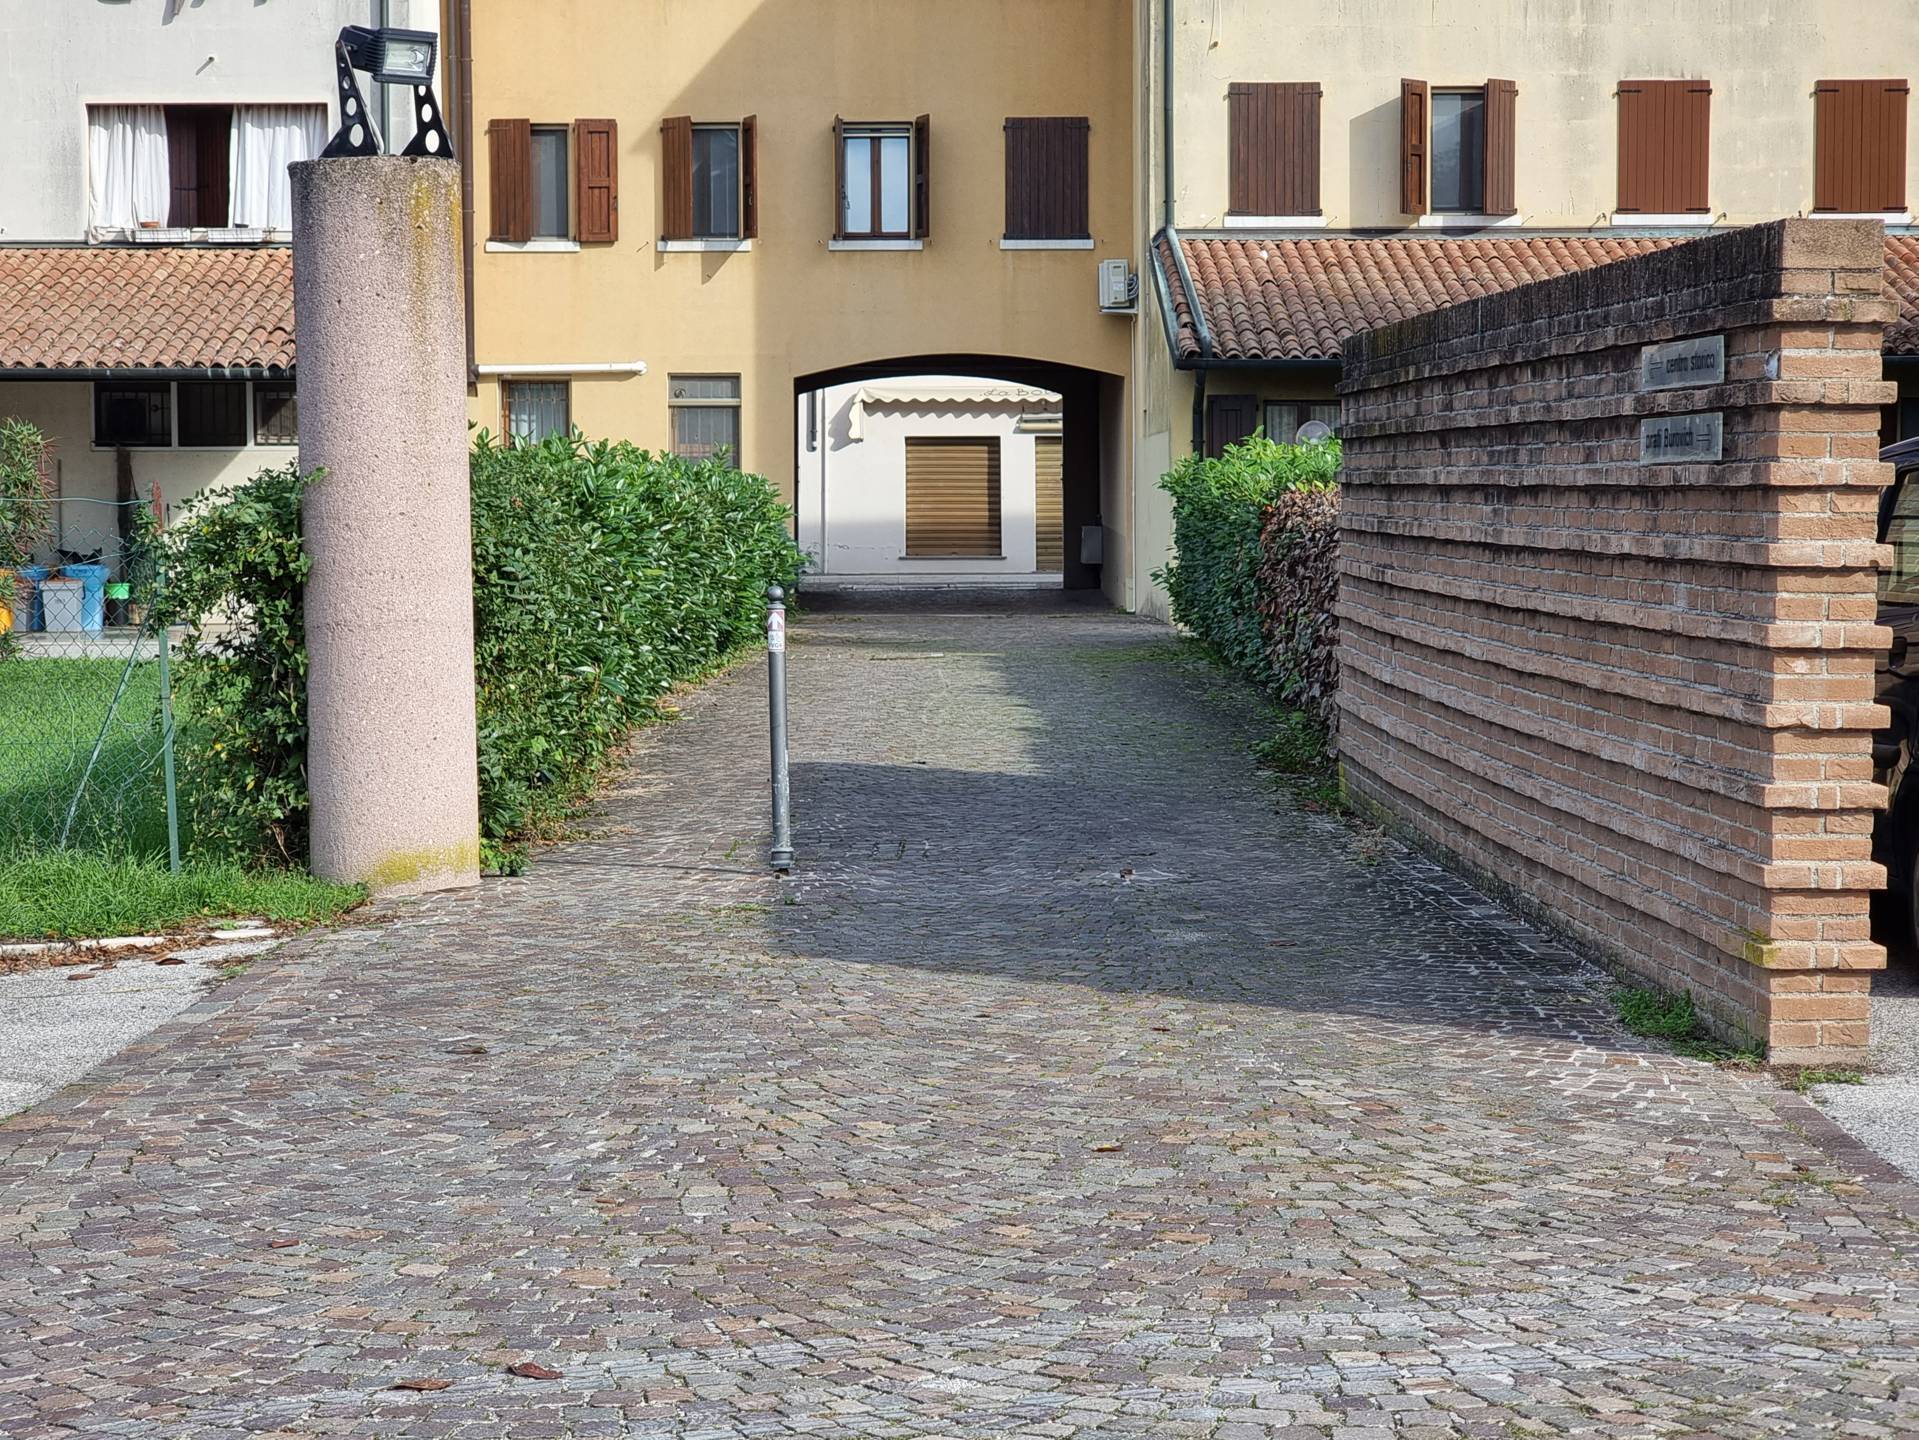
Photo 22 - underpass itinerary

Photo 23 - pavement without junction
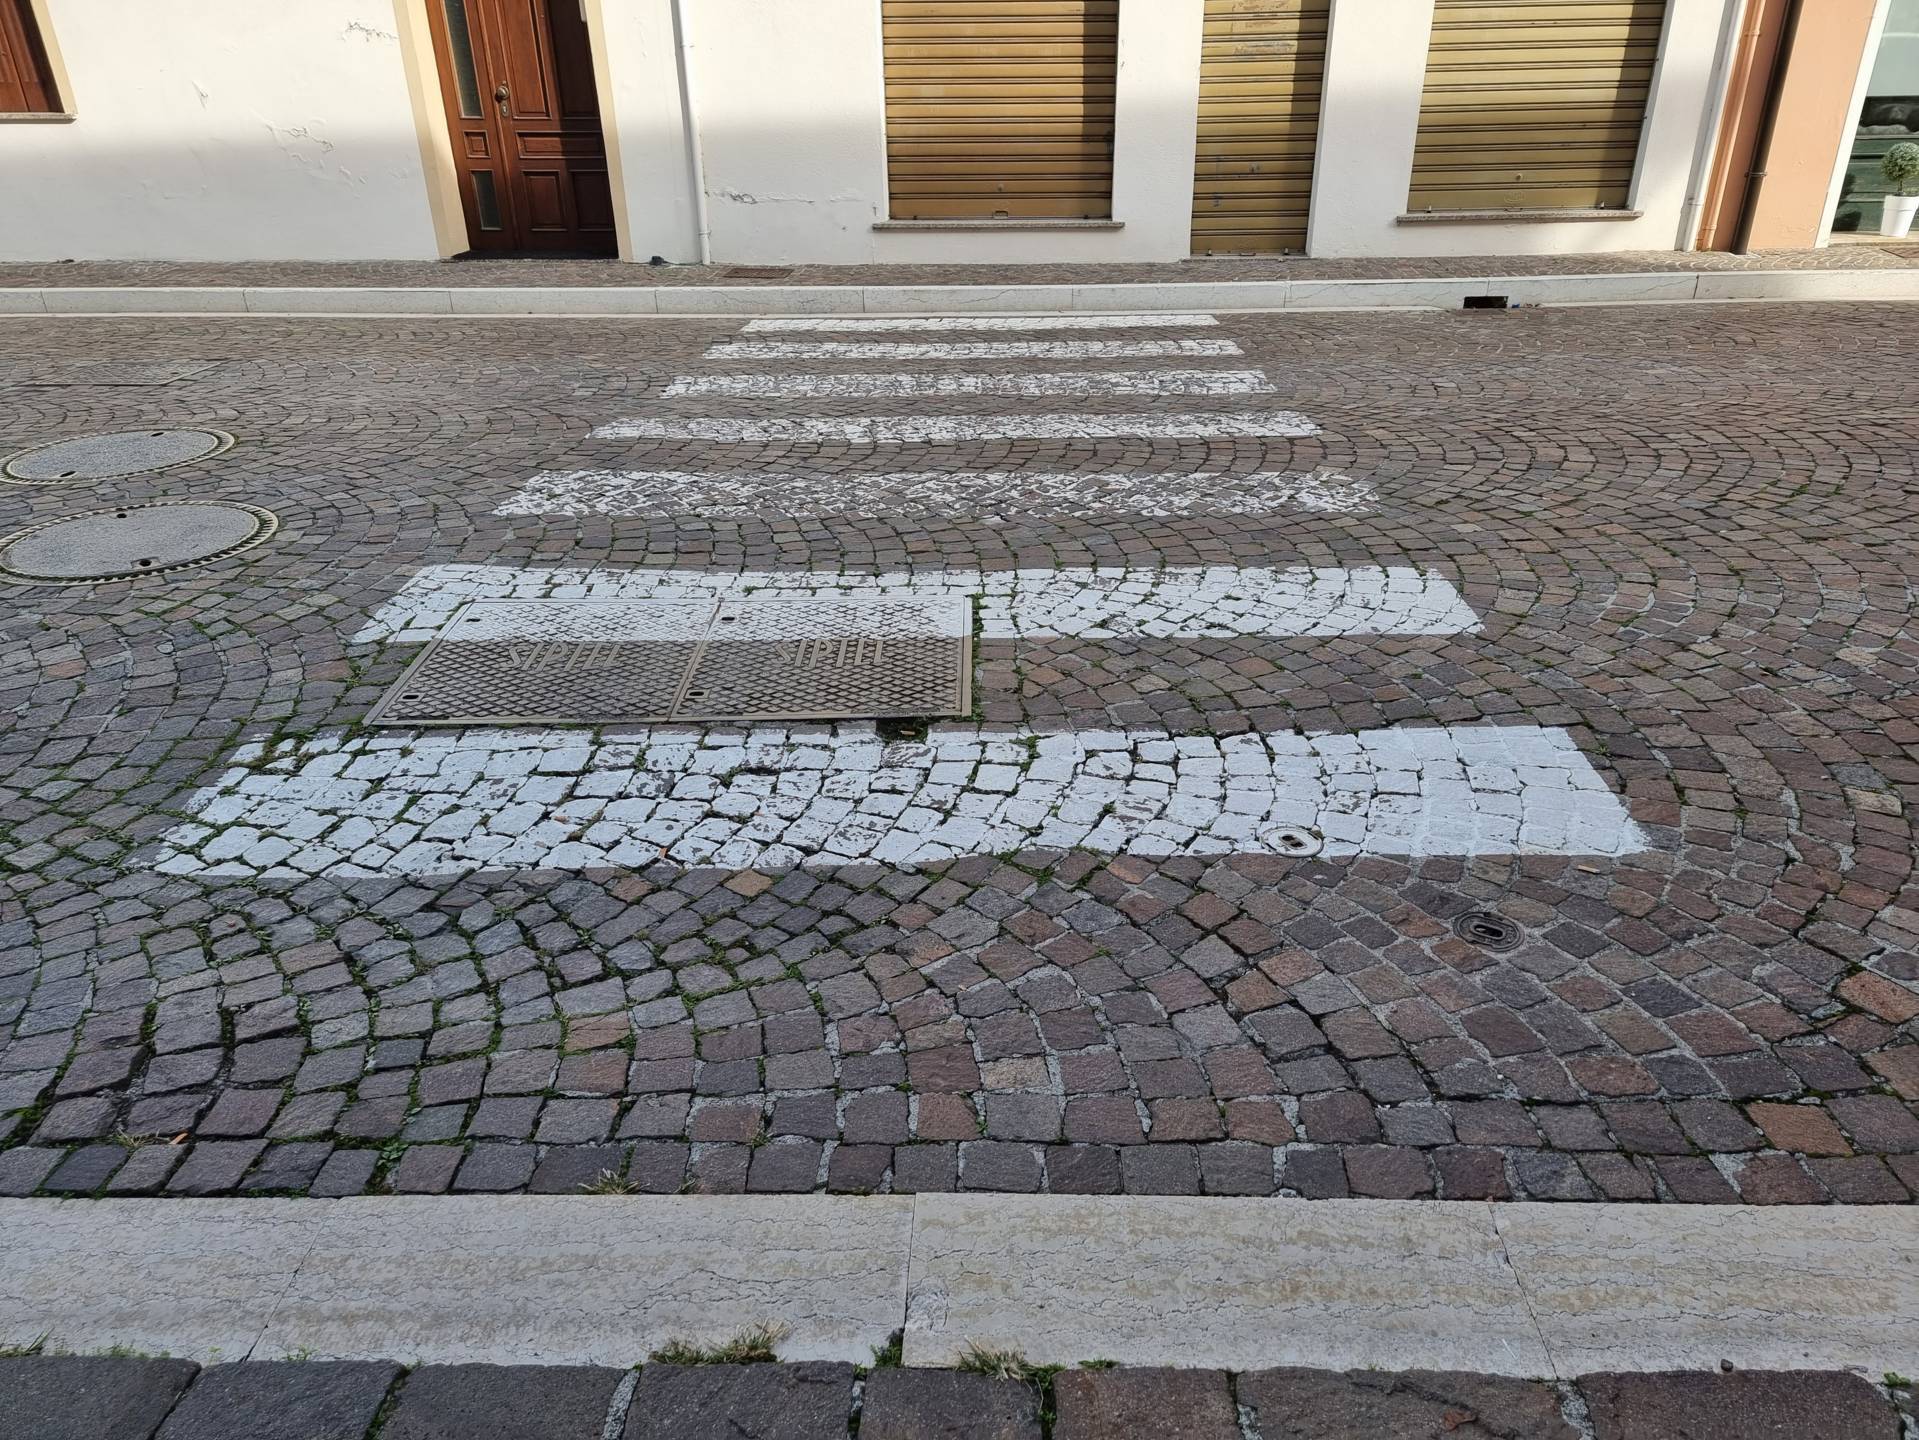
Photo 24 - pedestrian crossing

Photo 25 - itinerary on road surface

Photo 26 - Bridge access ramp
Continuing along the itinerary leads to the wooden plank bridge near Piazza Castello (Photograph 27). The bridge is well separated from vehicular traffic and reserved for pedestrians. It is 1.40 metres in width and has a slope of 8%. A metal gutter for water drainage is located at the end of the bridge, followed by fairly homogenous and regular stone paving (Photograph 28). Immediately after the bridge, there is a short uphill ramp (9%) in stone to access the pedestrian crossing on strips of Via Giotto di Bondone (porphyry slab surface) (Photograph 29). On the other side of the crossing after the 2 centimetres threshold, there is a pavement of 1.50 metres in width in light-coloured stone slabs with a slight slope (2%). This point can also be reached along Via Roma.

Photo 27 - wooden planking bridge

Photo 28 - metal gutter at the end of the bridge
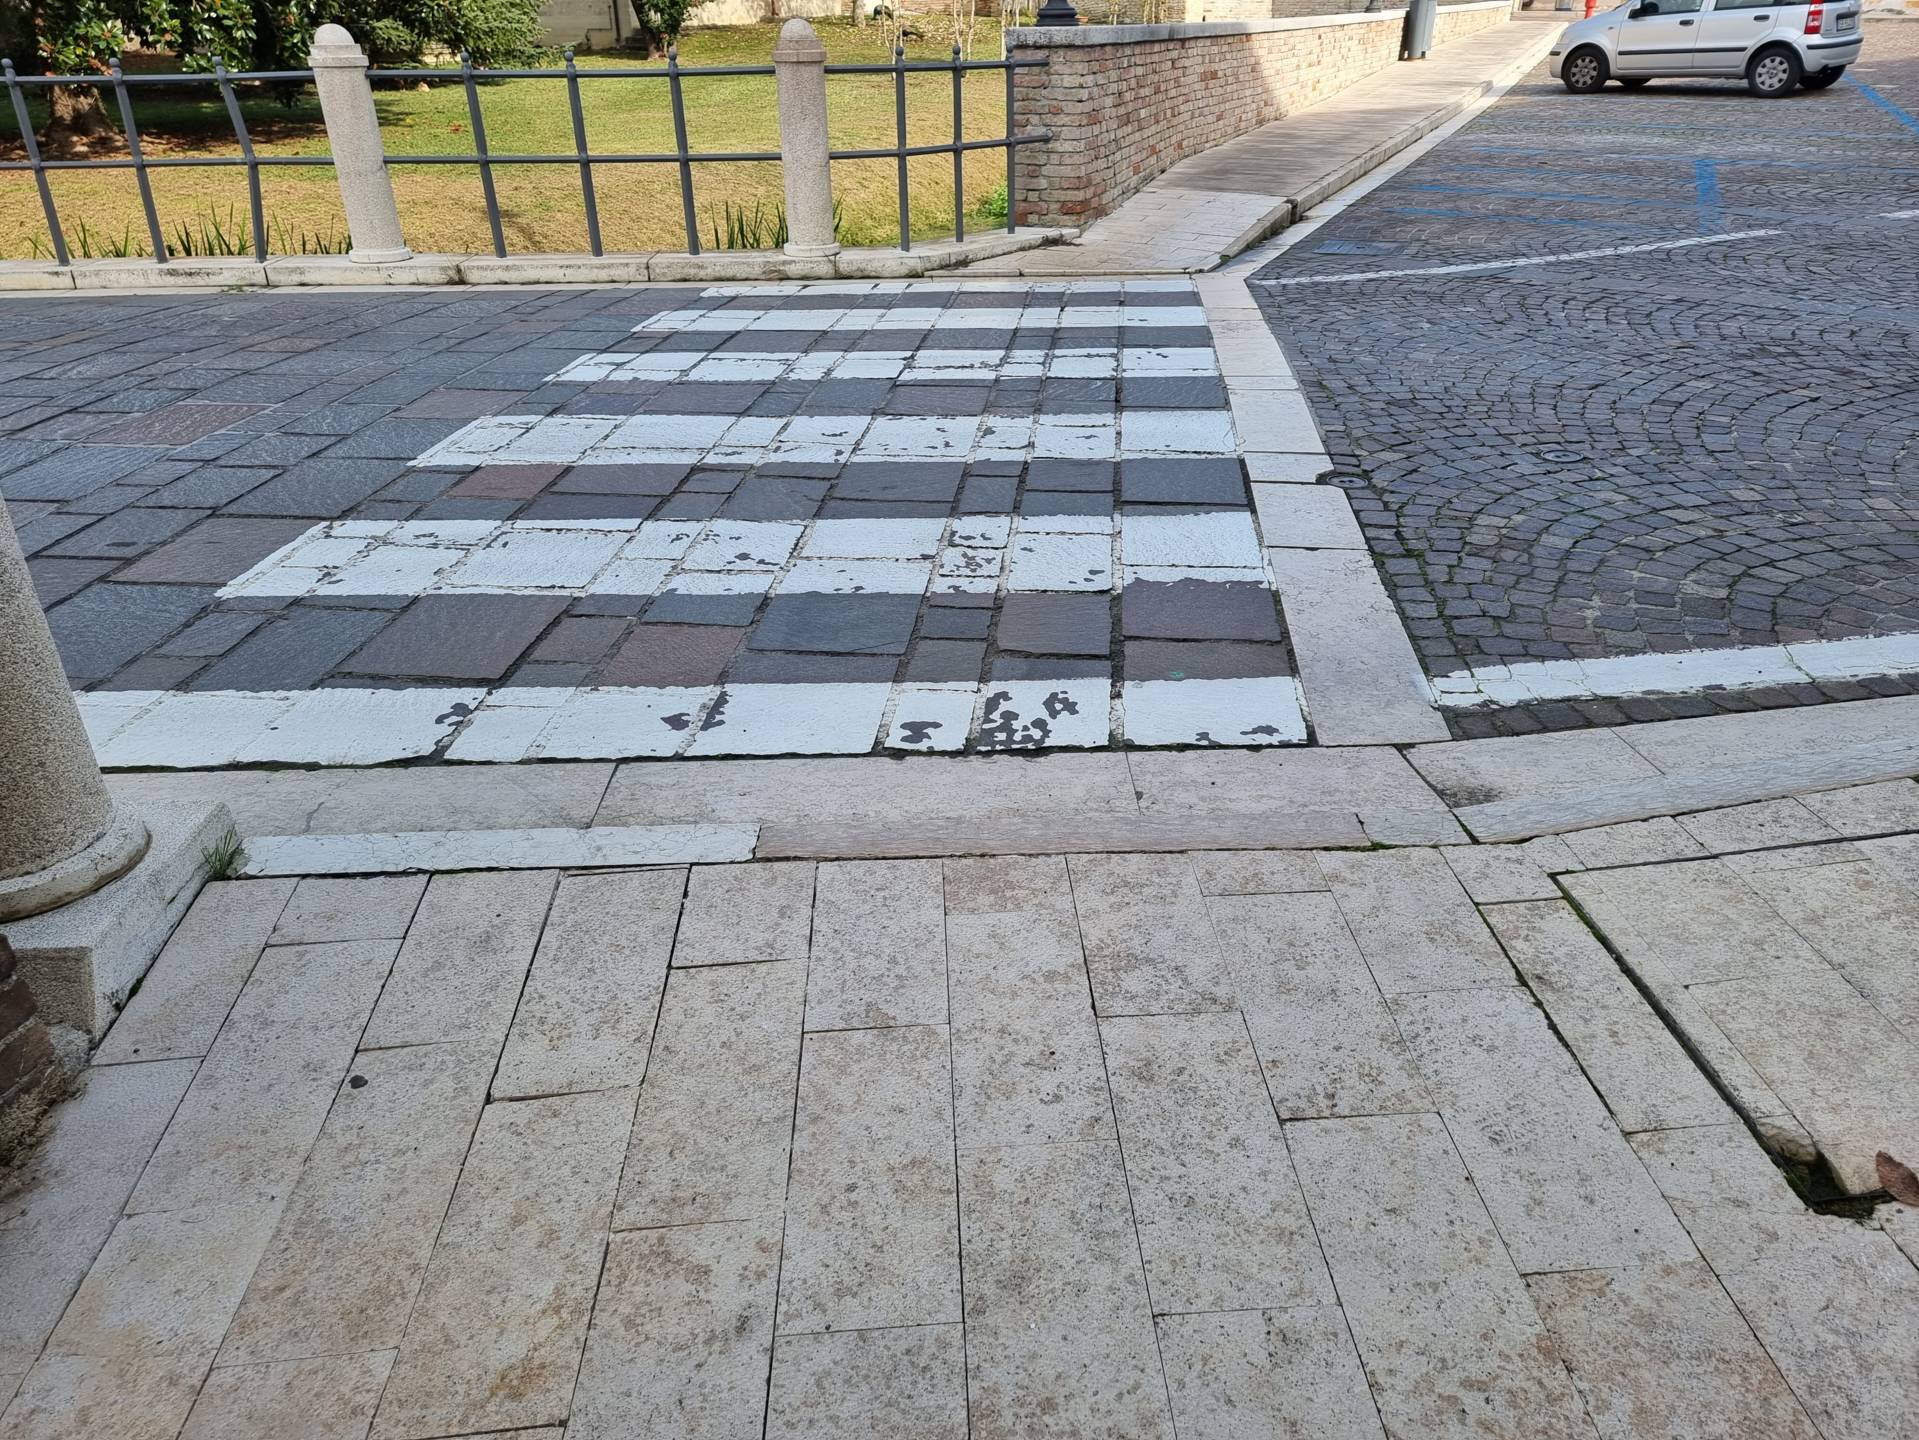
Photo 29 - pedestrian crossing
The entrance Tower is located at the end of the pavement. The pavement is on a slight uphill slope (3%) and is made of porphyry slabs (Photograph 30), with a rather broad width. After approximately 20 metres, you are located under the entrance arch of the tower and the path, which now narrows to about 3 metres, and is in cobblestone, not split. Inside the tower, there are information panels with a white background and black lettering, which are easy to read (Photographs 31-32).
Piazza Castello has a slight downward slope (1.5%) with an irregular cobbled surface and large slabs of piasentina stone. Given the possibility and condition of the surface, it is advisable to arrive in Piazza Castello by vehicle (Photograph 33).
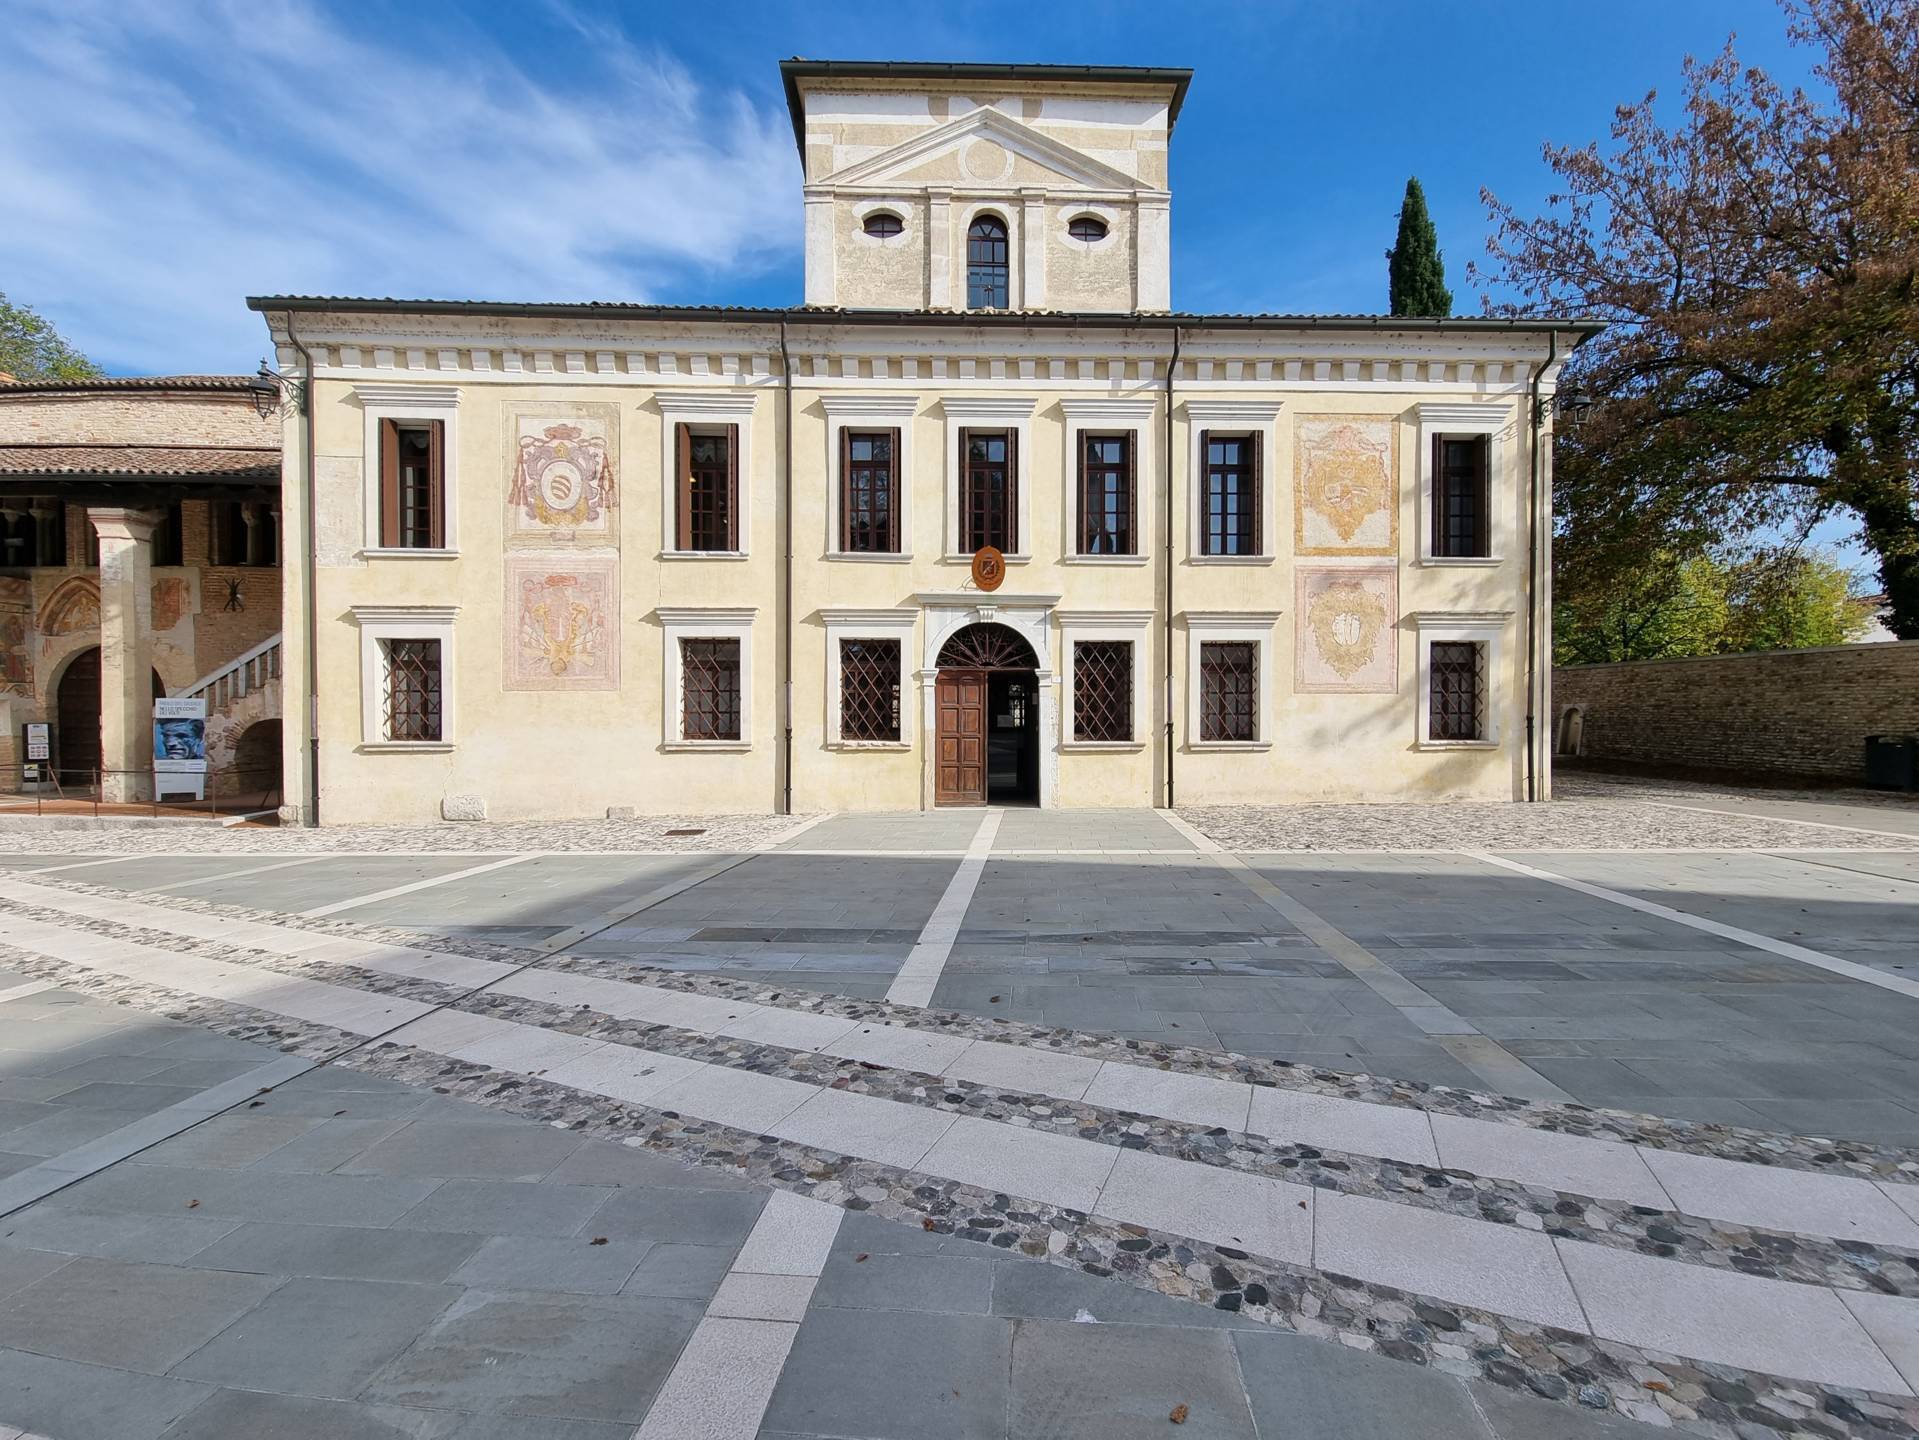
In Piazza Castello immediately after the tower, starting from the left, the Infopoint, inaccessible to people with mobility disabilities due to the entrance steps, the Chancellery, the Tower, the Abbey and the Town Hall building are located.
The entrance to the Abbey is accessible via a ramp that is 1.4 metres long and 0.9 metres wide with a 7% slope. Subsequently, however, it is necessary to cross a threshold with a height of 6 centimetres, and further on, there is an uneven and irregular pavement that precludes a visit to the Abbey, if not with significant difficulties (Photograph 34).

Photo 30 - entrance tower
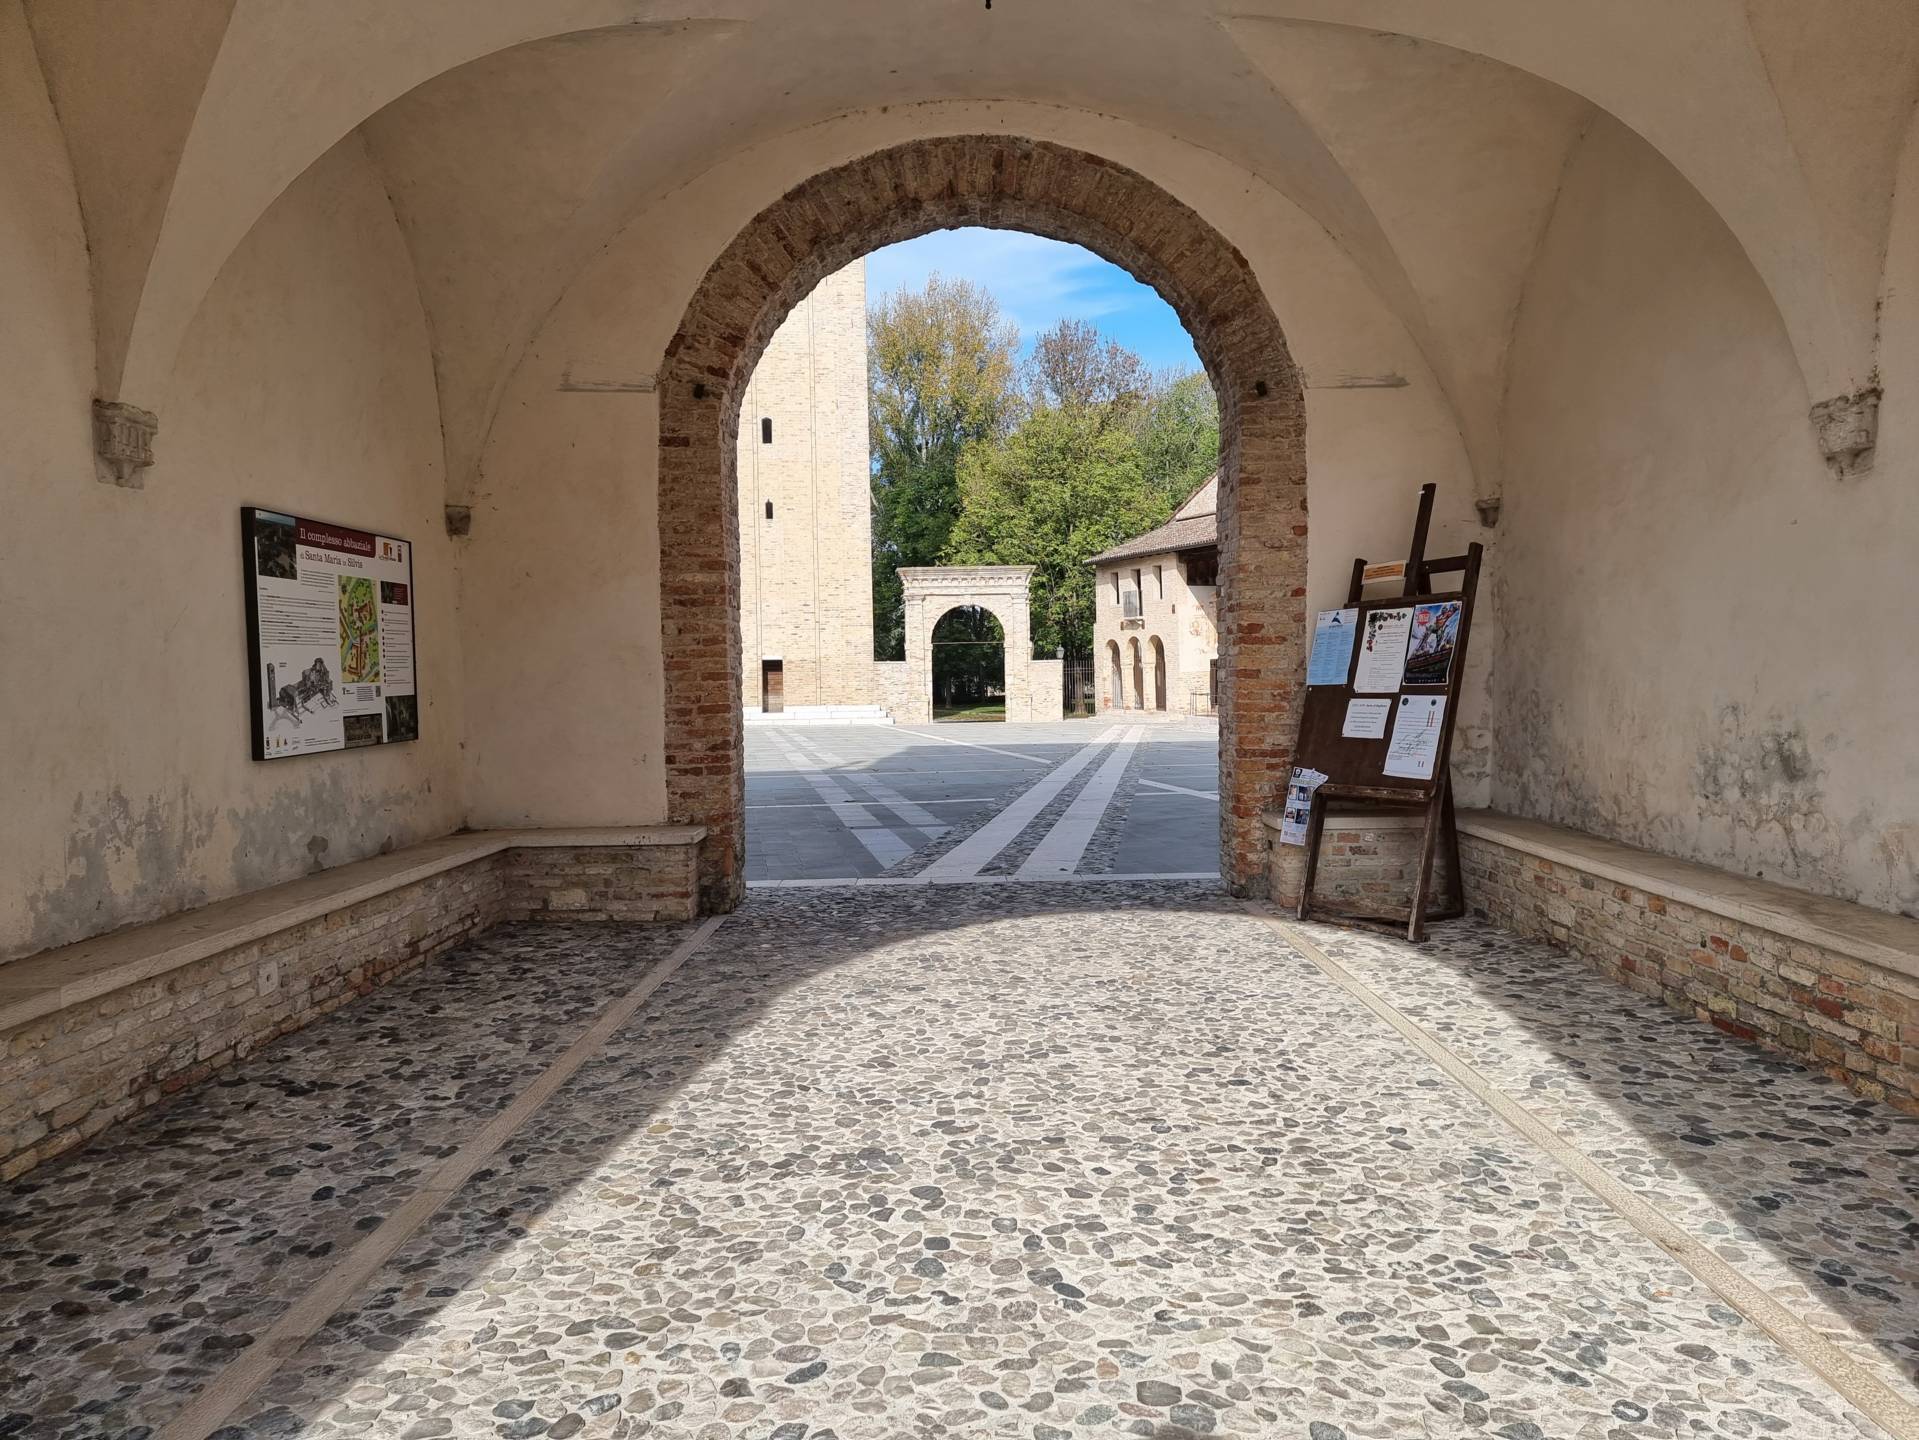
Photo 31 - information panels inside the tower

Photo 32 - Information panels inside the tower Premarine lake
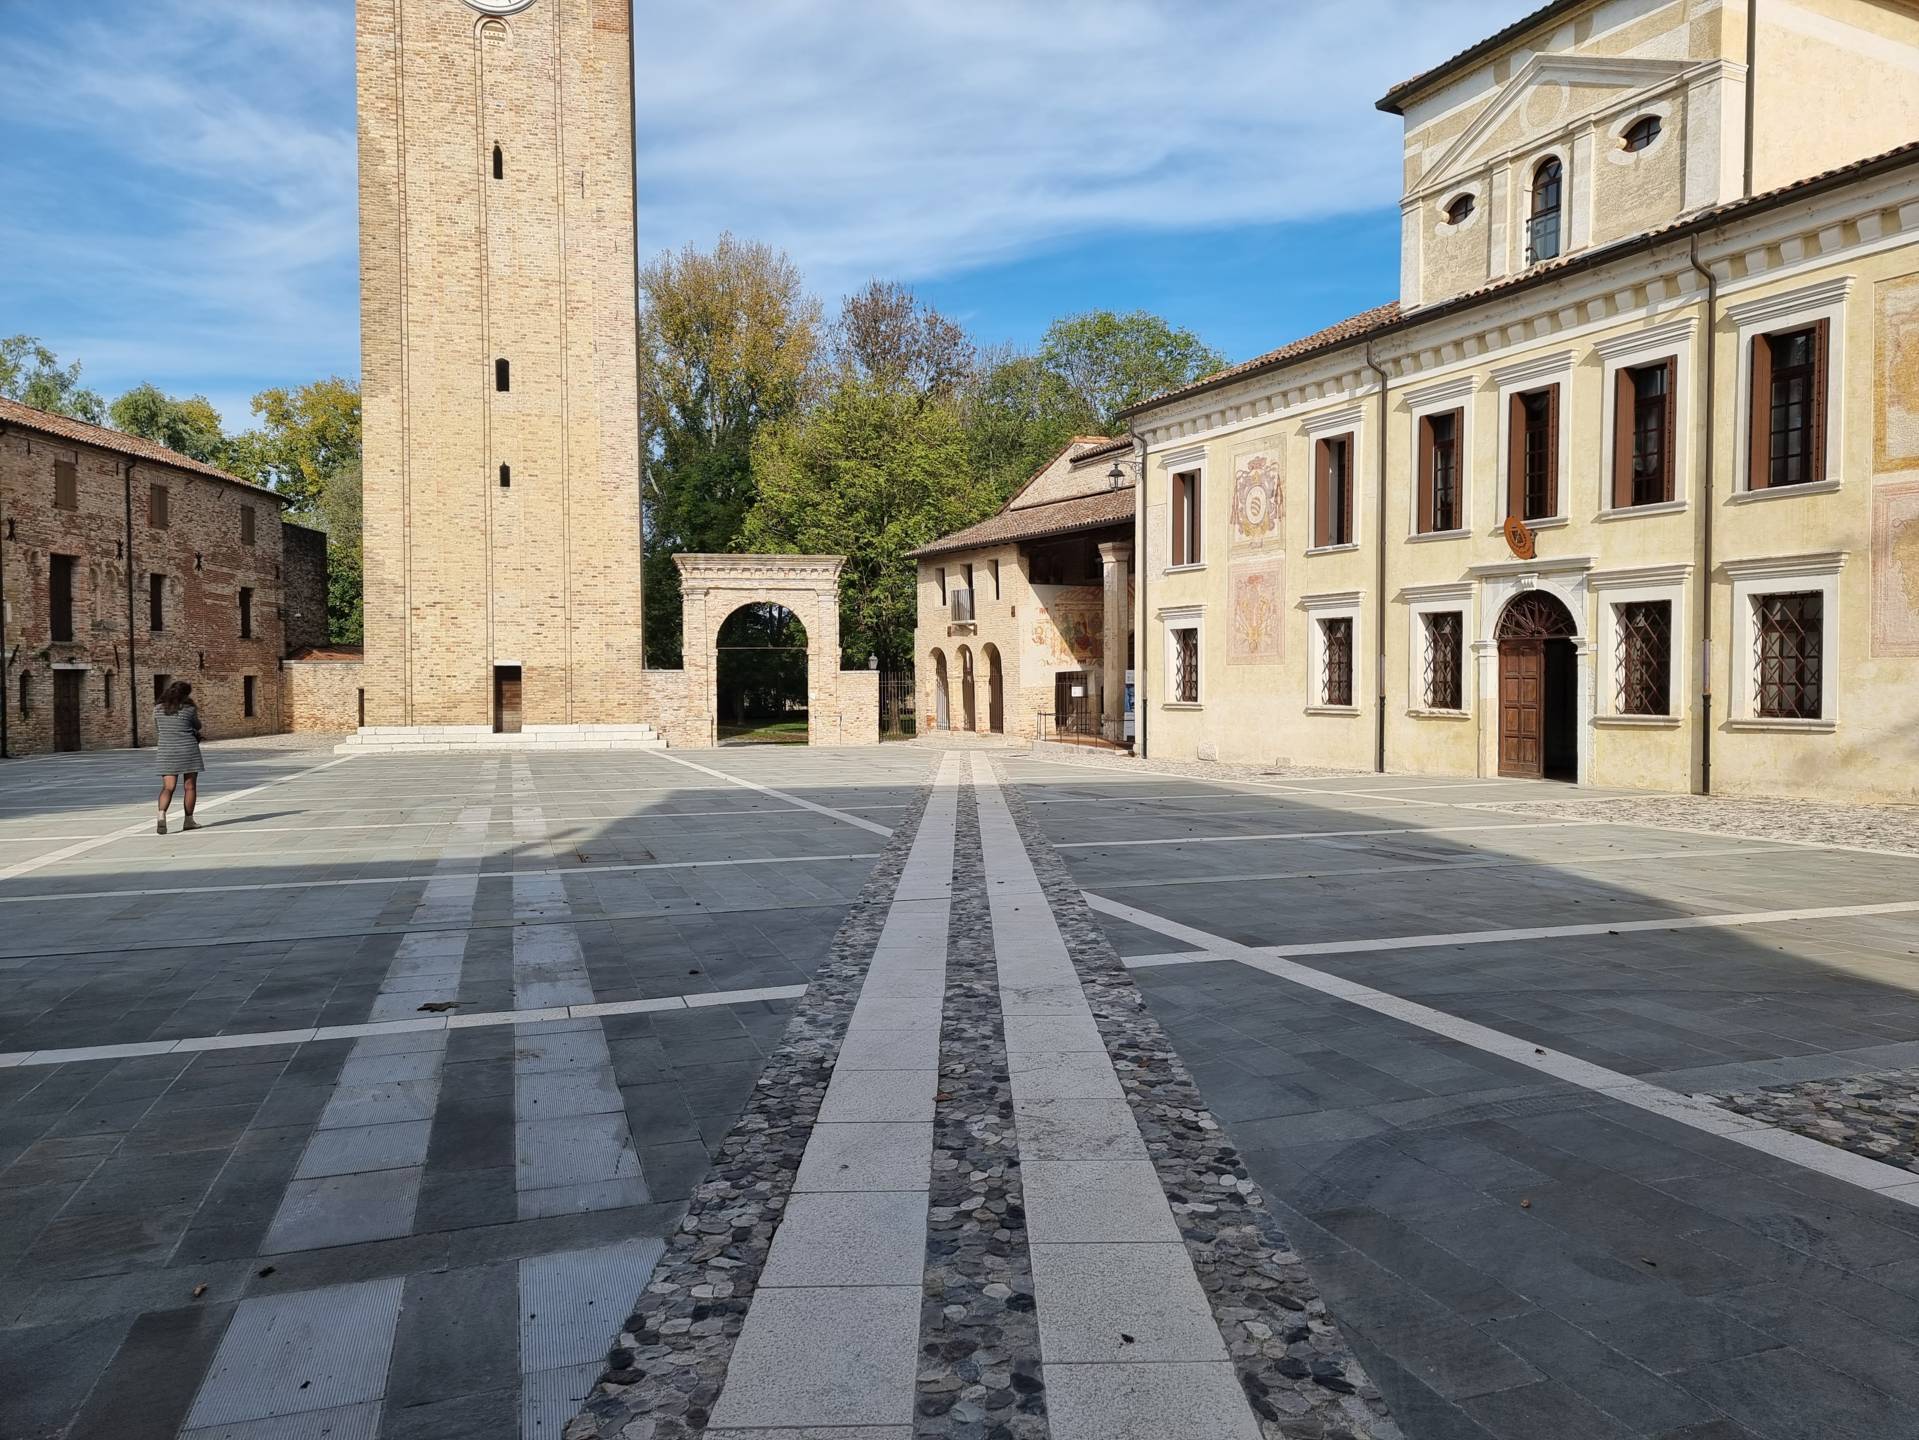
33 - Piazza Castello
34 - Abbey in Piazza Castello
Crossing the square, keeping the Tower to the left, visitors reach the park behind Piazza Castello, along the banks of the river, which is characterised by a ring-shaped, mixed gravel and wooden boardwalk with a width of 1.50 metres and a maximum slope of 5.5% (the itinerary is mainly flat) (Photograph 35). The route is difficult to travel because of the unstable planking.
Returning towards Piazza Castello, near the Ruins of the Church, it is necessary to cross a gravel connecting ramp, with a slope of 11%, immediately behind the Abbey, near the area also designated for private parking (Photographs 36-37). Once past the ramp, there is a 3-centimetre threshold and once again the cobblestone and stone slab pavement. The ruins of the Church can be visited by following the stone pavement, which is even and on a level plain (Photograph 38).

Photo 38 - Ruins of the church
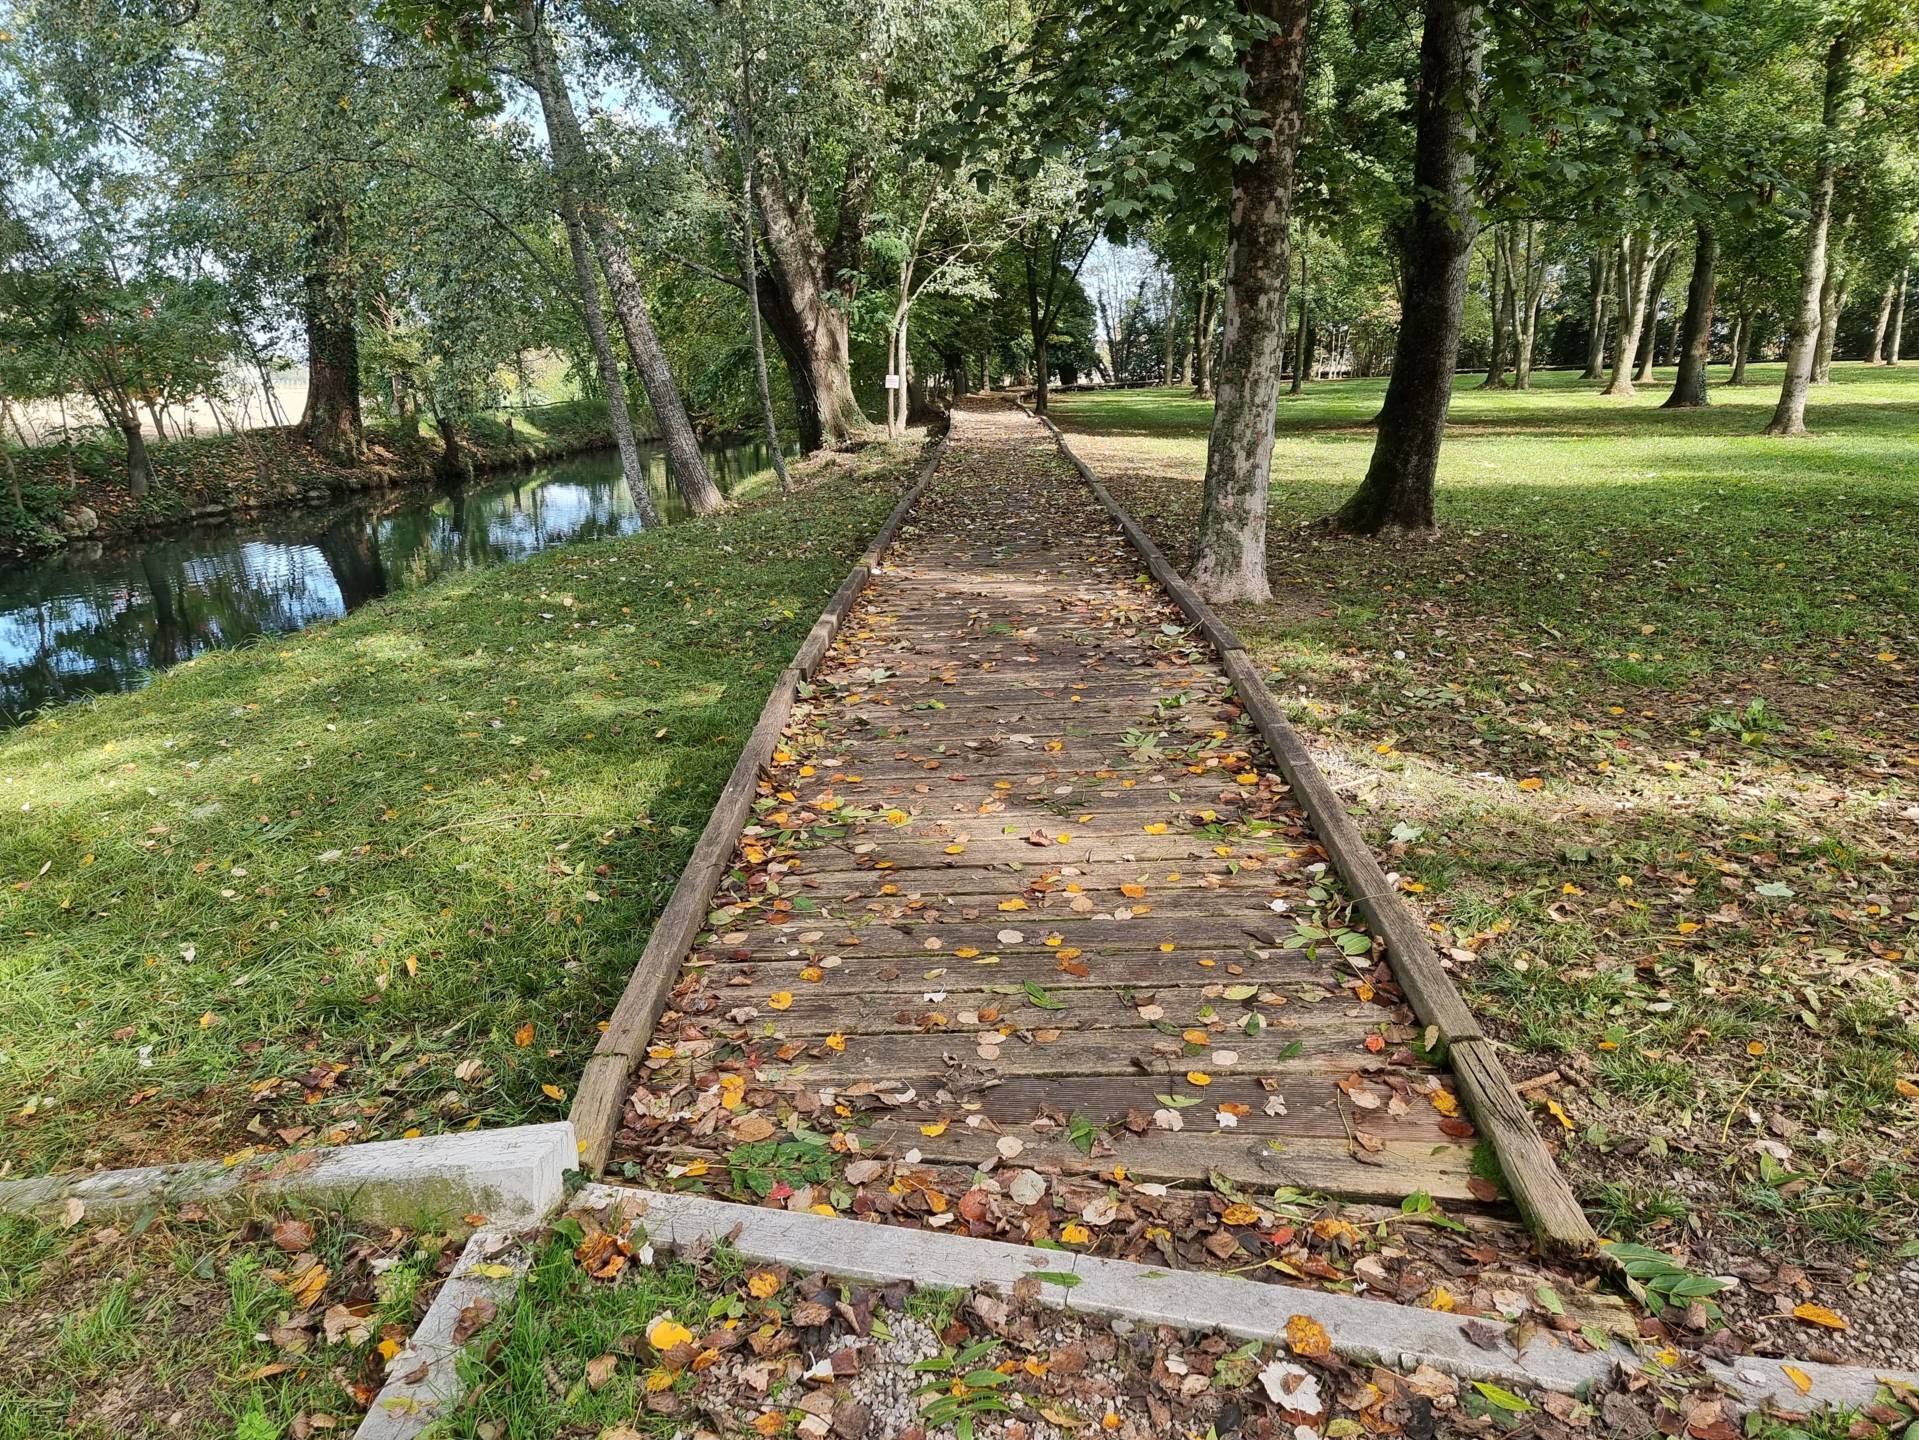
Photo 35 - loop path on wooden planking
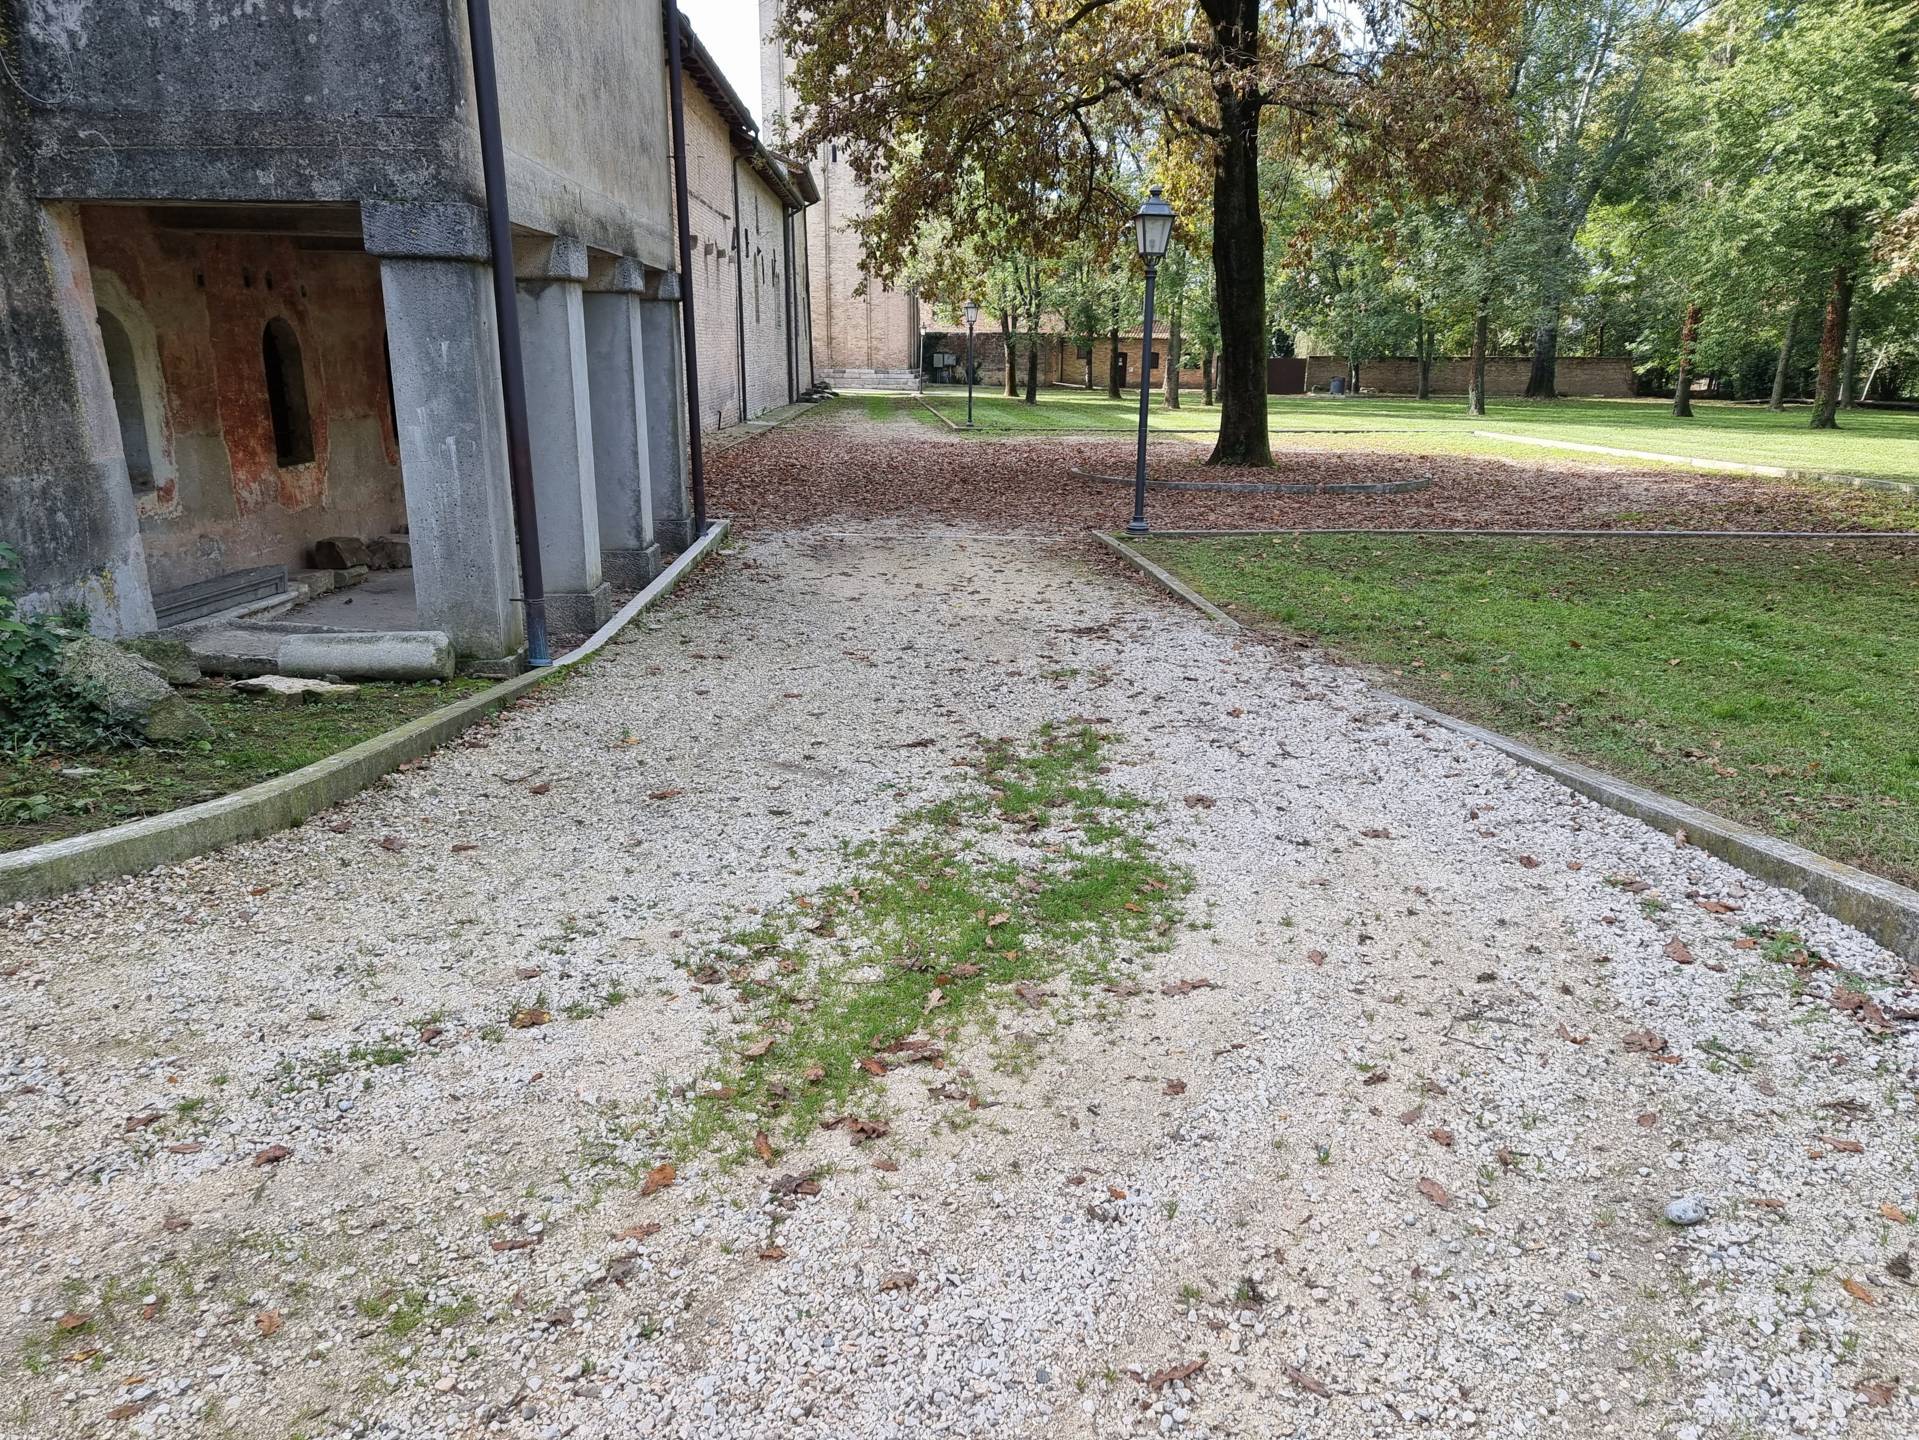
Photo 36 - Gravel ramp
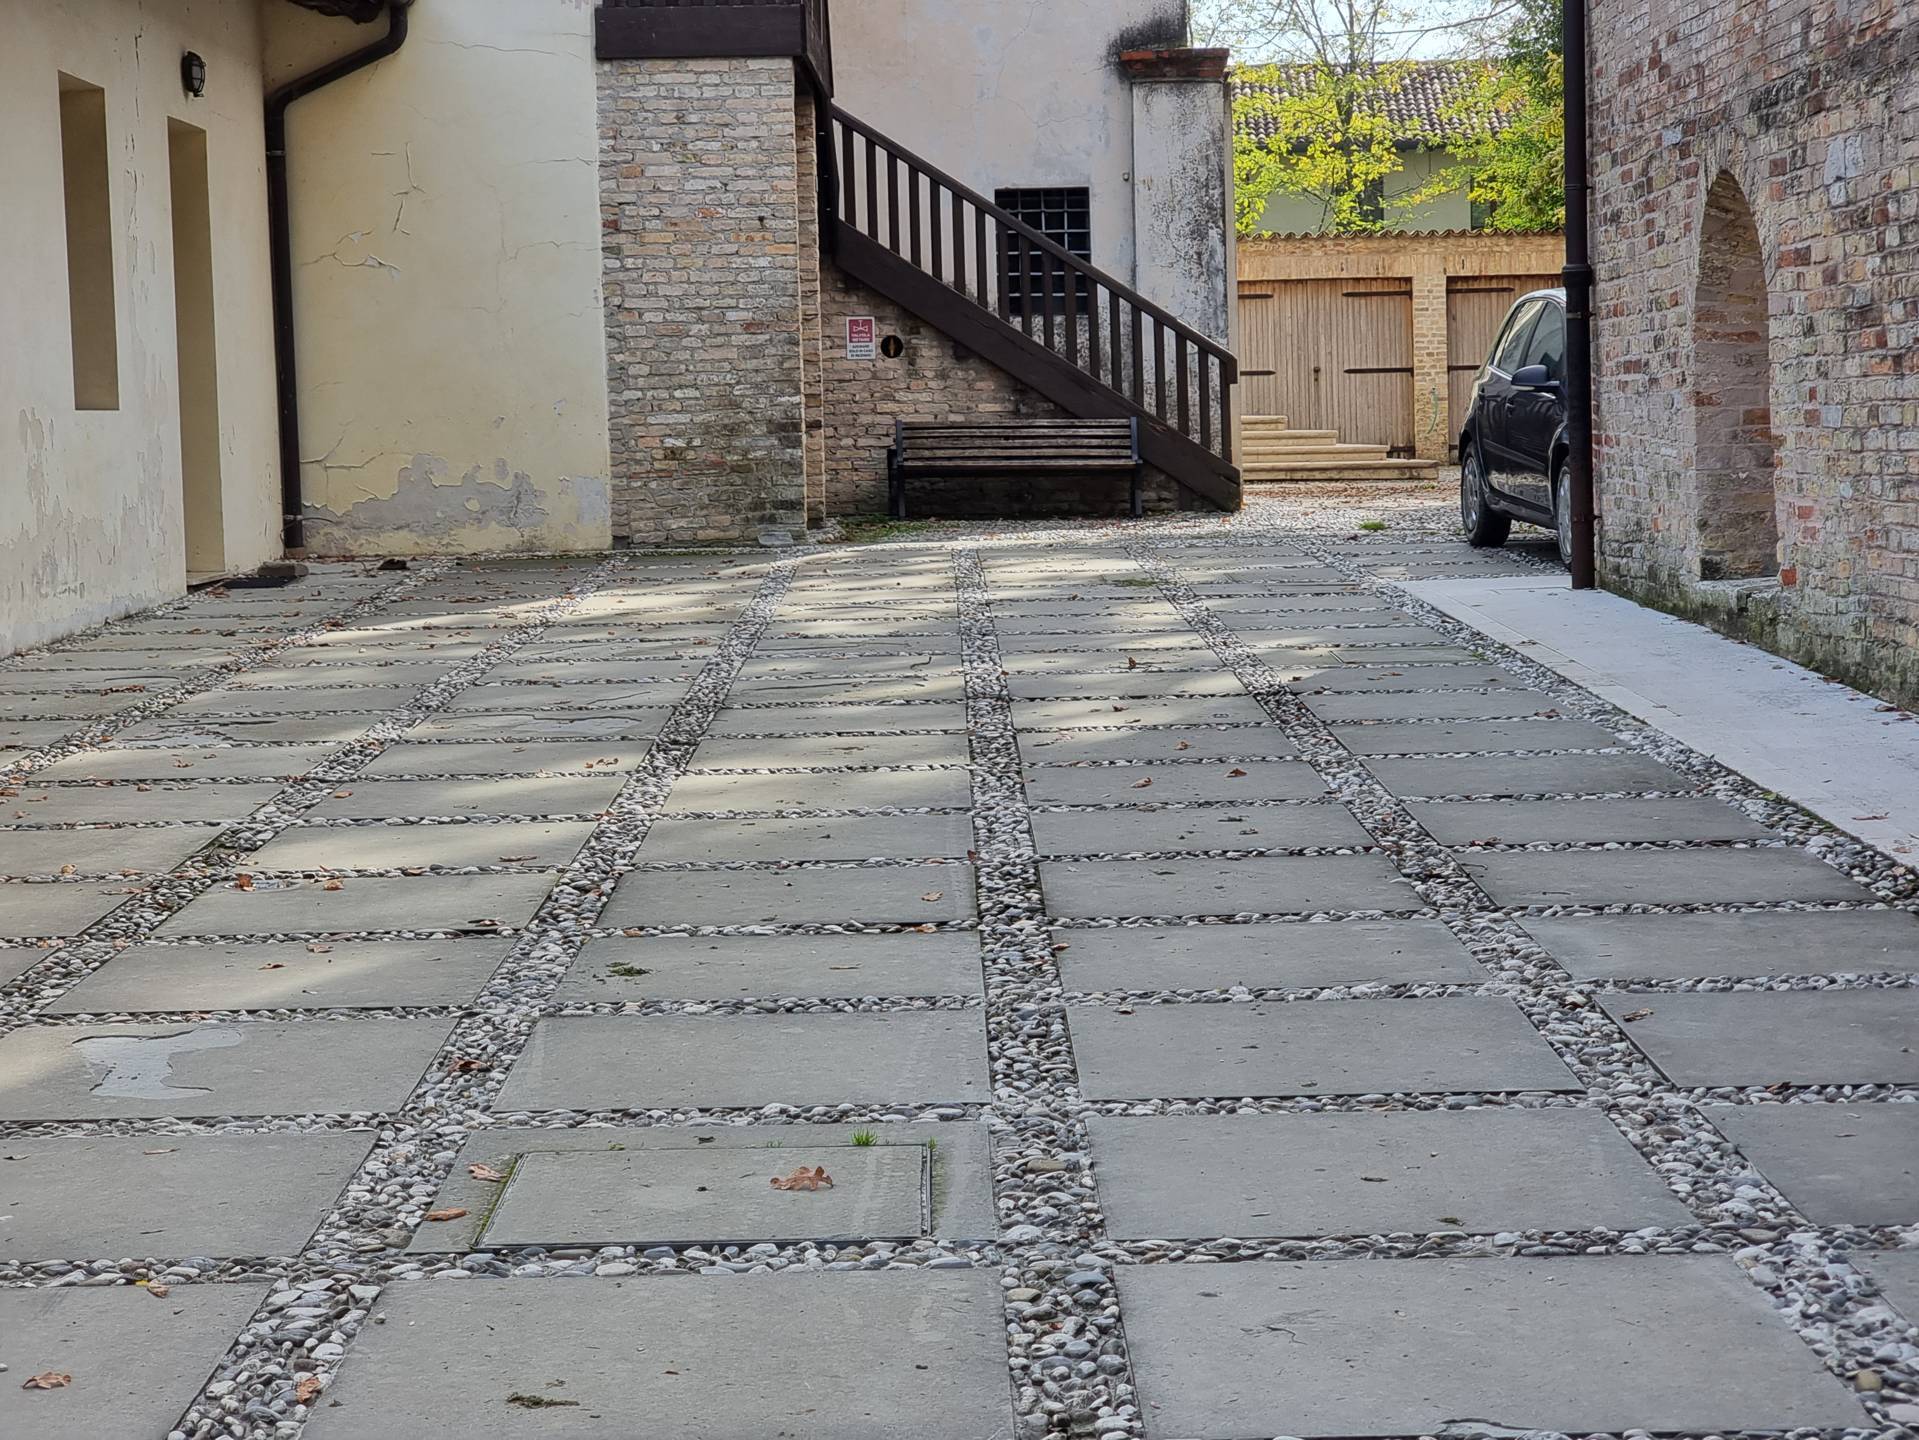
Photo 37 - Private parking
Continue along the park's wooden itinerary to reach a new small wooden bridge with a high slope of 17% near Trattoria Parco Vittoria (Photograph 39). The itinerary opens in a square paved with porphyry, on a level, fairly even surface, with stone benches, behind the Italian Garden, the latter of which can be partially visited (Photographs 40-41): the entrance is paved with a uniform surface, but then there are some gravel paths, very narrow and difficult for people with disability to travel along.
The final part of the route ends by either travelling the entire length of Via Roma or continuing along the itinerary of packed earth mixed with gravel that leads to the beginning of the porphyry pavement of Via Zanardini. The pavement of Via Roma is made of stone (Photograph 42), raised above the road surface by approximately 10 centimetres, with a fairly regular and uniform surface, and an average width of 1.30 metres. There are connecting ramps at the height of the roadways.
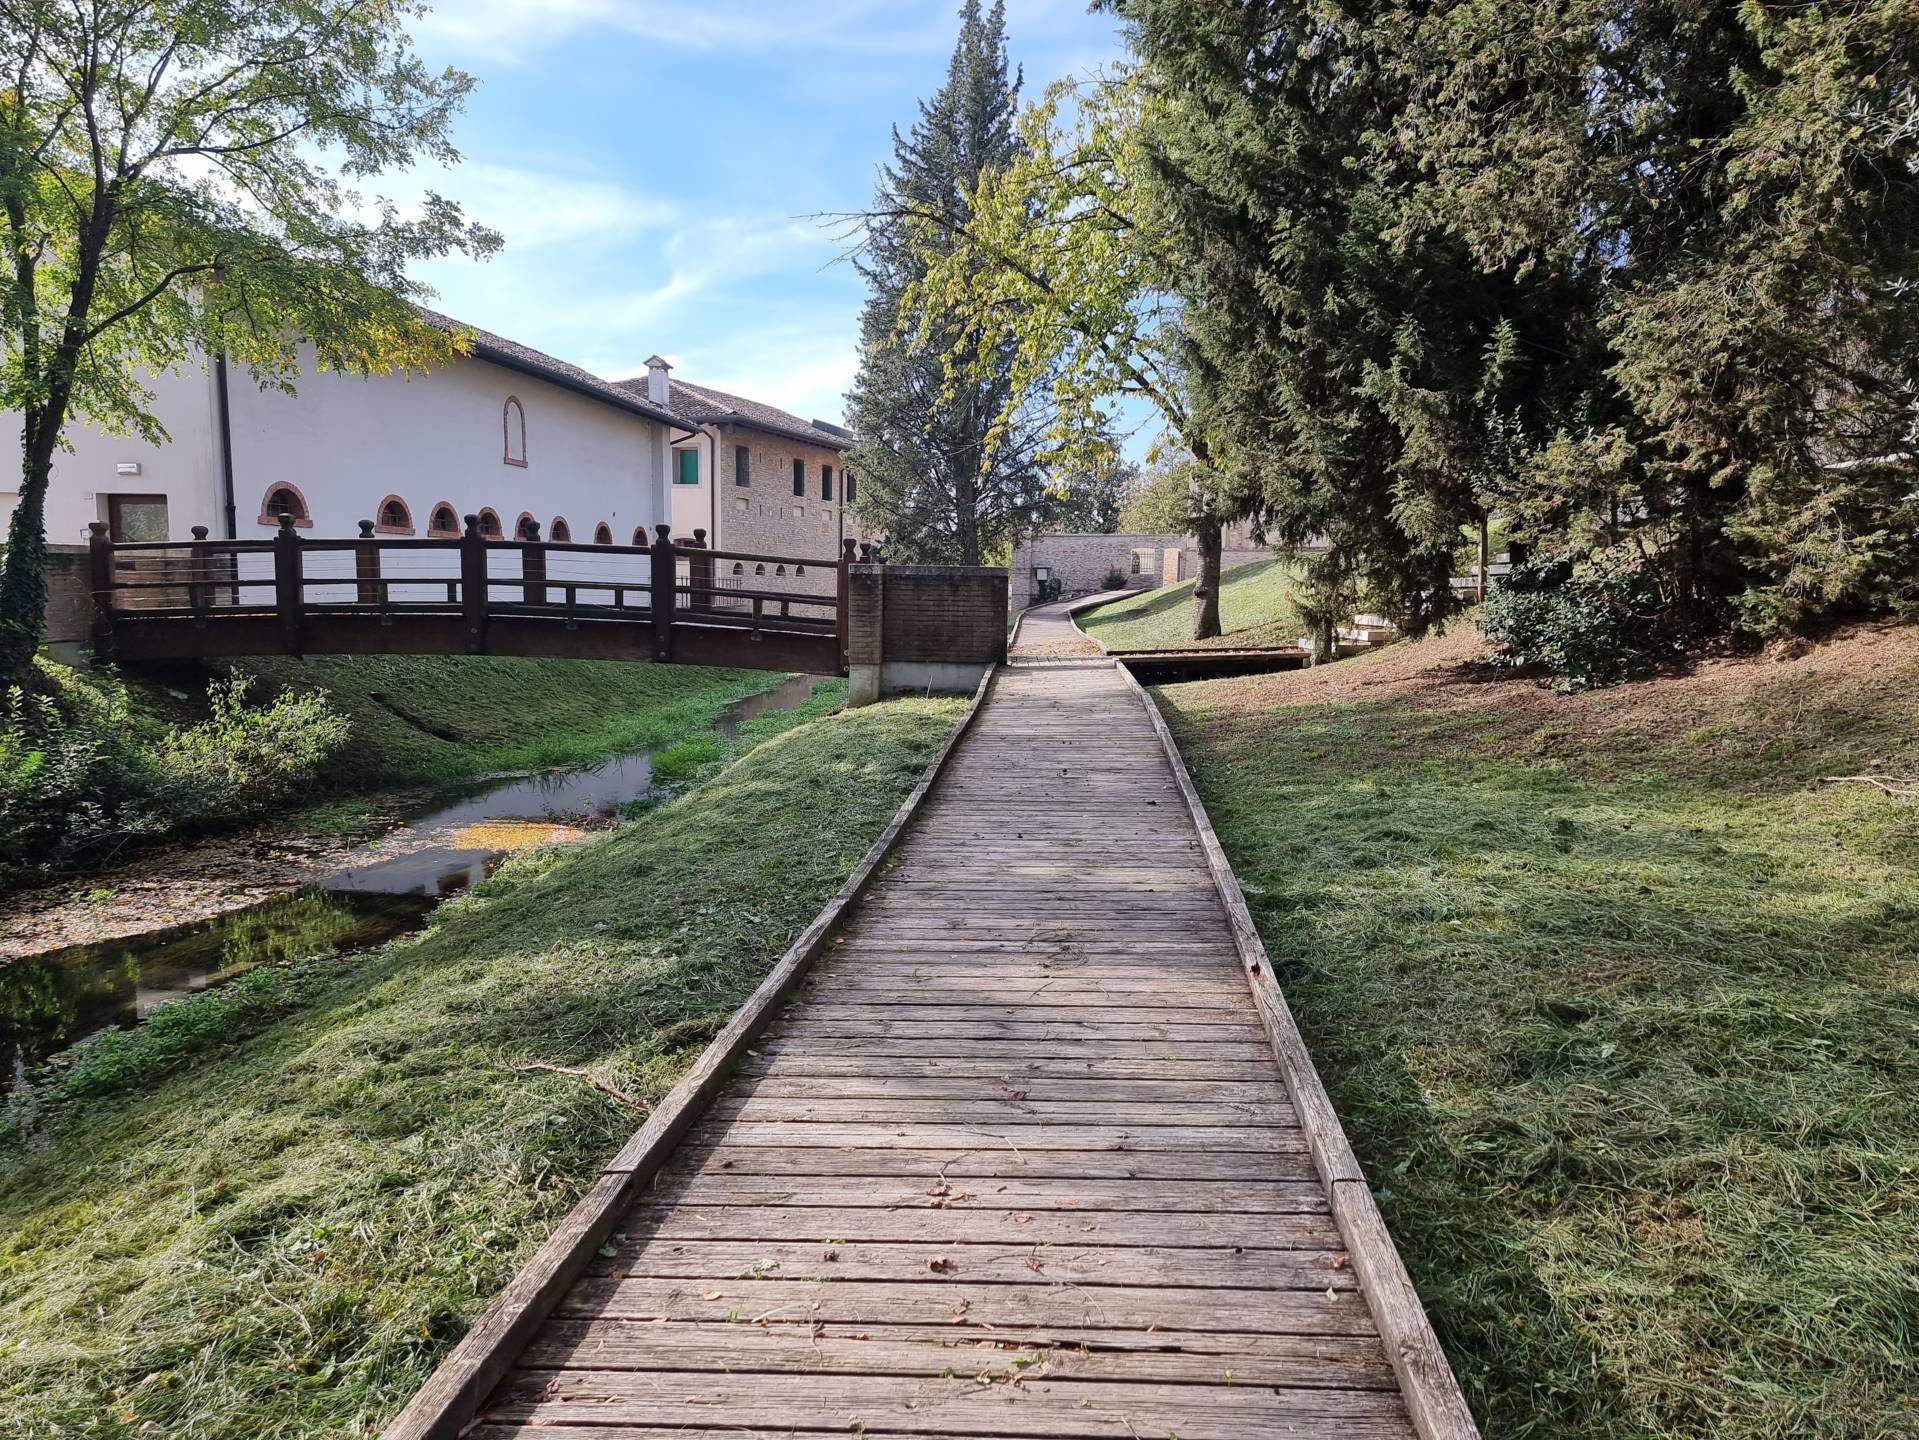
Photo 39 - pathway on wooden planking
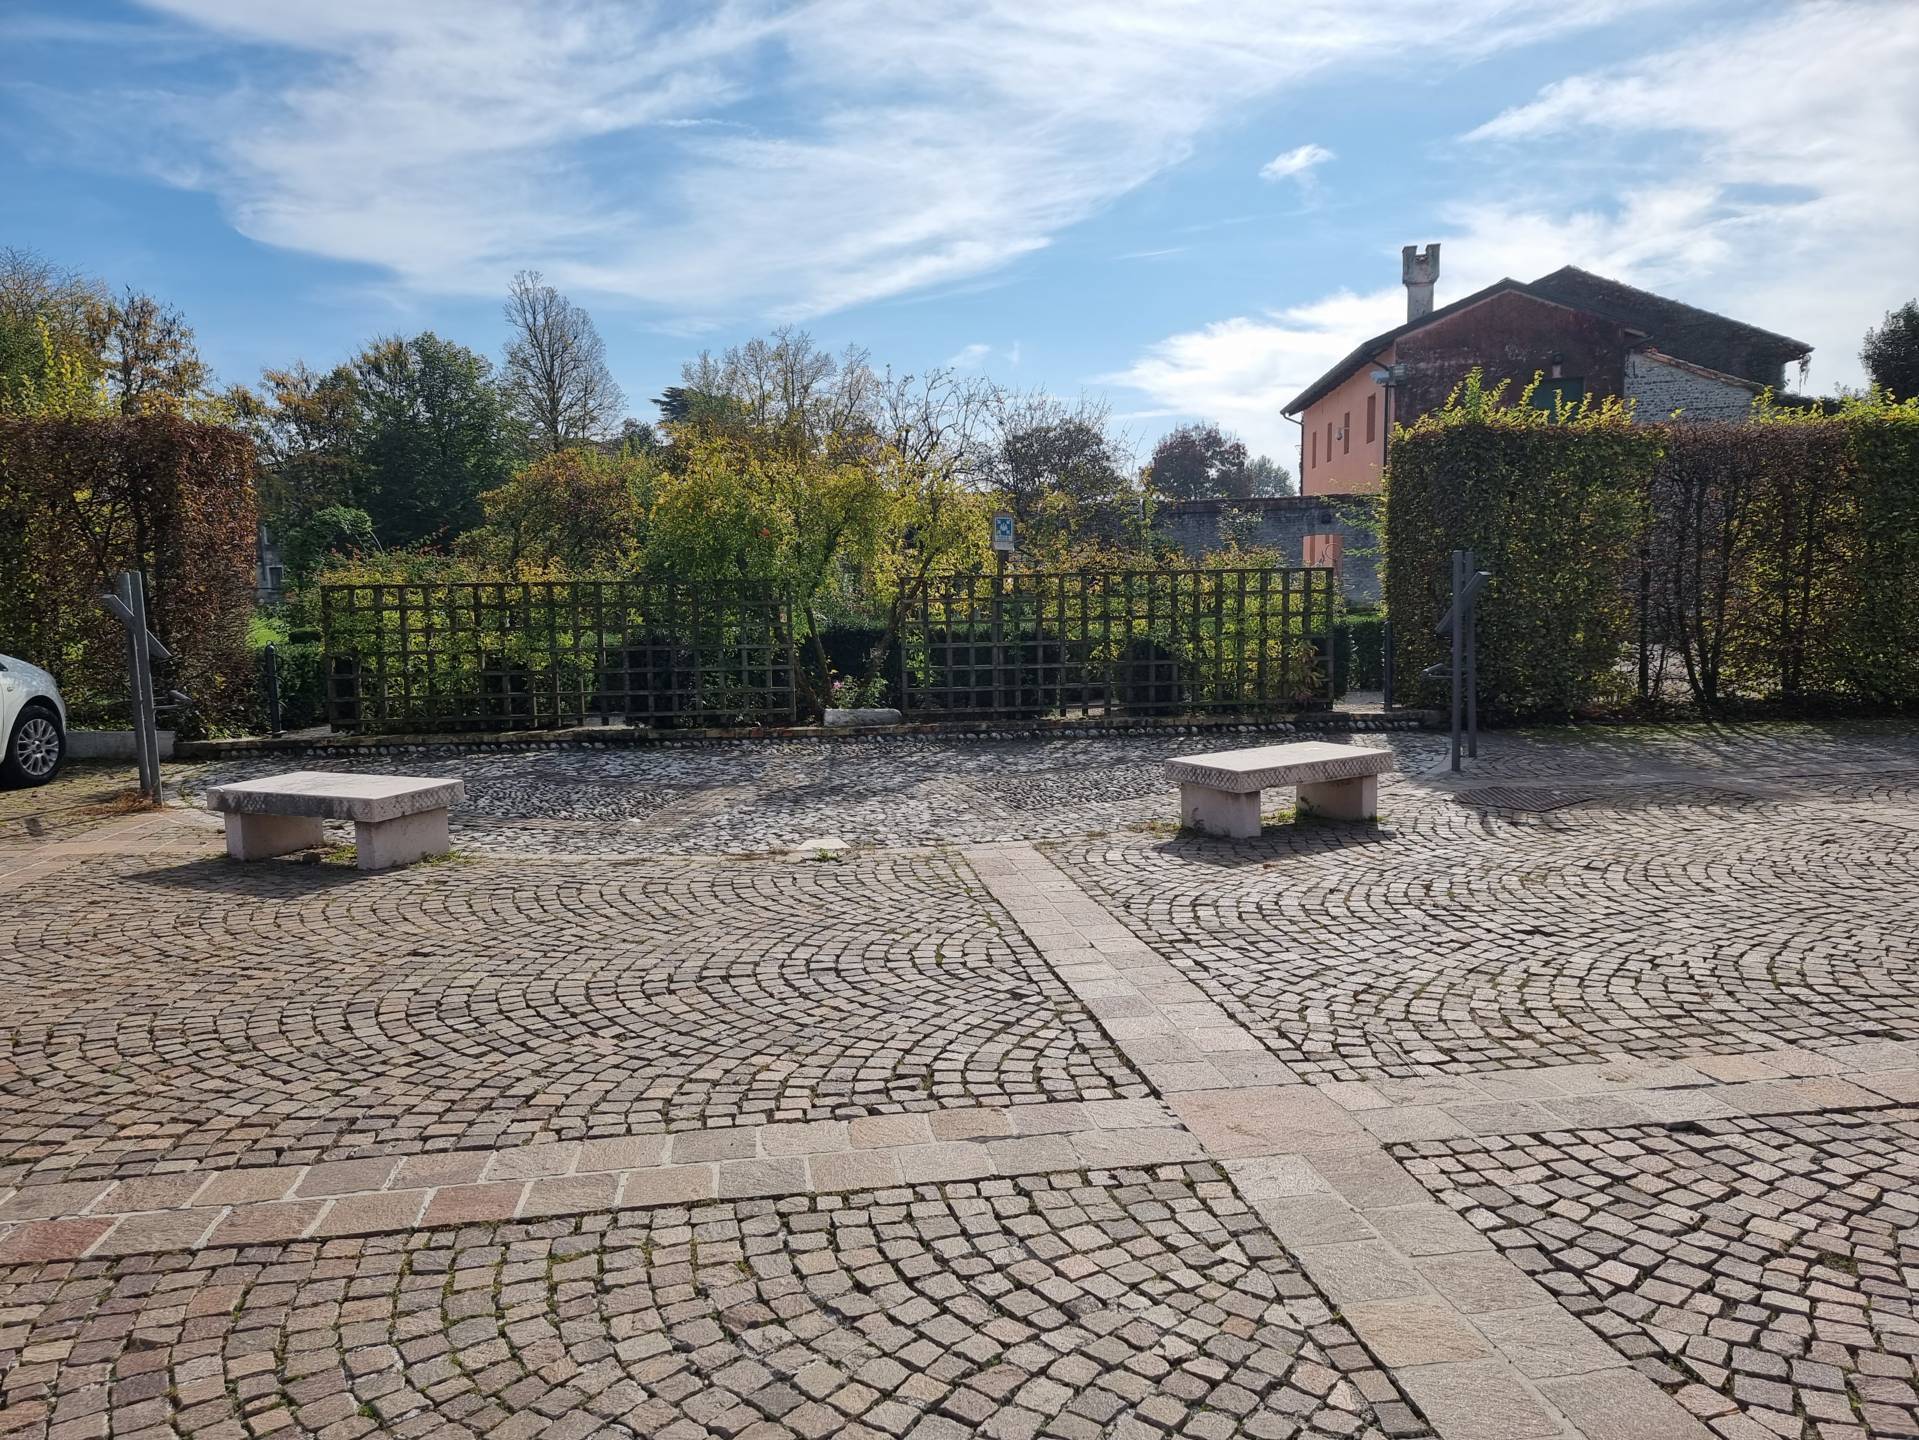
Photo 40 - porphyry paved square
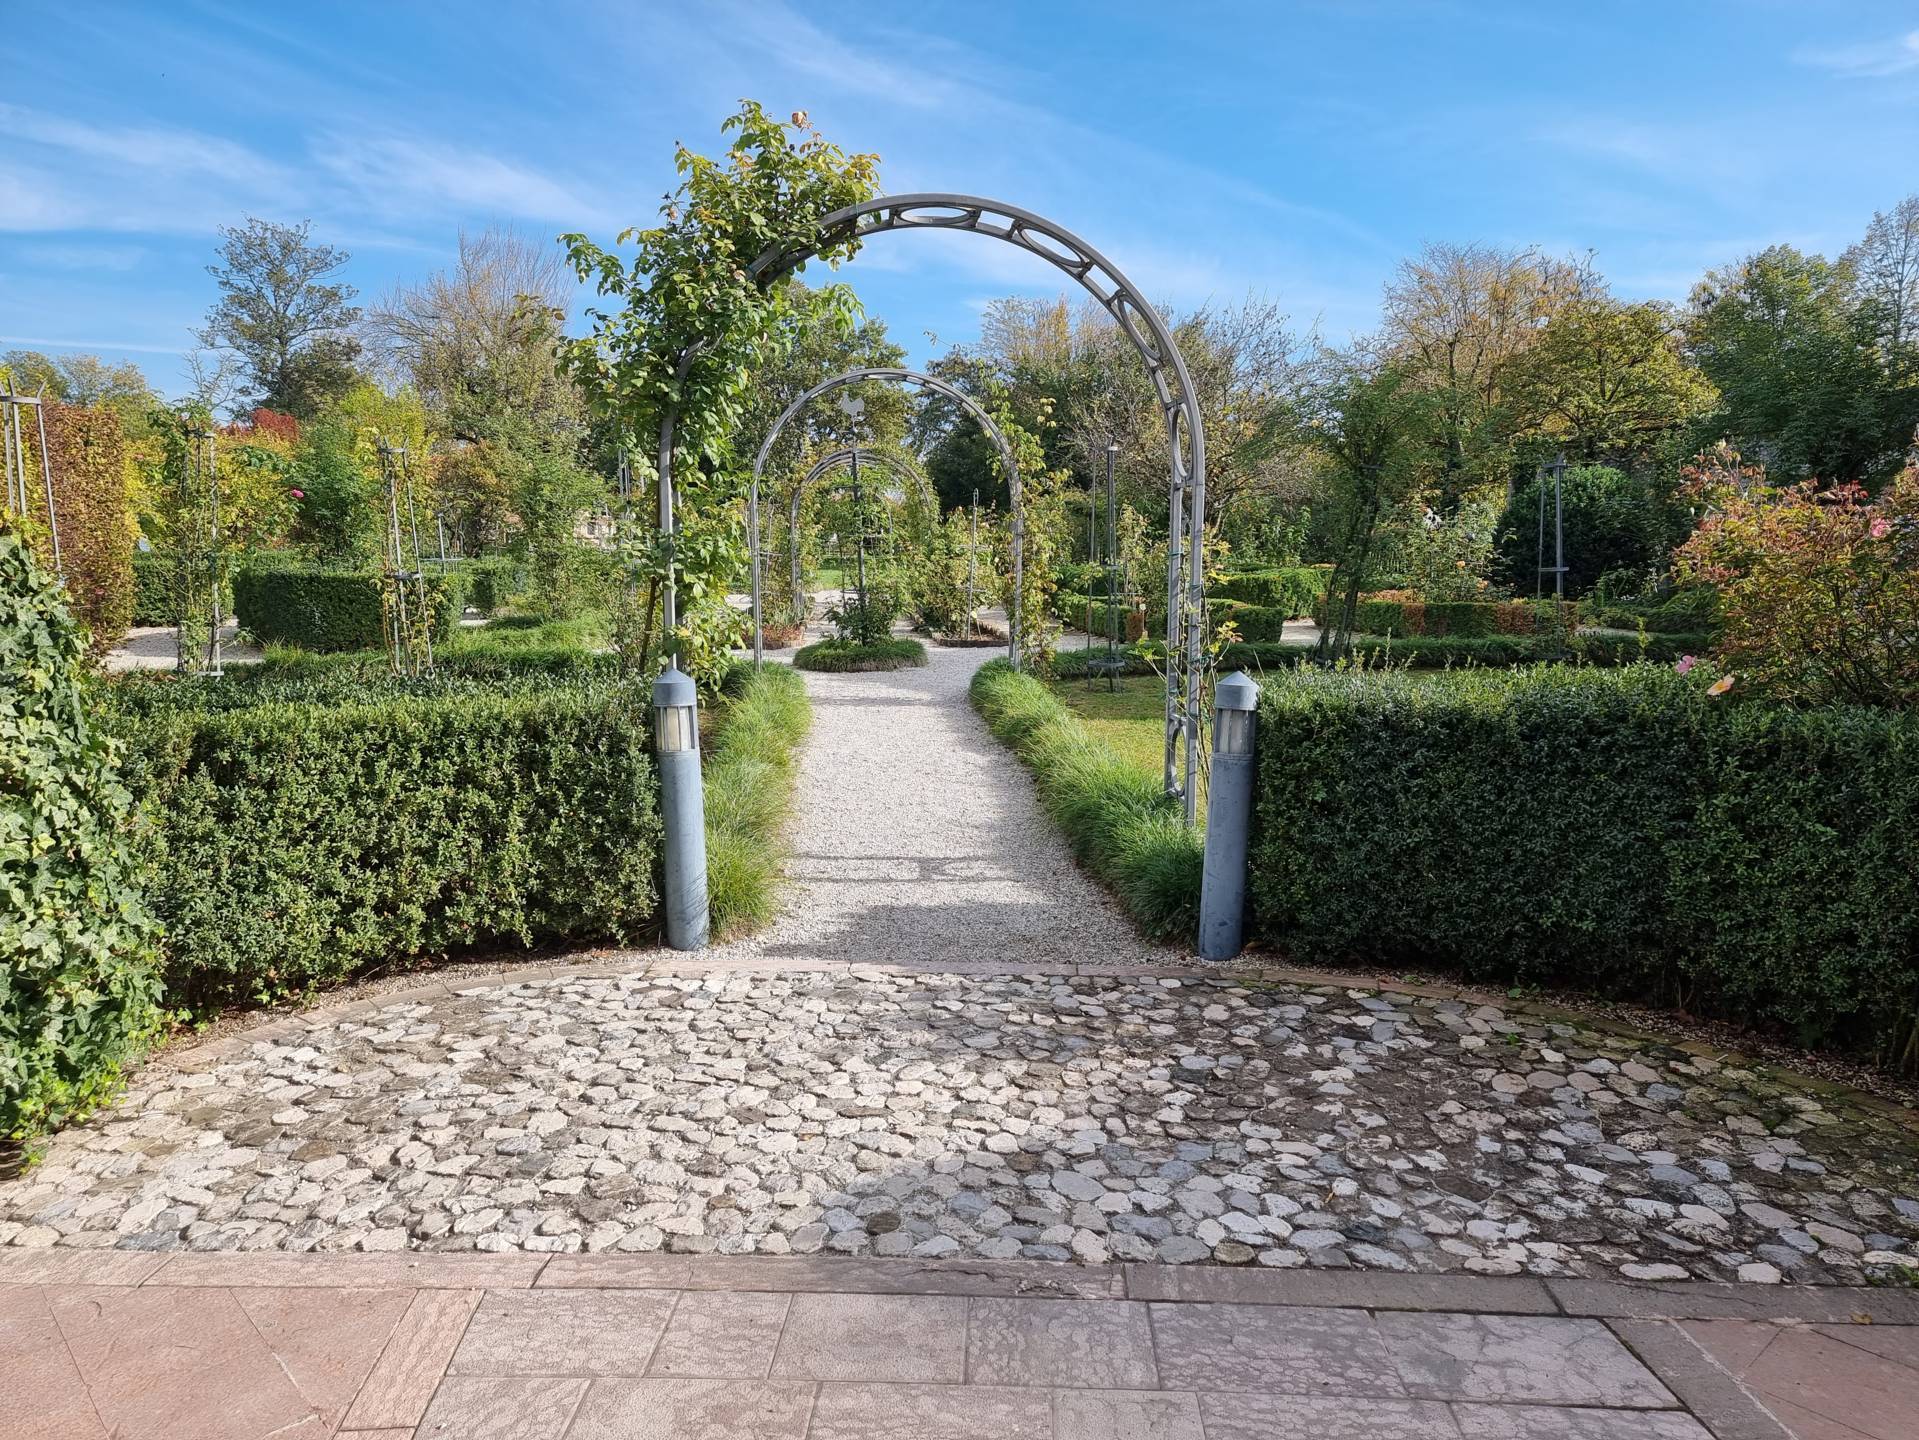
Photo 41 - Garden Entrance
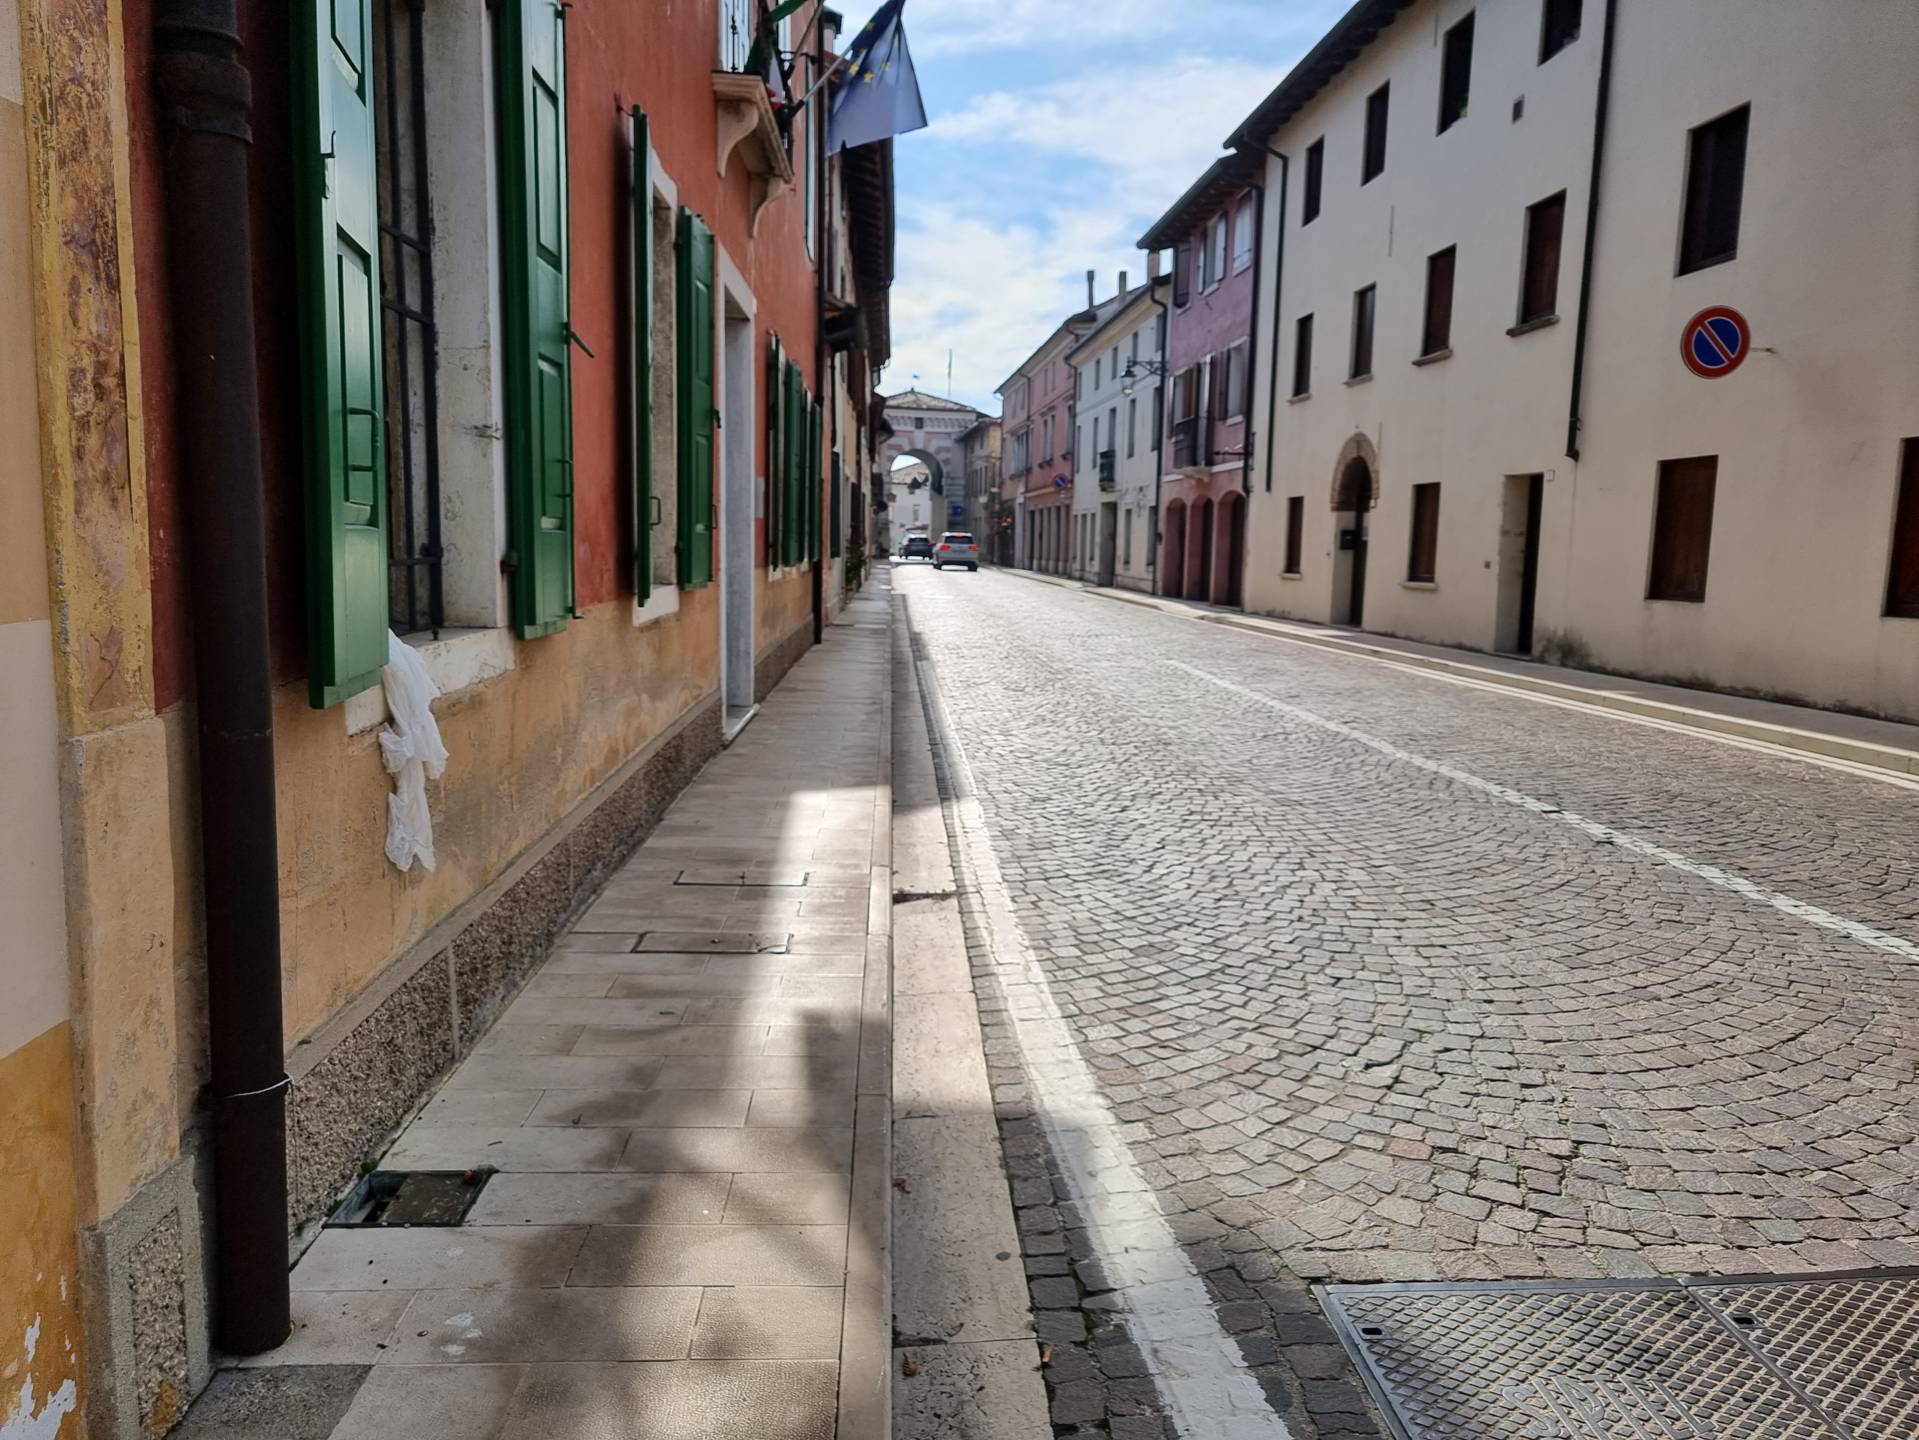
Photo 42 - Stone pavement path along via Roma
The itinerary ends with the tree-lined pavement of Via Zanardini (leading to the parking area along the same street) in width of 1.50 metres, complete with a parking area, and paved with porphyry cubes. It is also possible to park your vehicle in the middle of Via Zanardini, at the bus stop. The latter car park, in packed earth, can be reached from Via Zanardini by crossing a small bridge made of porphyry slabs (slope 6%) with a width of 3.60 metres, length of 4.5 metres and itinerary also made of porphyry cubes (Photographs 31 and 32). At the end of the pavement in Via Zanardini (Photograph 33), it is not possible to descend from the pavement unless a 10-centimetre step is cleared. It is also not possible to cross the present pedestrian crossing unless the existing step is cleared.

Photo 31 - porphyry bridge

Photo 32 - view towards the car park
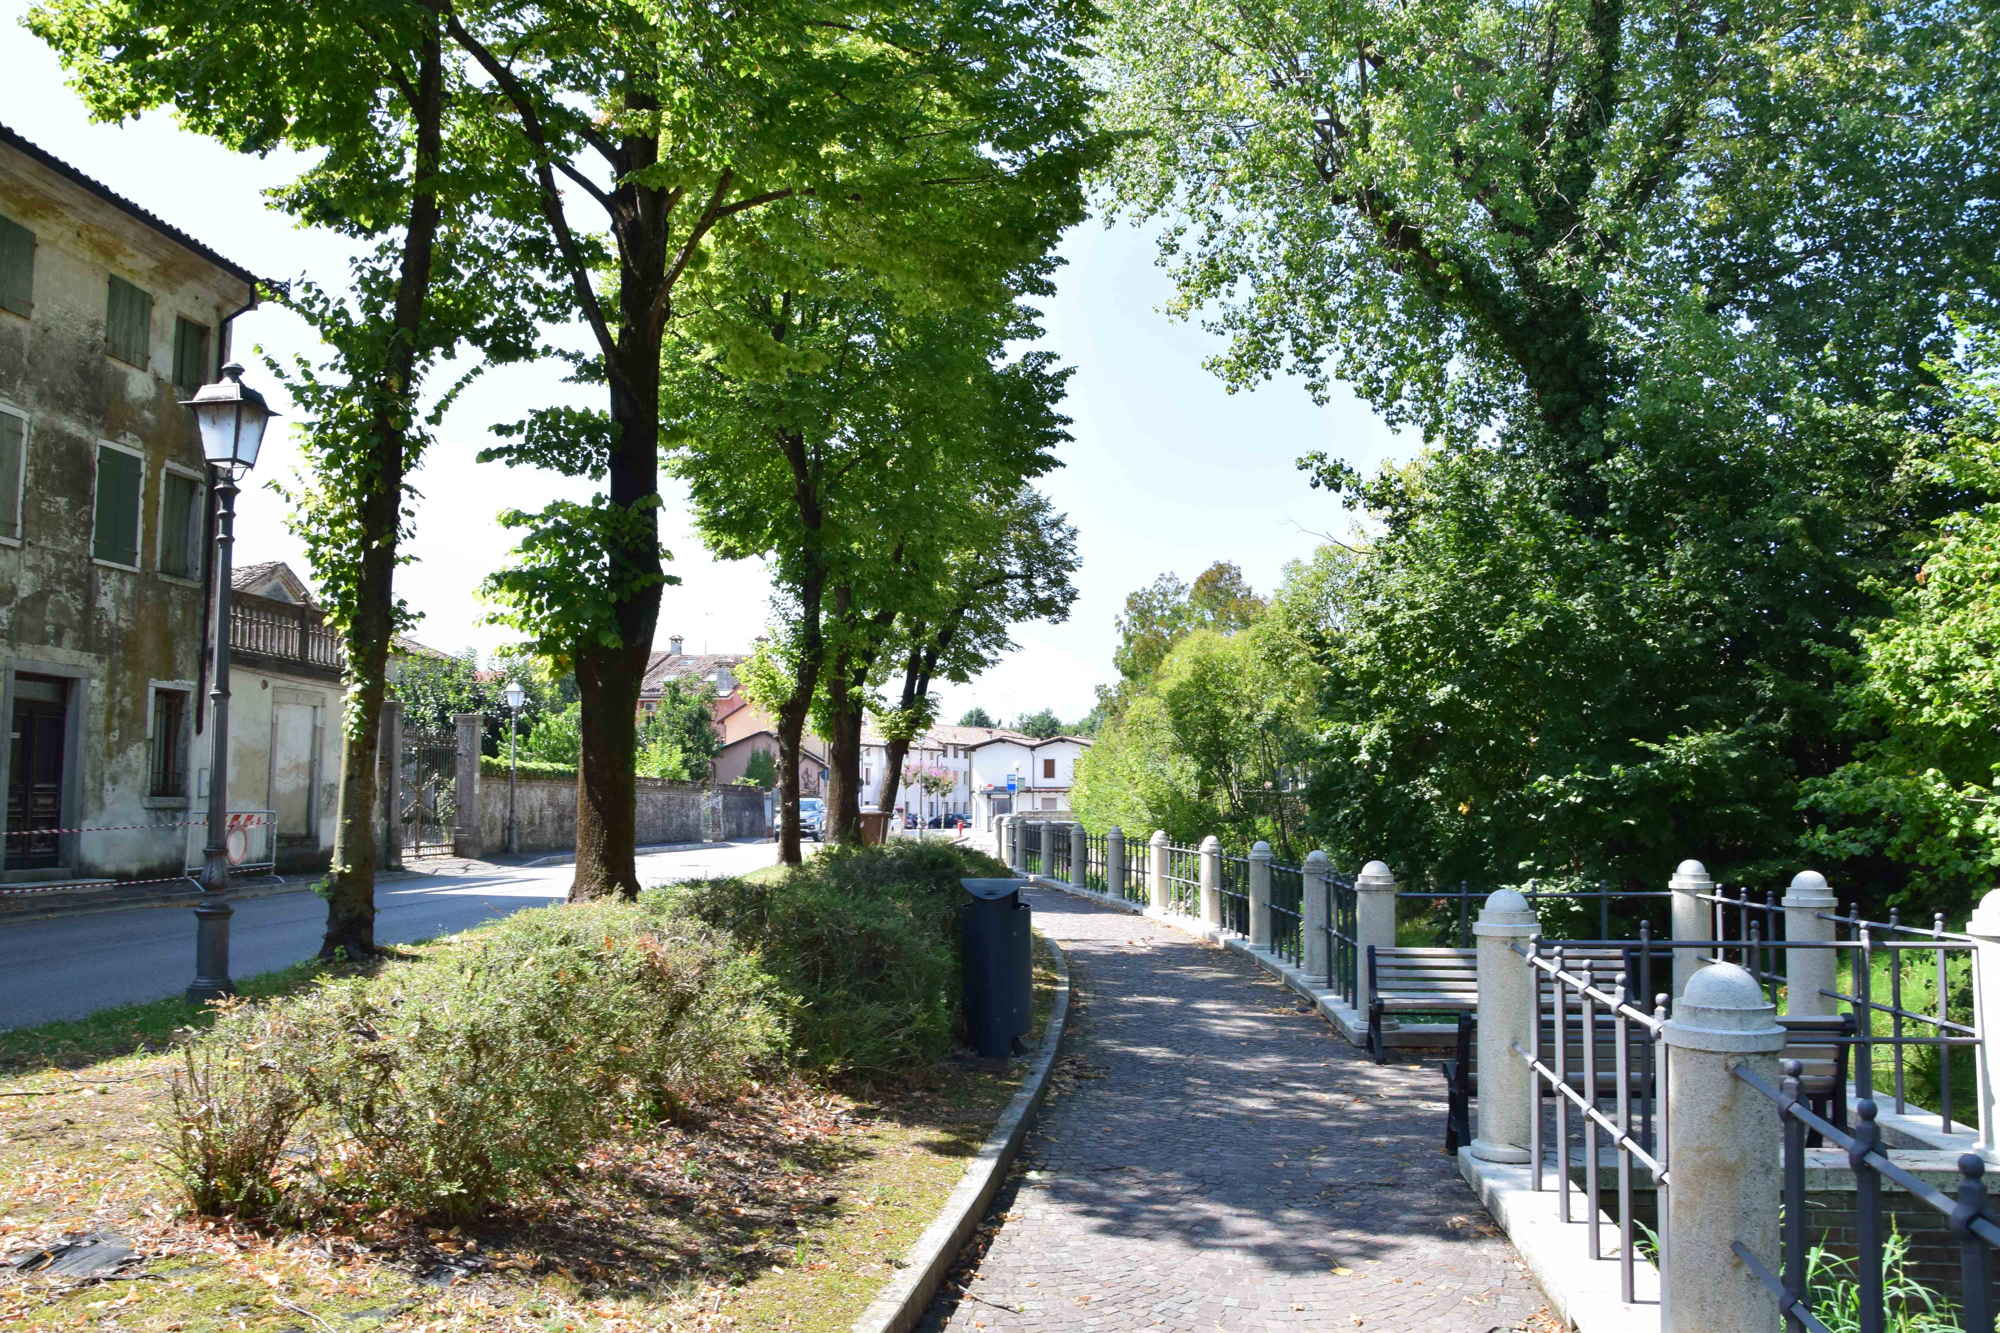
Photo 33 - pavement along via Zanardini
3
/3
ENTRANCE
.jpg)
Ingresso
Entrance typology
TYPE:
MainACCESSIBLE:
YesTIPO:
PrincipaleHeight difference (> 2.5 cm)
PRESENT:
NoThreshold (< 2.5 cm)
PRESENT:
YesHEIGHT:
1Entrance door
TYPE:
Single leafOPENING:
InsideAUTOMATED OPENING:
NoNET DOOR CLEARANCE:
Single or sliding doorMEASURE (CM):
90DOOR AND BACK DOOR COPLANARITY (NOT ASSESSED HEIGHT DIFFERENCE UP TO 2.5 CM):
YesZERBINI/CARPETS:
PRESENTS:
NoINTERCOM/BELL:
PRESENT:
NoGlass doors: window decals to indicate their presence
PRESENTS:
Yes2.6
/3
ENTRANCE
.jpg)
Ingresso
Entrance typology
TYPE:
MainACCESSIBLE:
NoTIPO:
PrincipaleHeight difference (> 2.5 cm)
PRESENT:
YesDISLEVEL:
-
TYPE:
Short staircase/stepUNIVOCAL CODE:
SB1SHORT STAIRCASE (LESS THAN ONE FLOOR):
WIDTH (CM):
120NUMBER OF STEPS:
1HEIGHT OF INDIVIDUAL RISER (CM):
5CORRIMANO:
PRESENT:
NoINTERMEDIATE LANDING:
NoTACTILE-PLANTAR PATHS:
No
Threshold (< 2.5 cm)
PRESENT:
No/LevelEntrance door
TYPE:
With two doors or with two opening elementsOPENING:
InsideAUTOMATED OPENING:
NoNET DOOR CLEARANCE:
With two doors or with two opening elementsOVERALL BORE (CM):
120MAIN DOOR (CM):
60DOOR AND BACK DOOR COPLANARITY (NOT ASSESSED HEIGHT DIFFERENCE UP TO 2.5 CM):
NoZERBINI/CARPETS:
PRESENTS:
NoINTERCOM/BELL:
PRESENT:
NoGlass doors: window decals to indicate their presence
PRESENTS:
NoCOMPARTMENT
.jpg)
Bancone
Compartment name
TYPE:
Generic, of the structureIDENTIFIER:
V1Door
ACCESS:
NoneDimensions
ROTATION DIAMETER 140 CM:
YesPREVAILING CLEAR WIDTH:
> 75 cmPaving
TYPE:
MoreOTHER TYPOLOGY:
CookedColour contrast floors/walls
TYPE:
YesFLOOR COLOUR:
RedWALL COLOUR:
WhiteSignage
TACTILE-PLANTAR PATHS:
NoTOUCH MAP:
NoINFORMATION SIGNAGE:
NoFurniture
COUNTER:
-
HEIGHT:
UniqueGROUND CLEARANCE (CM):
80EMPTY UNDER:
No
2.0
/3
PARKING FOR PUBLIC USE
.jpg)
Stalli di parcheggio
Public car park features
TYPE:
Outdoor uncoveredSTALL:
-
NUMBER OF STALLS:
2TYPE:
in combWIDTH (CM):
350LENGTH (CM):
450SIGNAGE:
Horizontal, VerticalPAVING:
Concrete/Asphalt or coplanar stone
Connection with the footpath
HEIGHT DIFFERENCE (> 2.5 CM):
PRESENT:
No2.5
/3
PARKING FOR PUBLIC USE
.jpg)
Stalli di parcheggio
Public car park features
TYPE:
Outdoor uncoveredSTALL:
-
NUMBER OF STALLS:
2TYPE:
in combWIDTH (CM):
400LENGTH (CM):
500SIGNAGE:
HorizontalPAVING:
Concrete/Asphalt or coplanar stone
Connection with the footpath
HEIGHT DIFFERENCE (> 2.5 CM):
PRESENT:
YesDISLEVEL:
-
TYPE:
RampUNIVOCAL CODE:
RA1RAMP:
WIDTH (CM):
140LENGTH (CM):
75SLOPE:
SLOPE (°):
10SLOPE (%):
17.63CORRIMANO:
PRESENT:
YesSIDE KERB:
NoNON-SLIP FINISH:
NoCOLOUR CONTRAST:
NoTACTILE-PLANTAR PATHS:
No
2.4
/3
ENTRANCE
.jpg)
Ingresso
Entrance typology
TYPE:
MainACCESSIBLE:
NoTIPO:
PrincipaleHeight difference (> 2.5 cm)
PRESENT:
YesDISLEVEL:
-
TYPE:
Short staircase/stepUNIVOCAL CODE:
SB1SHORT STAIRCASE (LESS THAN ONE FLOOR):
WIDTH (CM):
90NUMBER OF STEPS:
1HEIGHT OF INDIVIDUAL RISER (CM):
7CORRIMANO:
PRESENT:
NoINTERMEDIATE LANDING:
NoTACTILE-PLANTAR PATHS:
No
Threshold (< 2.5 cm)
PRESENT:
No/LevelEntrance door
TYPE:
Single leafOPENING:
InsideAUTOMATED OPENING:
NoNET DOOR CLEARANCE:
Single or sliding doorMEASURE (CM):
90DOOR AND BACK DOOR COPLANARITY (NOT ASSESSED HEIGHT DIFFERENCE UP TO 2.5 CM):
NoZERBINI/CARPETS:
PRESENTS:
YesTYPE:
Satin doormatTYPE:
CompactINTERCOM/BELL:
PRESENT:
NoGlass doors: window decals to indicate their presence
PRESENTS:
NoCOMPARTMENT
Compartment name
TYPE:
Generic, of the structureIDENTIFIER:
V1Door
ACCESS:
NoneDimensions
ROTATION DIAMETER 140 CM:
NoPREVAILING CLEAR WIDTH:
> 75 cmPaving
TYPE:
MoreOTHER TYPOLOGY:
Venetian sownColour contrast floors/walls
TYPE:
YesFLOOR COLOUR:
MixedWALL COLOUR:
MixedSignage
TACTILE-PLANTAR PATHS:
NoTOUCH MAP:
NoINFORMATION SIGNAGE:
NoFurniture
COUNTER:
-
HEIGHT:
UniqueGROUND CLEARANCE (CM):
90EMPTY UNDER:
No
2.8
/3
ENTRANCE
.jpg)
Ingresso
Entrance typology
TYPE:
MainACCESSIBLE:
YesTIPO:
PrincipaleHeight difference (> 2.5 cm)
PRESENT:
NoThreshold (< 2.5 cm)
PRESENT:
YesHEIGHT:
2Entrance door
TYPE:
Single leafOPENING:
InsideAUTOMATED OPENING:
NoNET DOOR CLEARANCE:
Single or sliding doorMEASURE (CM):
90DOOR AND BACK DOOR COPLANARITY (NOT ASSESSED HEIGHT DIFFERENCE UP TO 2.5 CM):
YesZERBINI/CARPETS:
PRESENTS:
YesTYPE:
Satin doormatTYPE:
CompactINTERCOM/BELL:
PRESENT:
NoGlass doors: window decals to indicate their presence
PRESENTS:
NoCOMPARTMENT
.jpg)
Bancone
.jpg)
Tavolo e sedie
Compartment name
TYPE:
Generic, of the structureIDENTIFIER:
V1Door
ACCESS:
NoneDimensions
ROTATION DIAMETER 140 CM:
YesPREVAILING CLEAR WIDTH:
> 75 cmPaving
TYPE:
TilesColour contrast floors/walls
TYPE:
YesFLOOR COLOUR:
PinkWALL COLOUR:
YellowSignage
TACTILE-PLANTAR PATHS:
NoTOUCH MAP:
NoINFORMATION SIGNAGE:
NoFurniture
COUNTER:
-
HEIGHT:
UniqueGROUND CLEARANCE (CM):
120EMPTY UNDER:
No
TABLE:
-
TYPE OF SUPPORT:
Corner legsTYPE OF PLAN:
Rectangular/SquareWIDTH (CM):
80LENGTH (CM):
80GROUND CLEARANCE (CM):
80GROUND CLEARANCE (CM):
72TOP WITH ROUNDED EDGES:
No
CHAIR:
-
Backrest
FIXED TO THE GROUND:
No
OUTDOOR AREA
.jpg)
Tavoli e sedie
Destination of the area
AREA TYPOLOGY:
ConsumptionType
Access to the area
TYPE:
From the main door already describedHeight difference (> 2.5 cm)
PRESENT:
NoPaving
TYPE:
Compact gravel/rammed earth, TilesDimensions
ROTATION DIAMETER 140 CM:
YesPREVAILING CLEAR WIDTH:
> 75 cmFurniture
TABLE:
-
TYPE OF SUPPORT:
Corner legsTYPE OF PLAN:
Rectangular/SquareWIDTH (CM):
150LENGTH (CM):
150GROUND CLEARANCE (CM):
80GROUND CLEARANCE (CM):
75TOP WITH ROUNDED EDGES:
No
CHAIR:
-
Backrest, Armrests
FIXED TO THE GROUND:
No