Fagagna - Tour Itinerary

Hill
GENERAL INFORMATION
LAST INSPECTION DATE
24/11/2022
PLANNED ITINERARY
Fagagna - Tour Itinerary
LENGTH
1600 meters
DEPARTURE
Via dei Tigli
The tour can take place at any time of the year.
Starting point from Via dei Tigli. The surface is paved, but there are no pavements, so the itinerary takes place on a road with no safety conditions. In addition, considering the uphill stretch and at the same time the bends, it is not recommended to proceed on the footpath in this section (in the absence of a pavement) because adequate safety conditions are not guaranteed (Photographs 1 and 2). The upper road, which leads to the ancient Pieve, is made of round cobblestones; both have a slope of 11% (Photograph 3). Continuing the itinerary by vehicle, however, visitors are treated to a wonderful panorama. The road continues in these conditions until the junction with Via Sotto gli Orti and Via Castello di Fagagna (Photograph 4). The itinerary continues along Via Castello di Fagagna: a packed earth footpath mixed with grass and gravel is located on the right-hand side (presumably not completed) with an uneven surface that does not allow an easy itinerary for wheelchair users. It is, therefore, necessary to continue the itinerary on the road, on cobblestones, not level and downhill, in the absence of safety conditions (Photograph 5). Please note, in any case, that the road is on a slope and therefore, also for this reason, it is advisable to drive along this stretch. Continuing downhill, the pavements on both sides become narrower until they disappear and cross the road on the right that climbs to the top of the hill and leads to the remains of the old castle of Fagagna (Photographs 6-7-8). The small road is paved, and the surface is uneven, narrow and suitable for the passage of only one vehicle at a time, with a steep slope, and therefore it is also recommended to reach the castle ruins by automobile. At the crossroads, there are two information panels providing historical and educational details: the first is the customary information panel provided for the points of interest of the Province of Udine, with a white surface, black lettering, difficult to read and in poor condition, while the second is about the Castle, small in size, with a light surface, black lettering, and good legibility.

Photo 1 - Initial section of Via dei Tigli
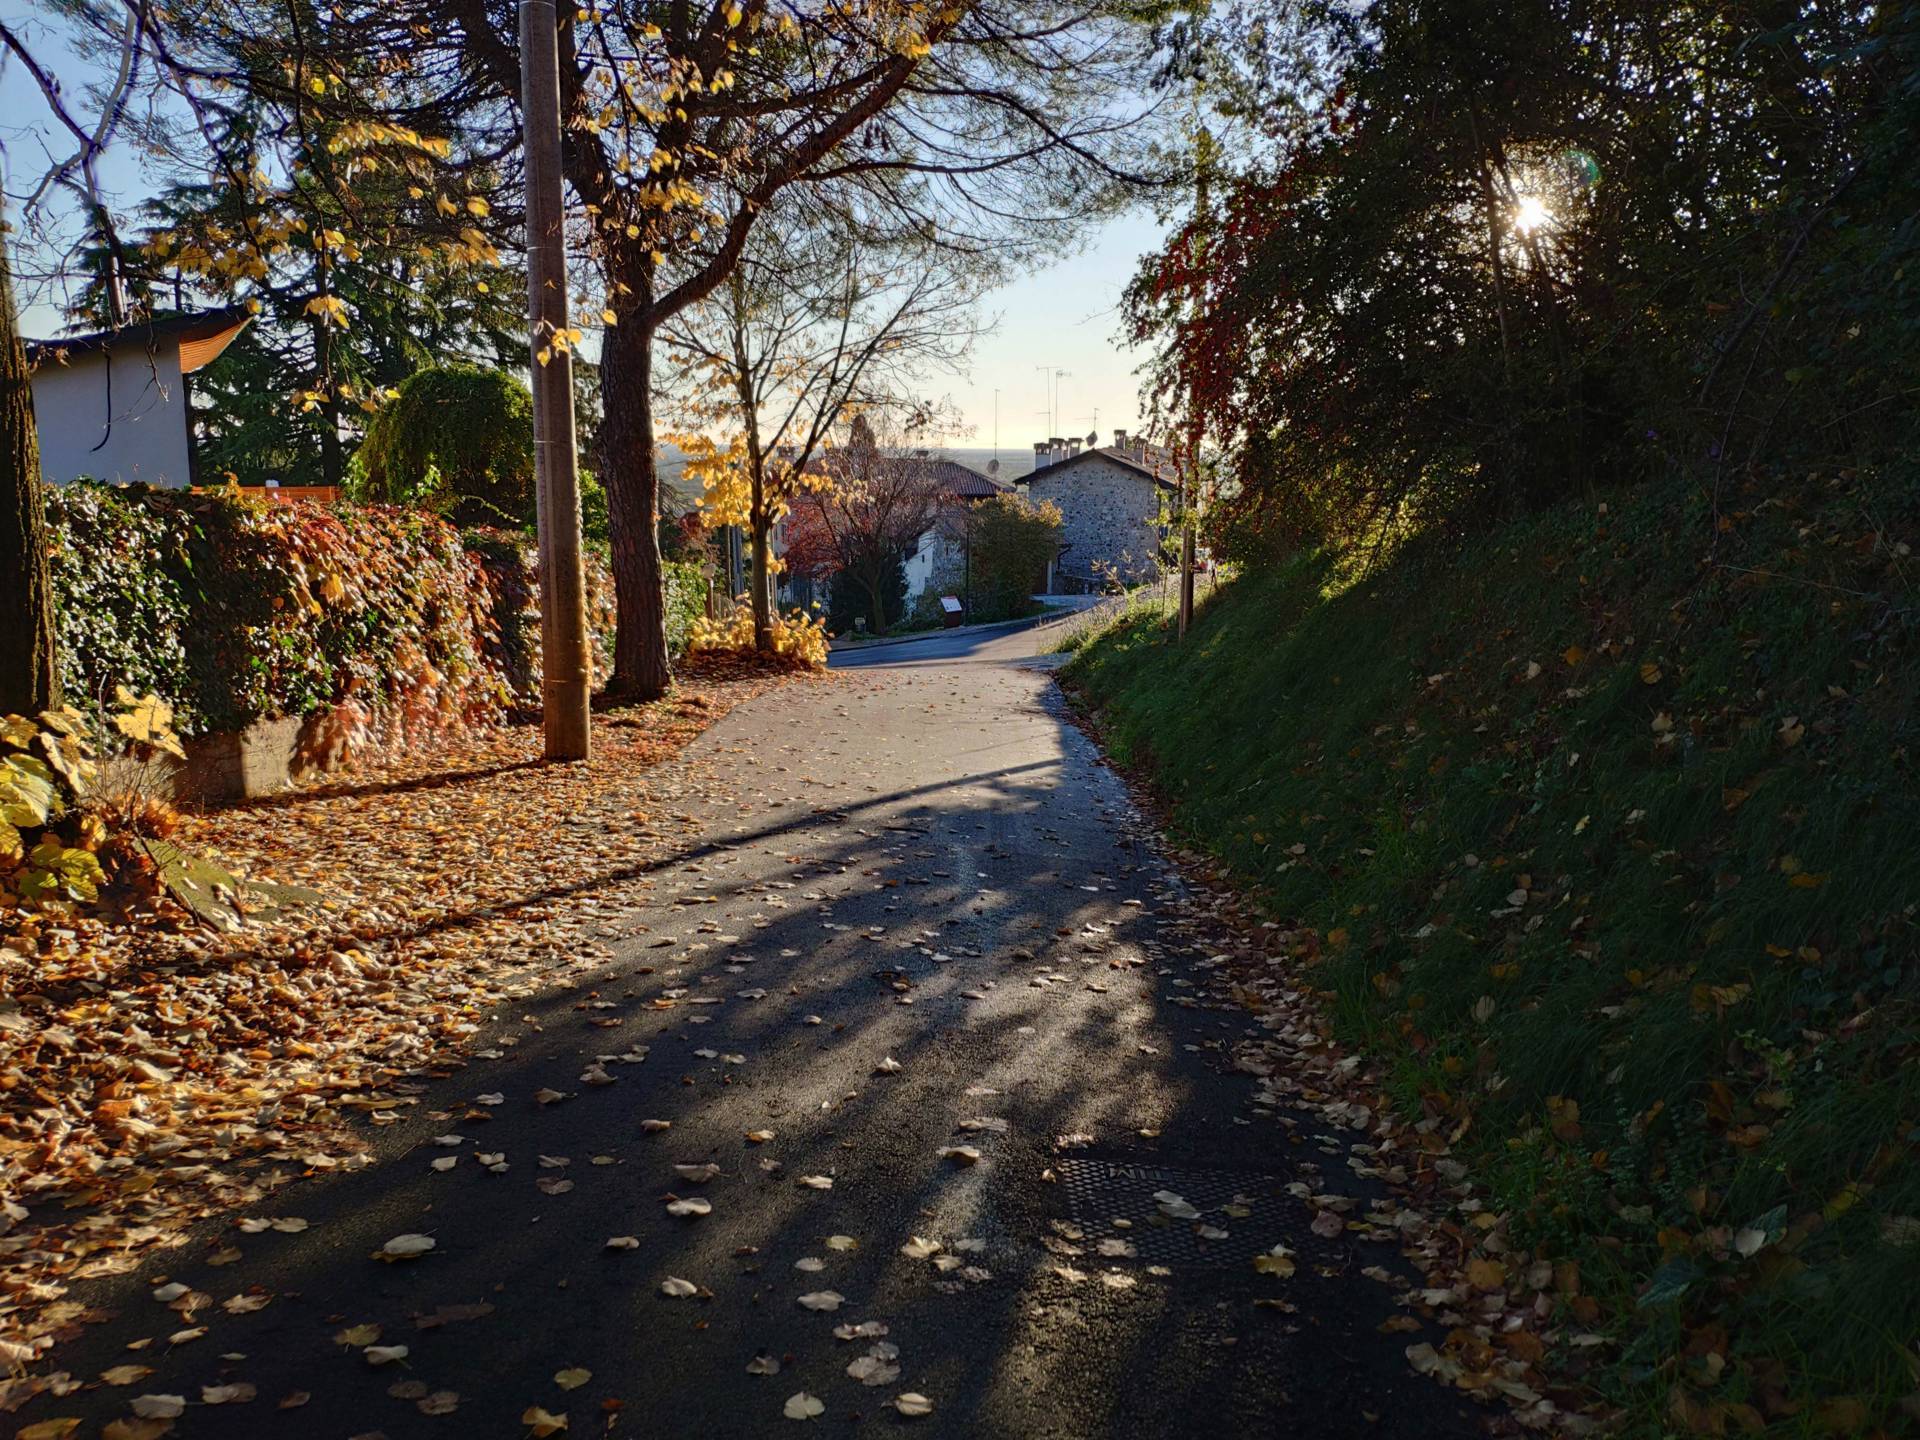
Photo 2 - Final section of Via dei Tigli
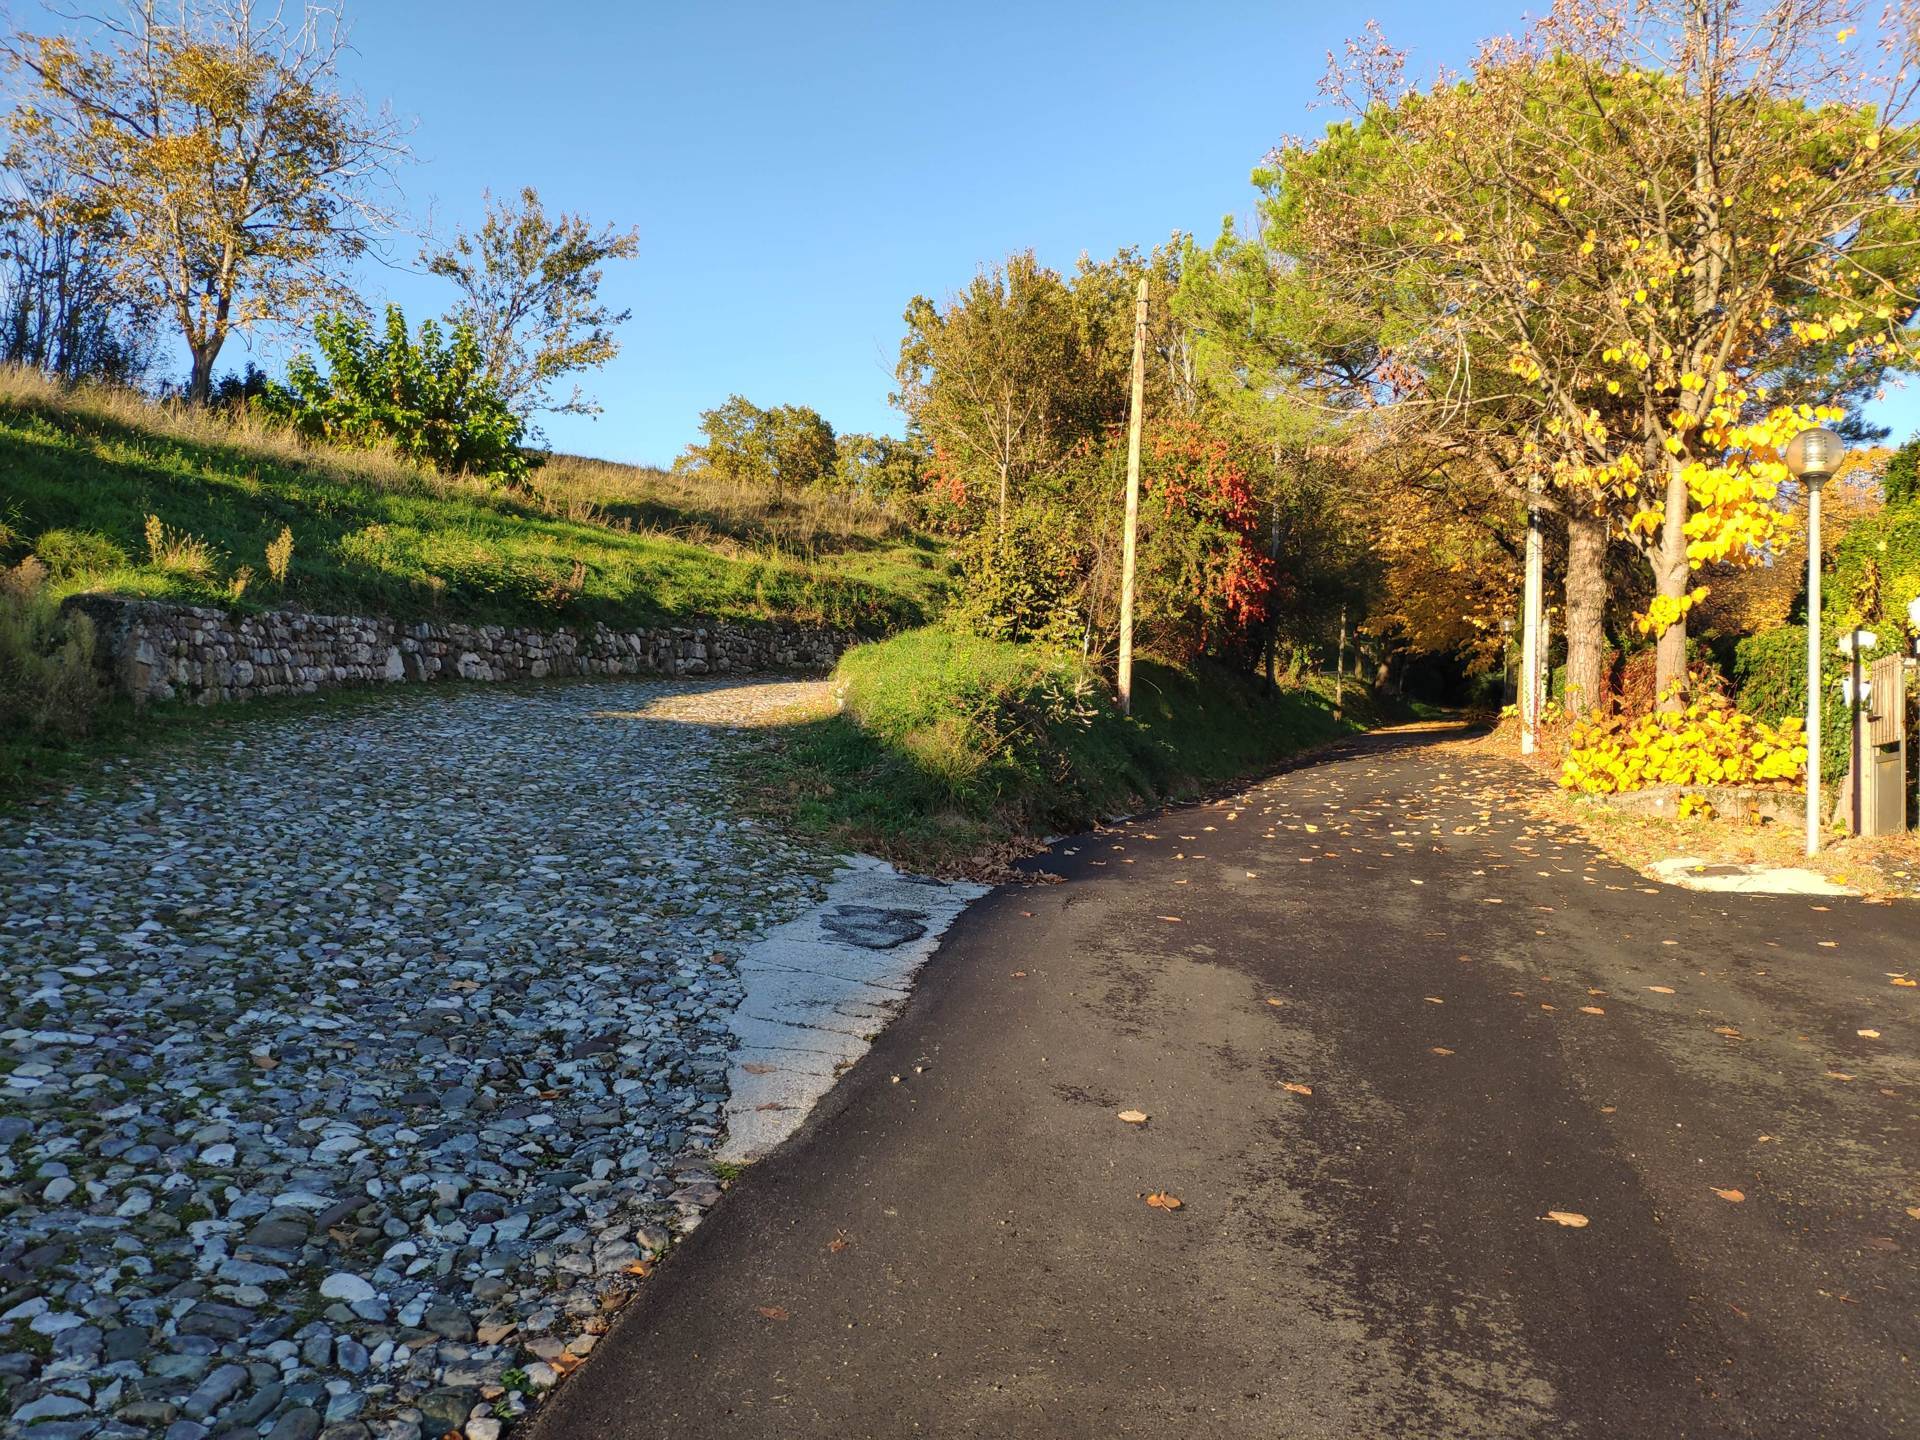
Photo 3 - Route to the Ancient Pieve
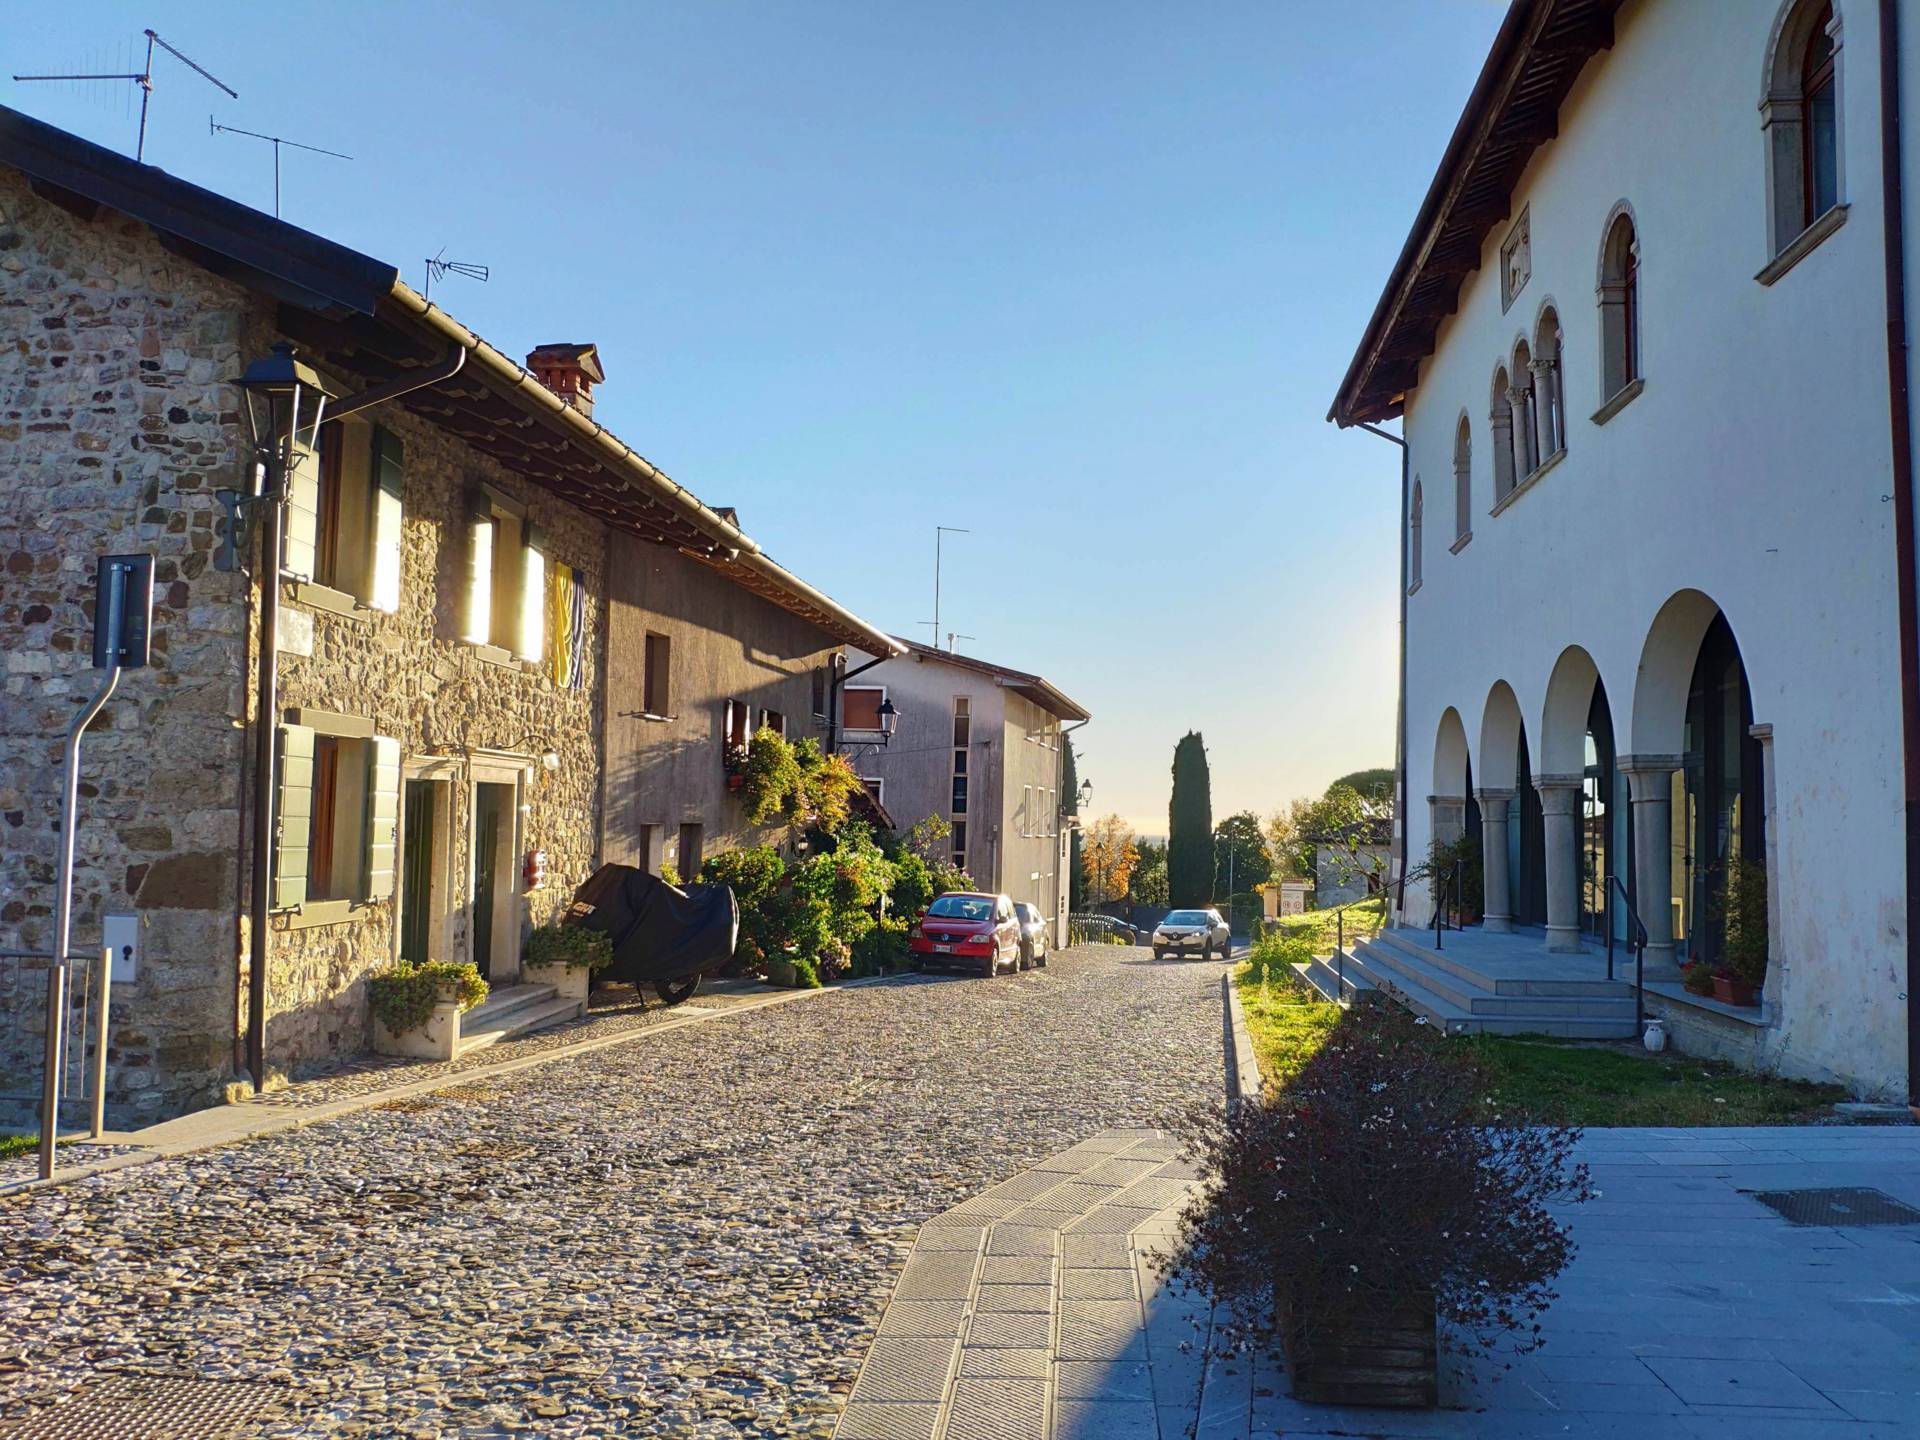
Photo 4 - itinerary on cobblestones
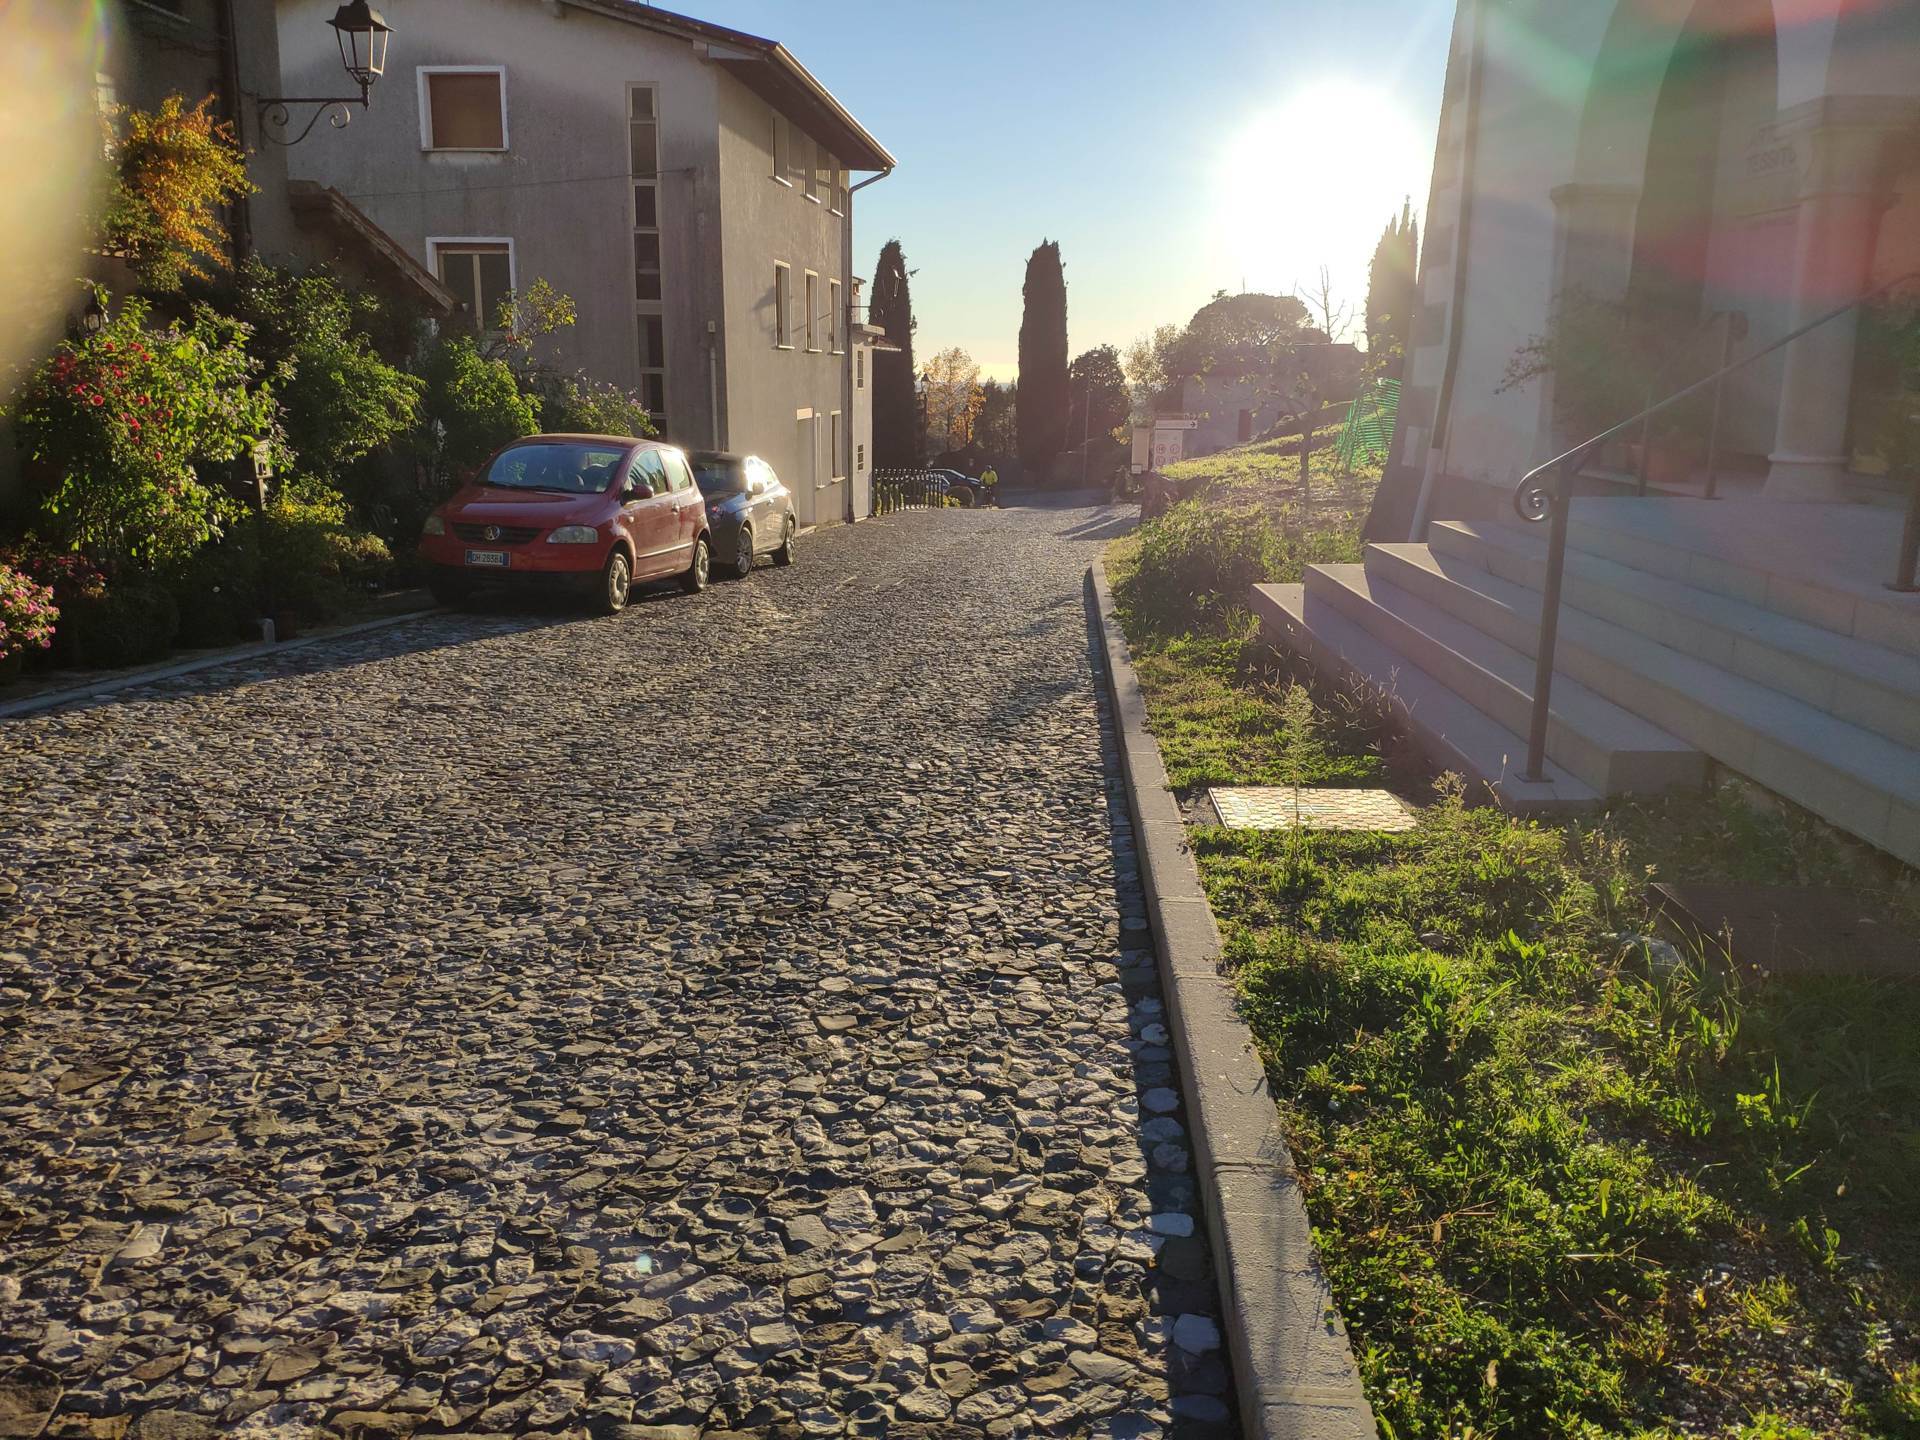
Photo 5 - itinerary on the road in the absence of the pavement

Photo 6 - signage

Photo 7 - itinerary on uneven asphalt
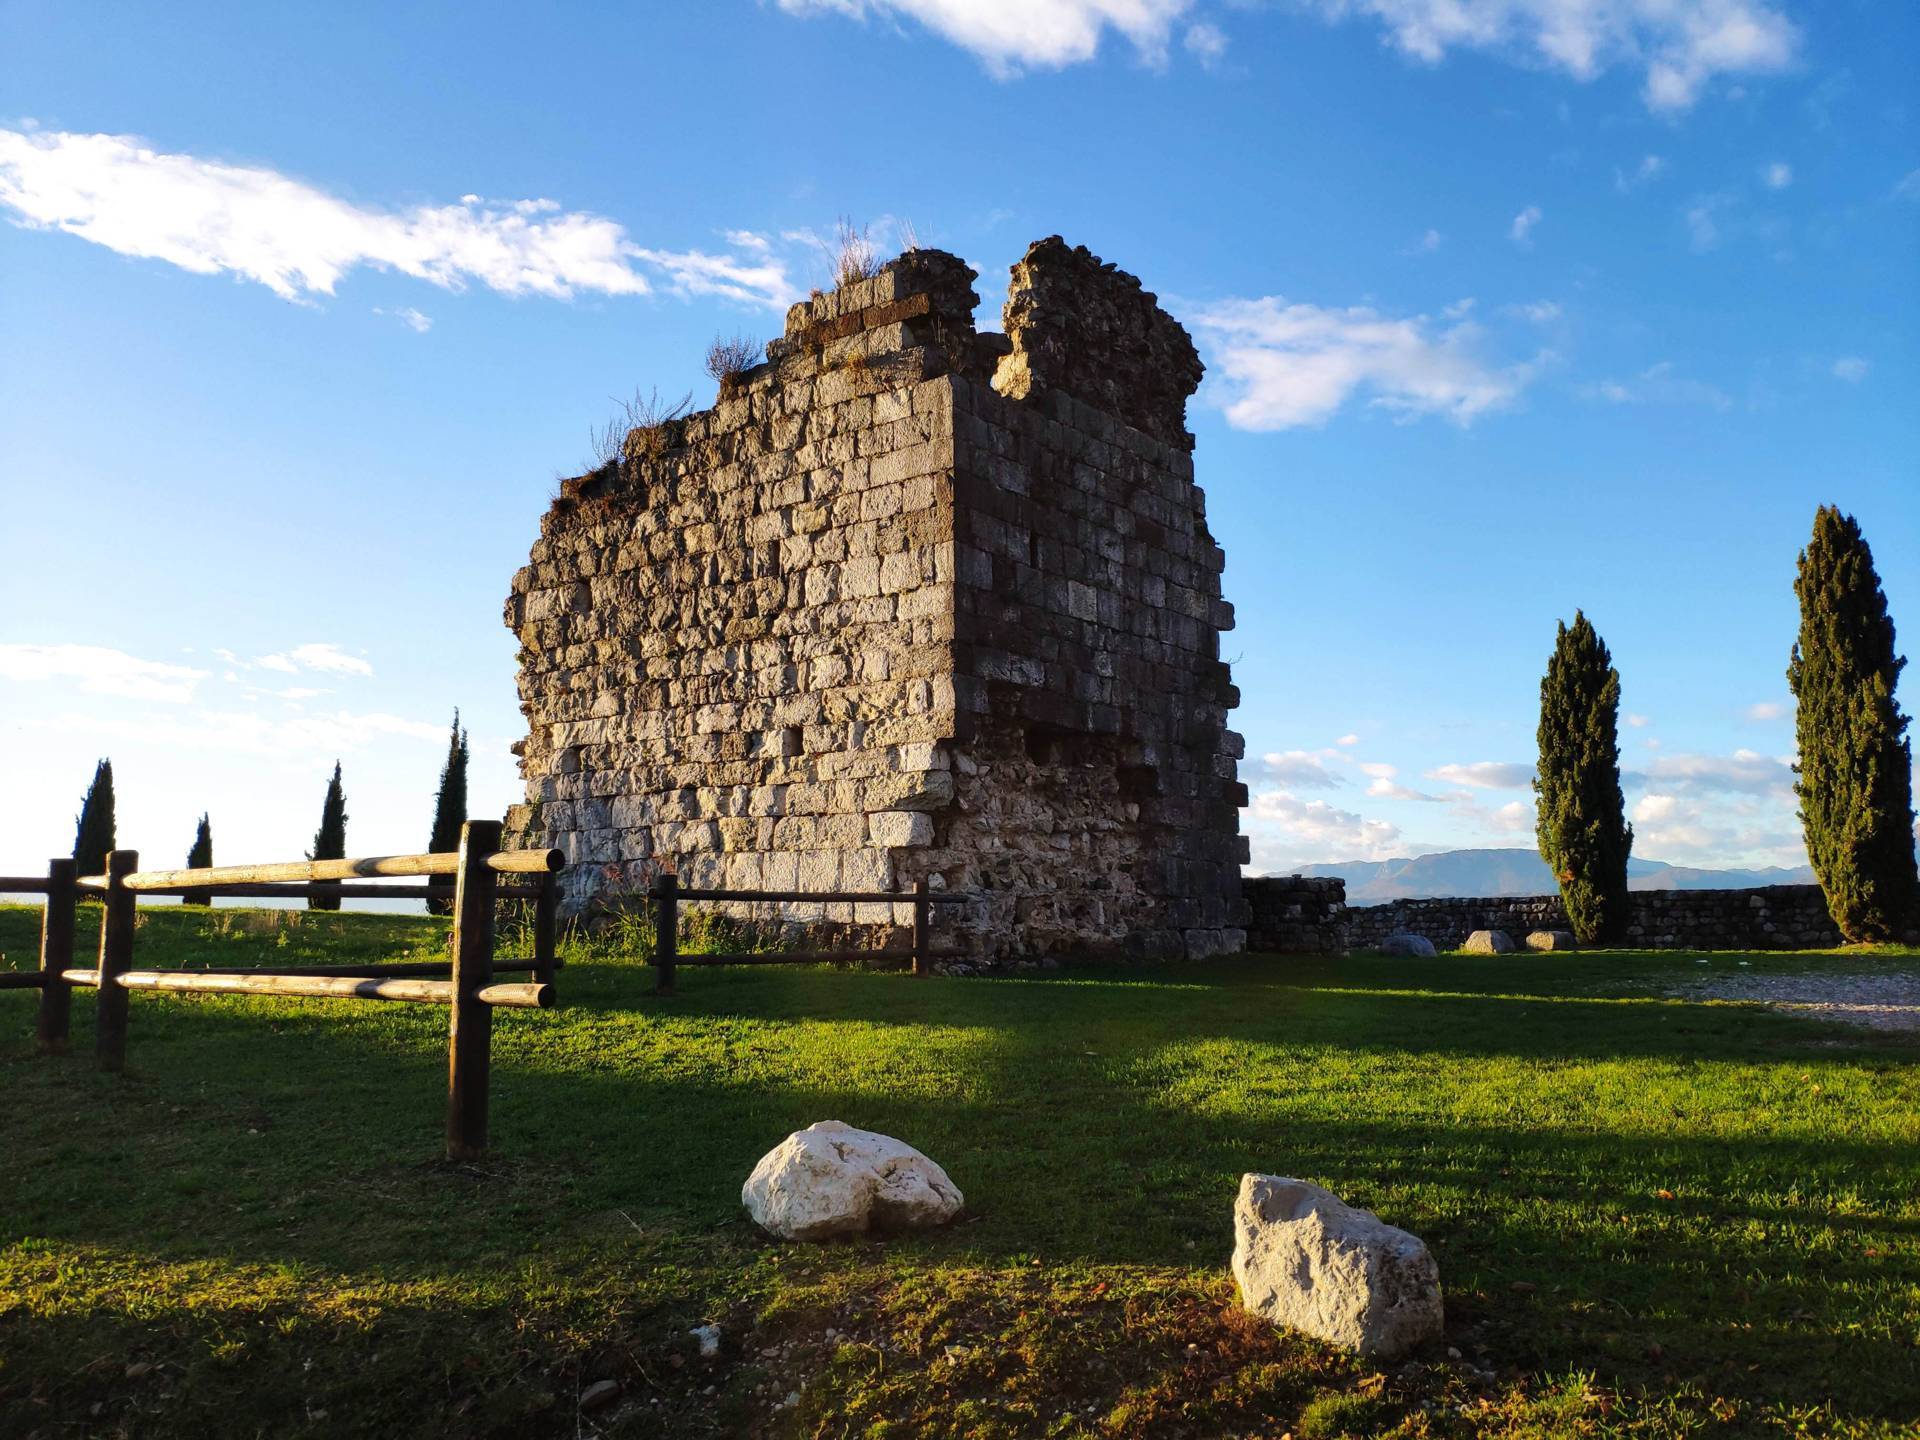
Photo 8 - Castle ruins
Turning back and continuing straight along Via Castello di Fagagna, the pavement is absent on both sides, the road is paved in asphalt and continues downhill, with a slope of 9%, an irregular and uneven surface; after the first bend, it is possible to reach a viewpoint (a clearing for about 2 parking spaces consisting of packed earth mixed with grass) (Photograph 9) where it is possible to admire the surrounding area from above. Given the limited safety conditions, even in this case, it is recommended to travel by vehicle. Returning back once again, at the crossroads with Via Castello di Fagagna, there is the start of Via Sotto gli Orti. In order to gain access, it is necessary to overcome a height difference of approximately 7 centimetres and a long flight of steps (about sixty steps) made of red herringbone tiles (Photographs 10-11). A cobblestone pavement is located at the end of the staircase, which is not split and has a high slope downhill and is therefore difficult for wheelchair users to travel on (Photograph 12). There is also the possibility of reaching this level by a cobblestone staircase that starts a little further up (Photograph 12). At a certain point, there is the possibility of turning right and reaching Porta di Sinagoga (the fortified gate of the walls of the Fagagna castle village) (Photograph 13). The paving is always cobblestone (not split) and on a high, uneven slope.

Photo 9 - viewpoint
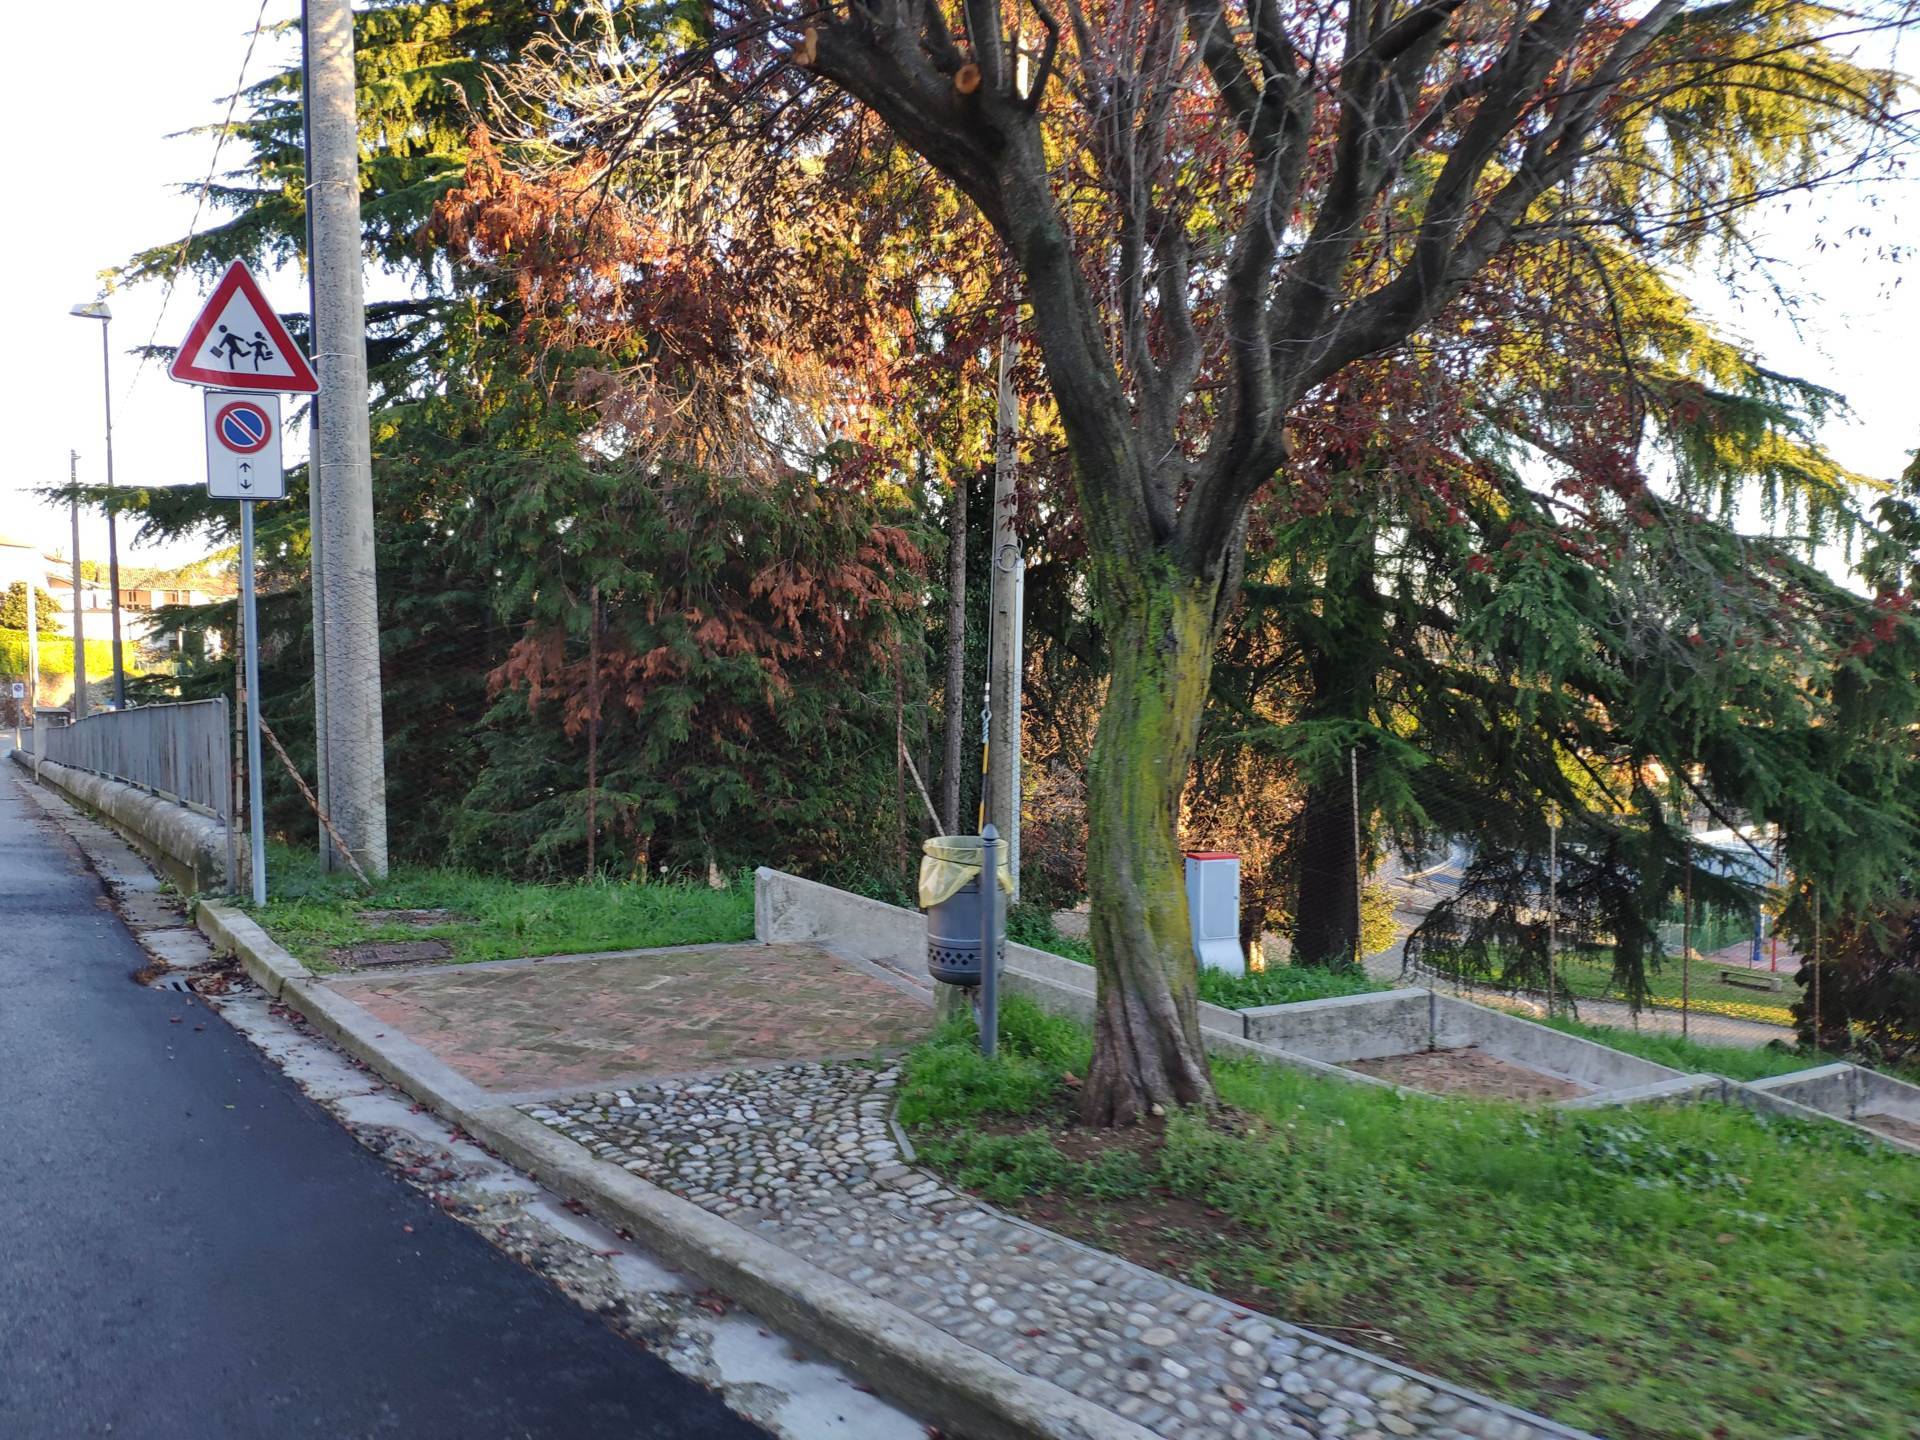
Photo 10 - beginning of the staircase

Photo 11 - itinerary along the steps

Photo 12 - cobbled itinerary
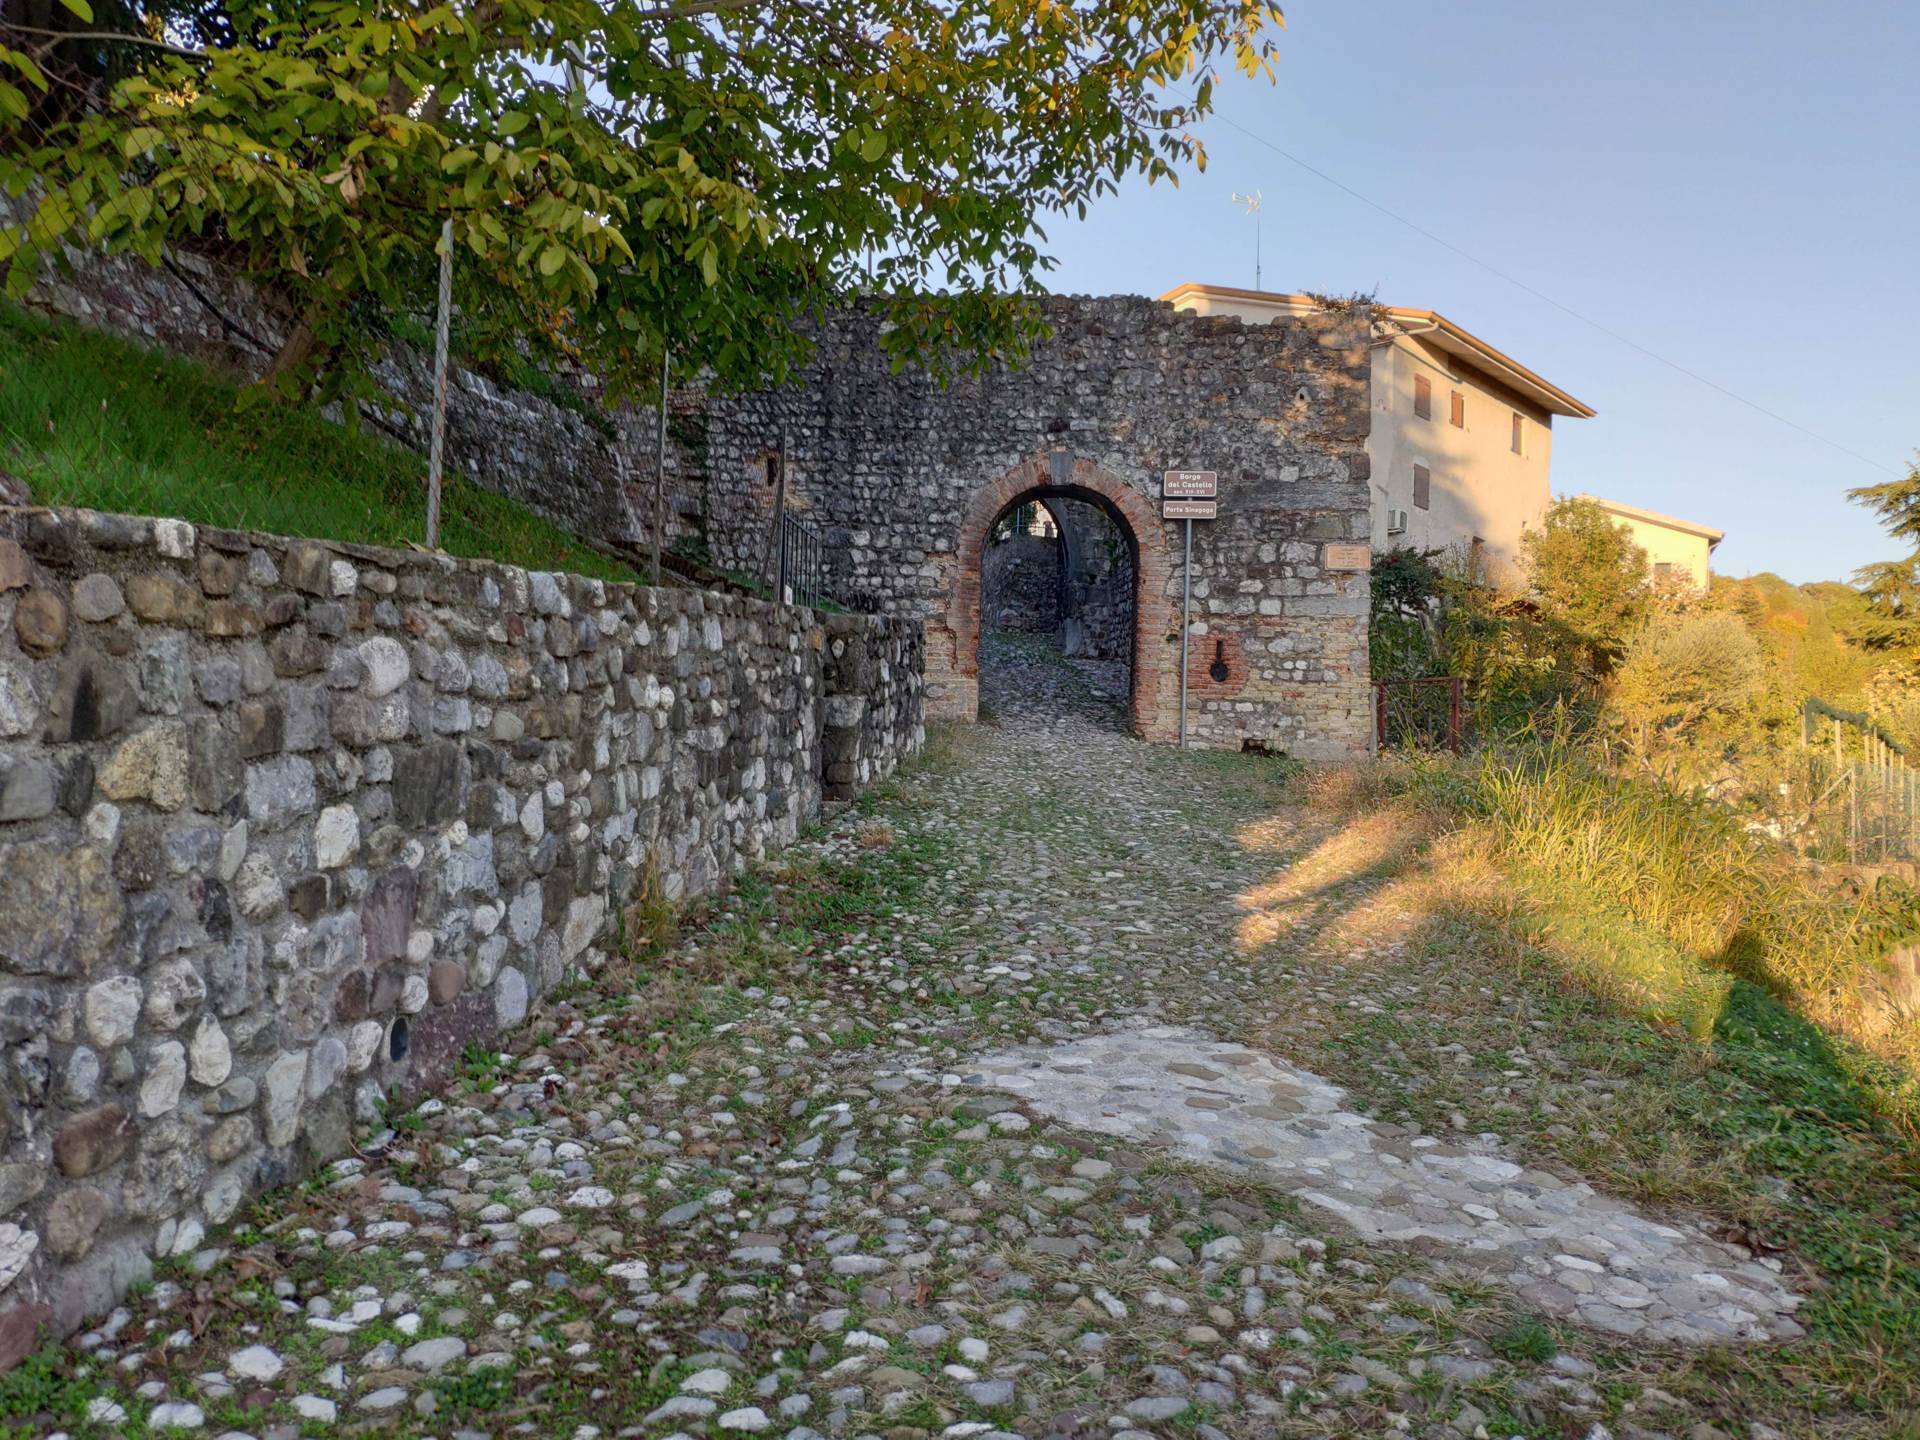
Photo 13 - Porta di Sinagoga
The end of Via Sotto gli Orti leads to Via dei Colli. In order to continue safely, it is necessary to take the pedestrian crossing on Via dei Colli, which is connected to the pavements, with the presence of LOGES systems. On the left side of the road, there is a pavement, first in cobblestones that are not split in correspondence with the pedestrian crossing, and then in porphyry cubes, with a uniform surface and a broad width, which slopes slightly downwards (Photograph 14). On the inner side of the pavement, there are concrete and wooden seats (Photograph 15). An information board describing the features of interest in the Province is likewise on display here, with the same features, in good condition and good legibility (Photograph 16). Subsequently, the route begins to descend with a considerable slope and the pavement narrows until it ends on a paved road that drops considerably. It is advisable to travel this stretch of road by vehicle as adequate safety conditions are not guaranteed (Photographs 17-18).
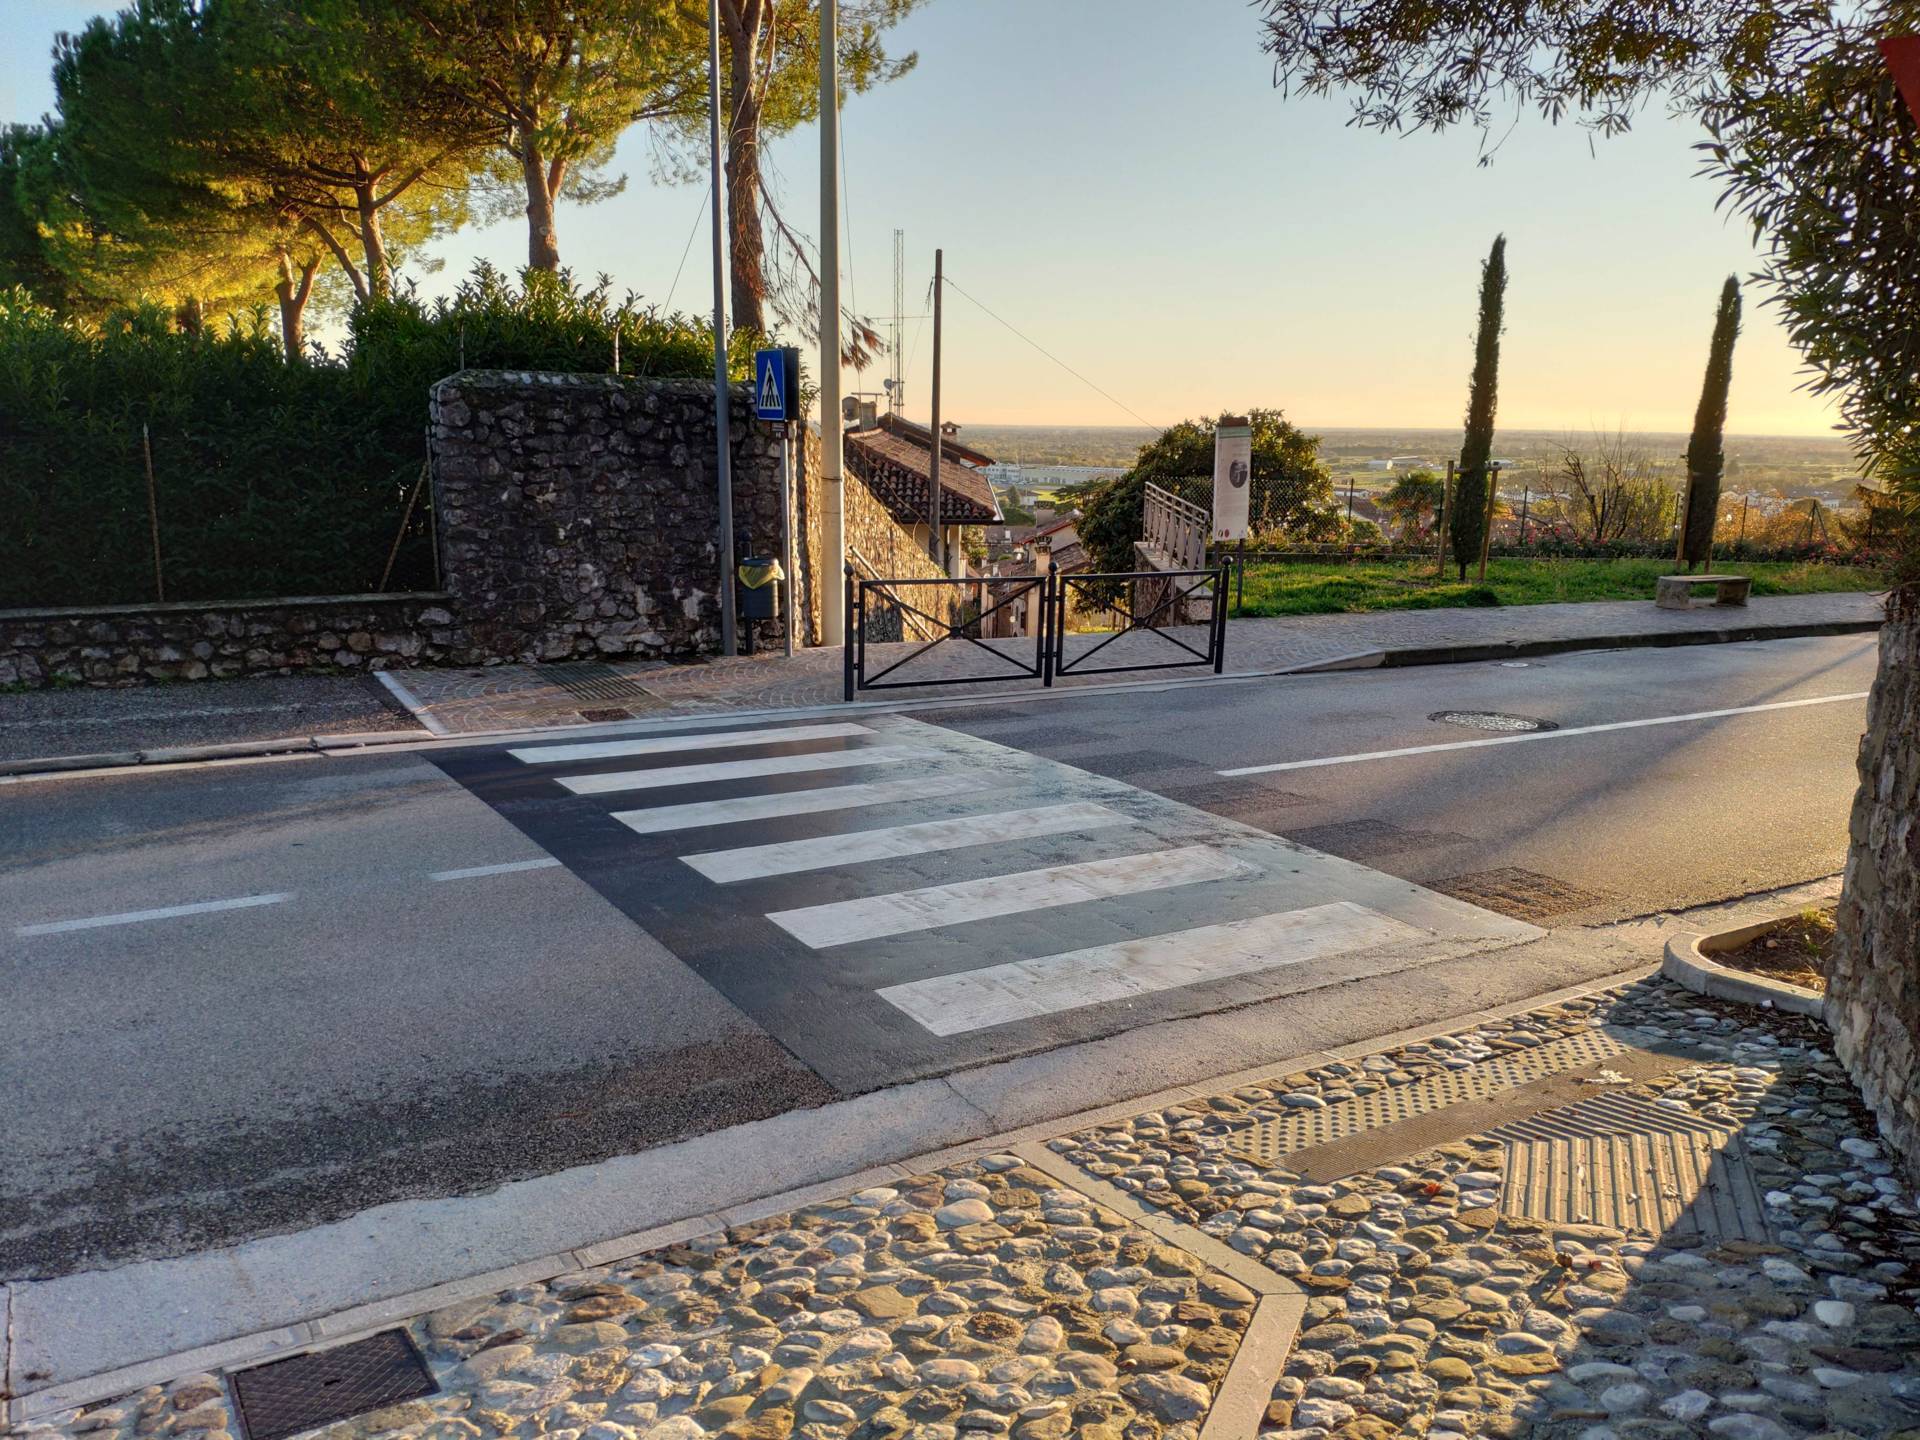
Photo 14 - Pedestrian crossing on via dei Colli
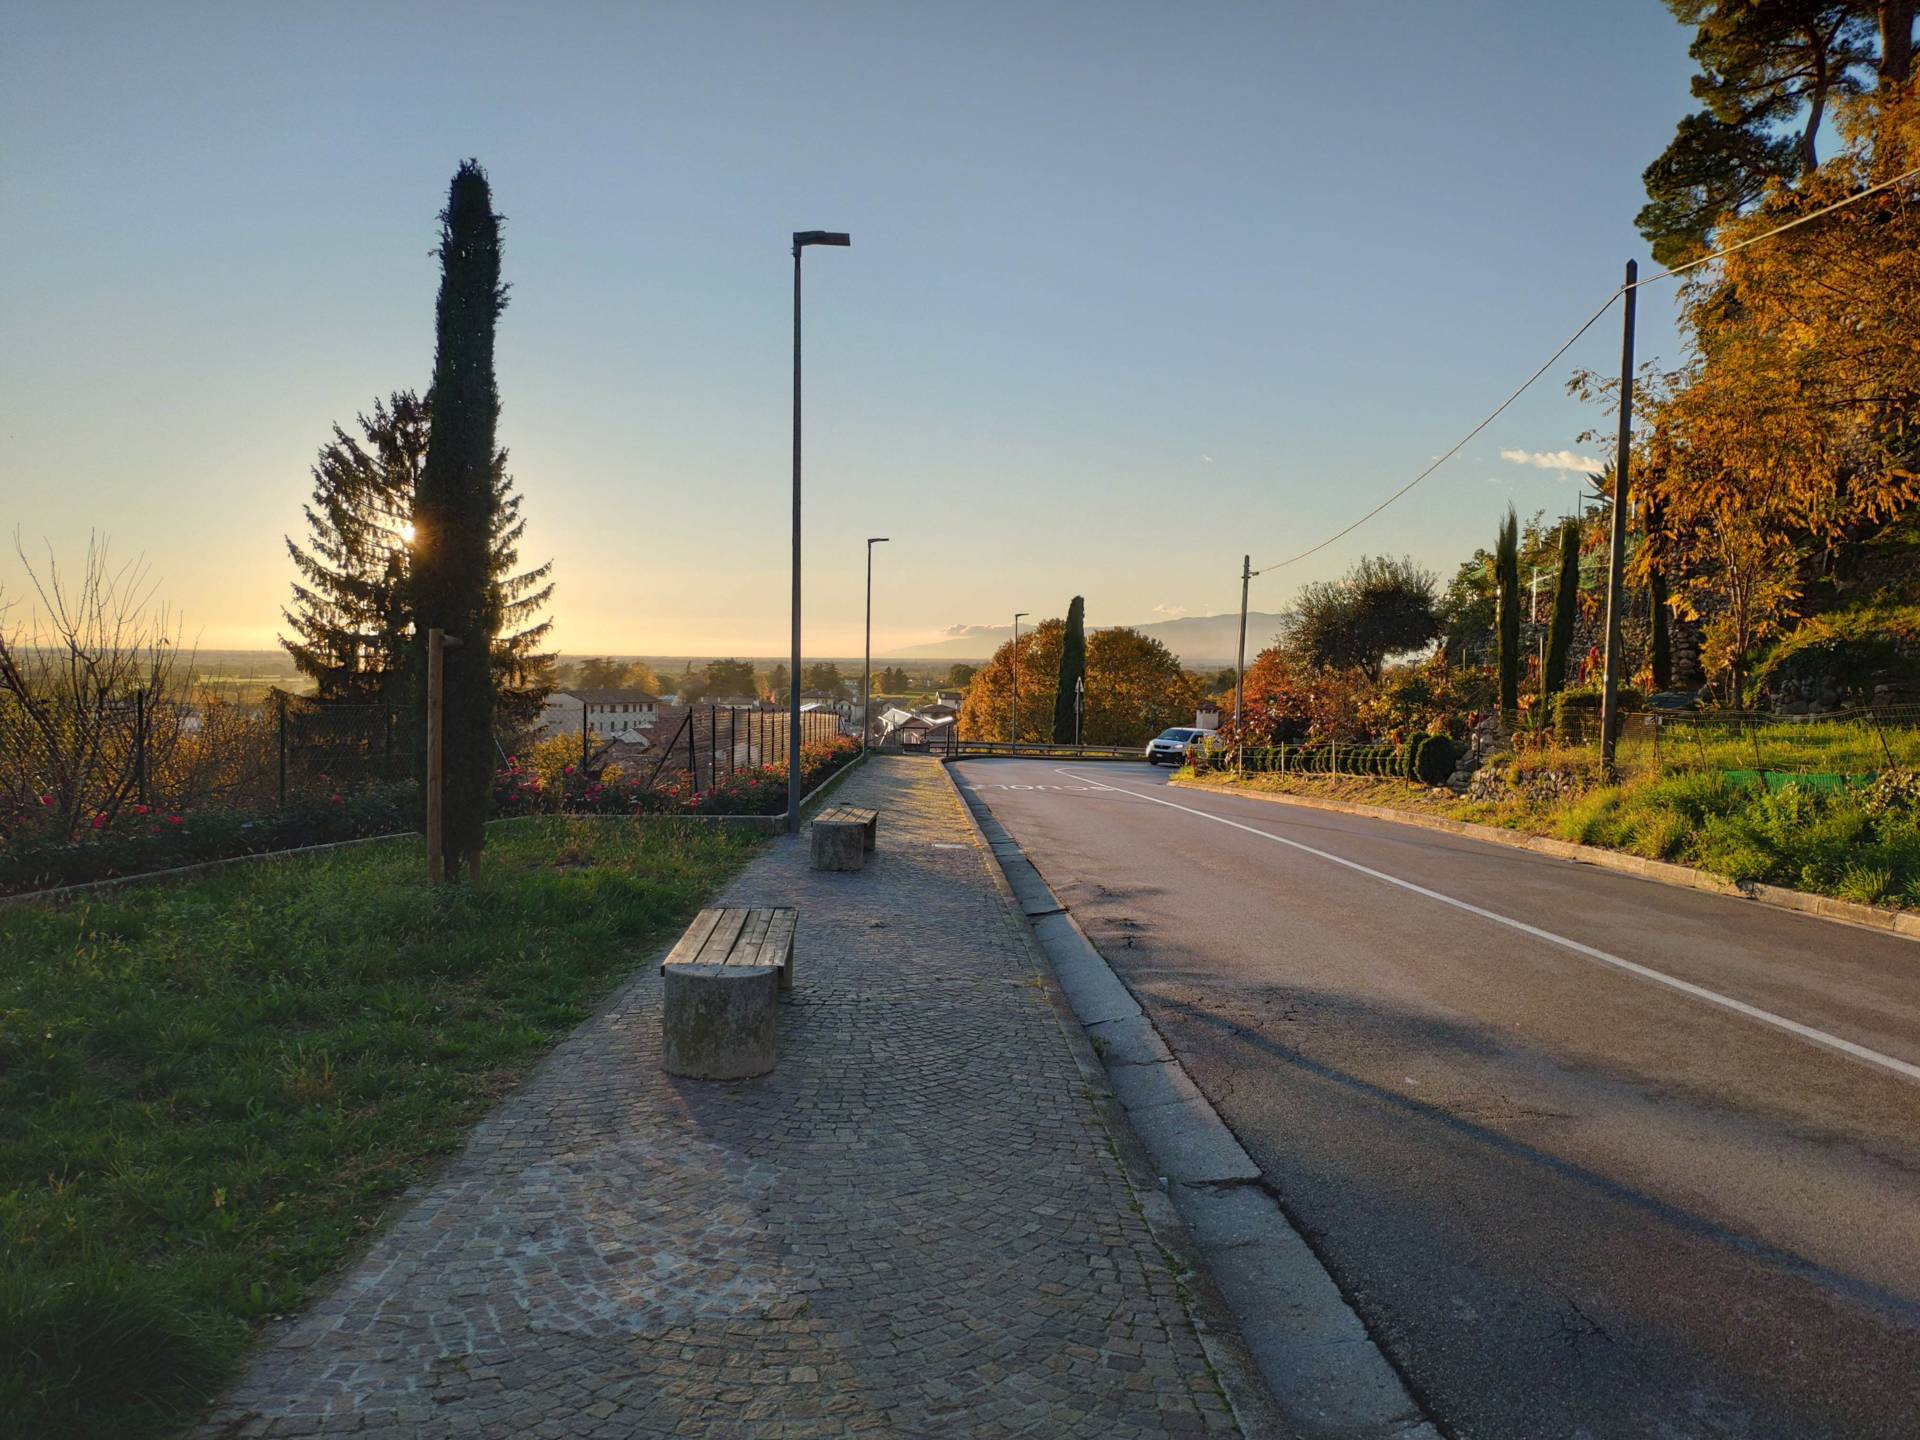
Photo 15 - Benches along the route
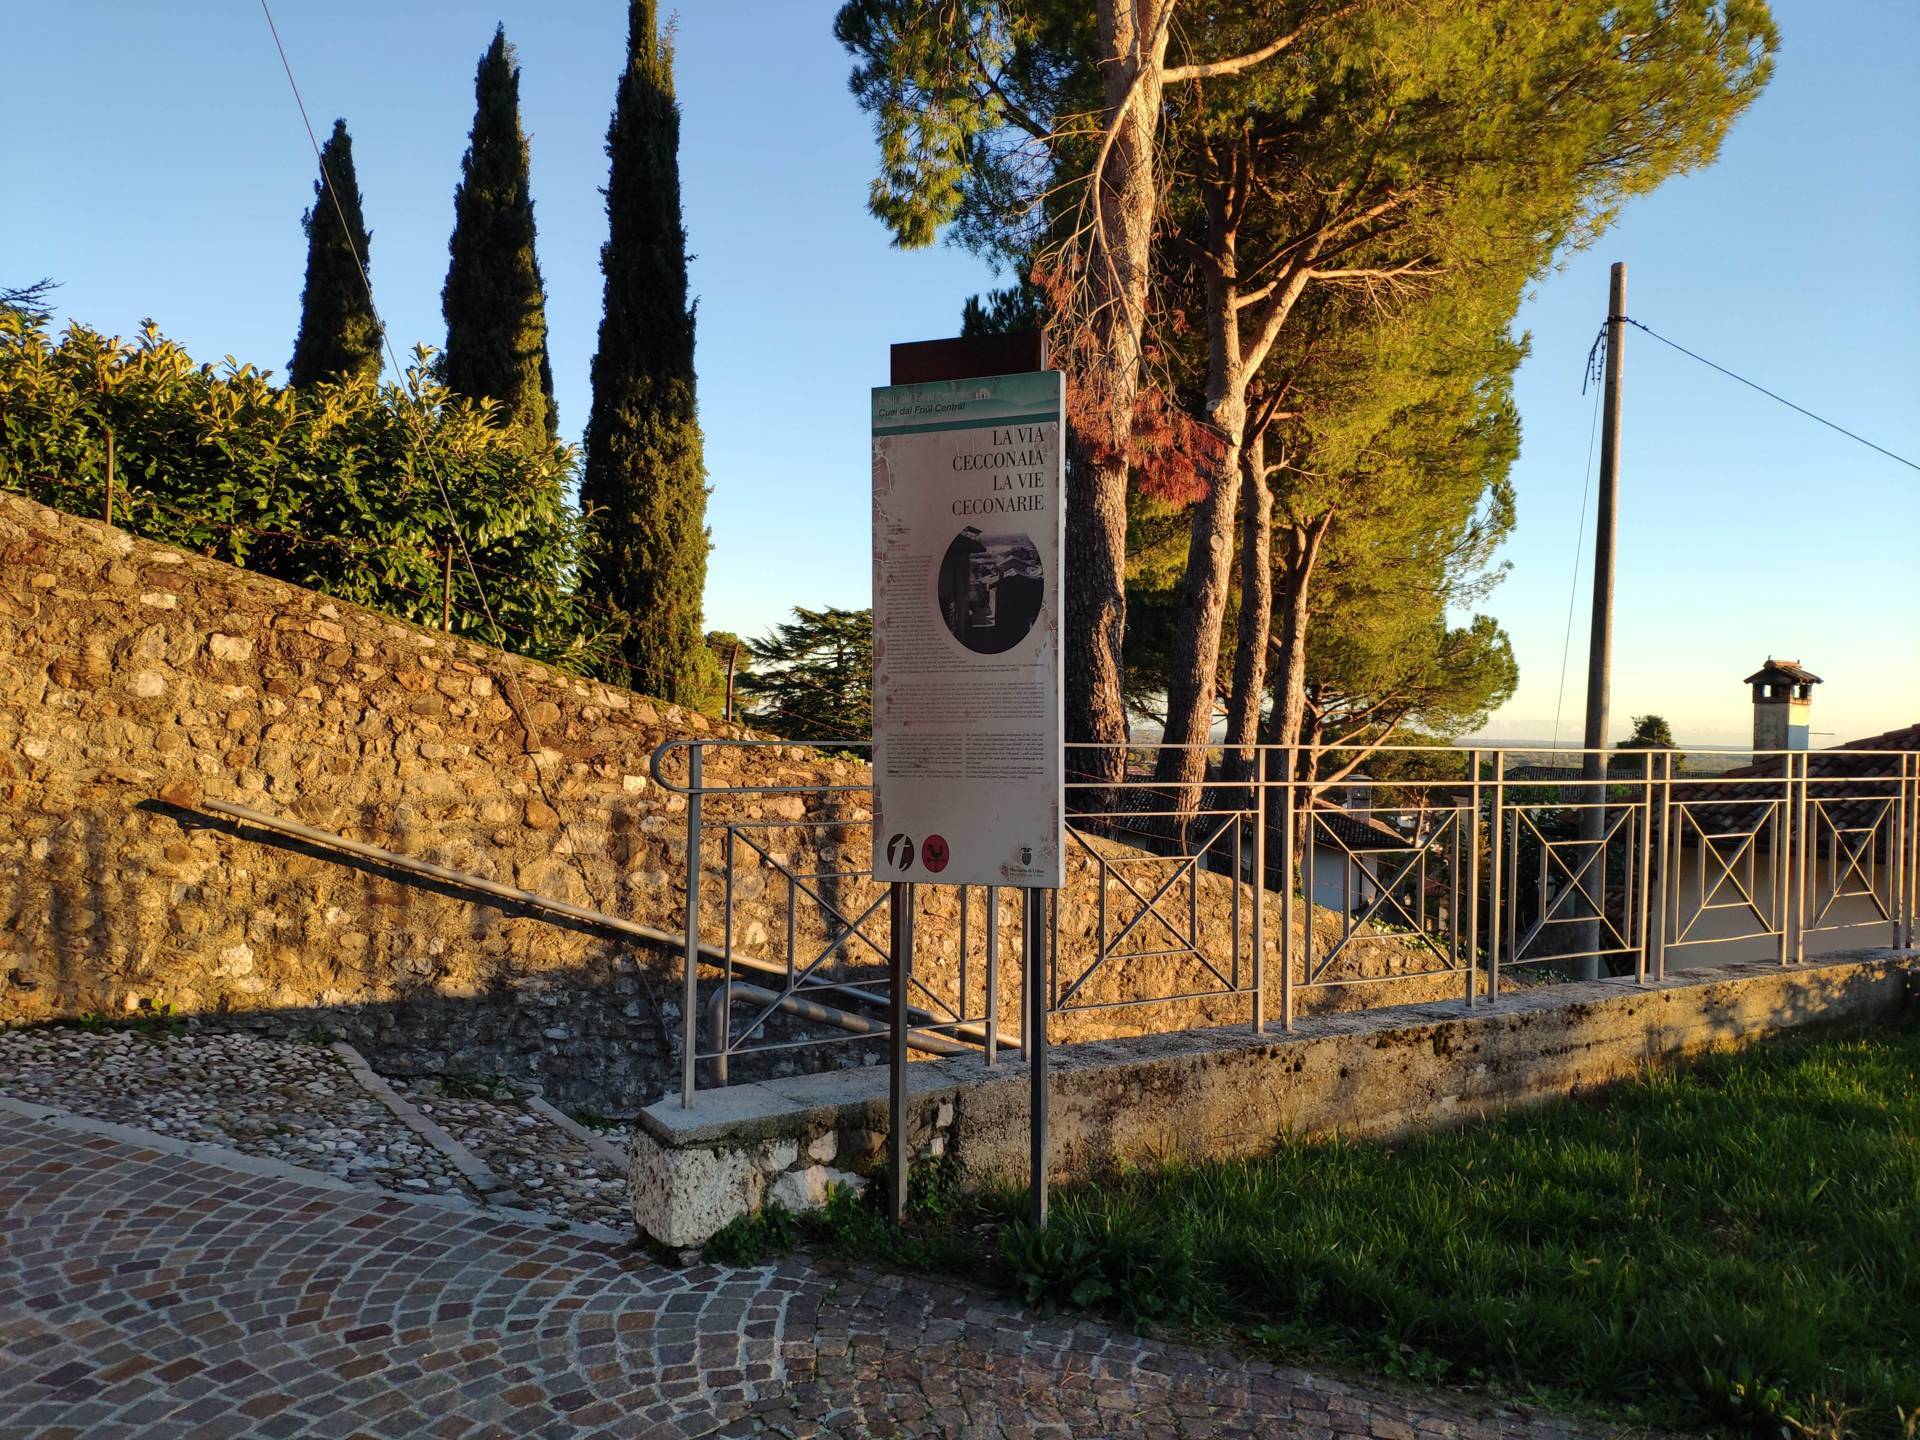
Photo 16 - signage

Photo 17 - itinerary on left pavement

Photo 18 - left pavement break
The pavement then resumes on both sides in the vicinity of Piazza Unità d'Italia (Photographs 19-20), although access to it requires reaching the first pedestrian crossing, which is connected to the roadway (Photograph 21). Please also note that the high downhill slope makes the itinerary difficult for wheelchair users.

Photo 19 - Right pavement on Via dei colli toward Piazza Unità.
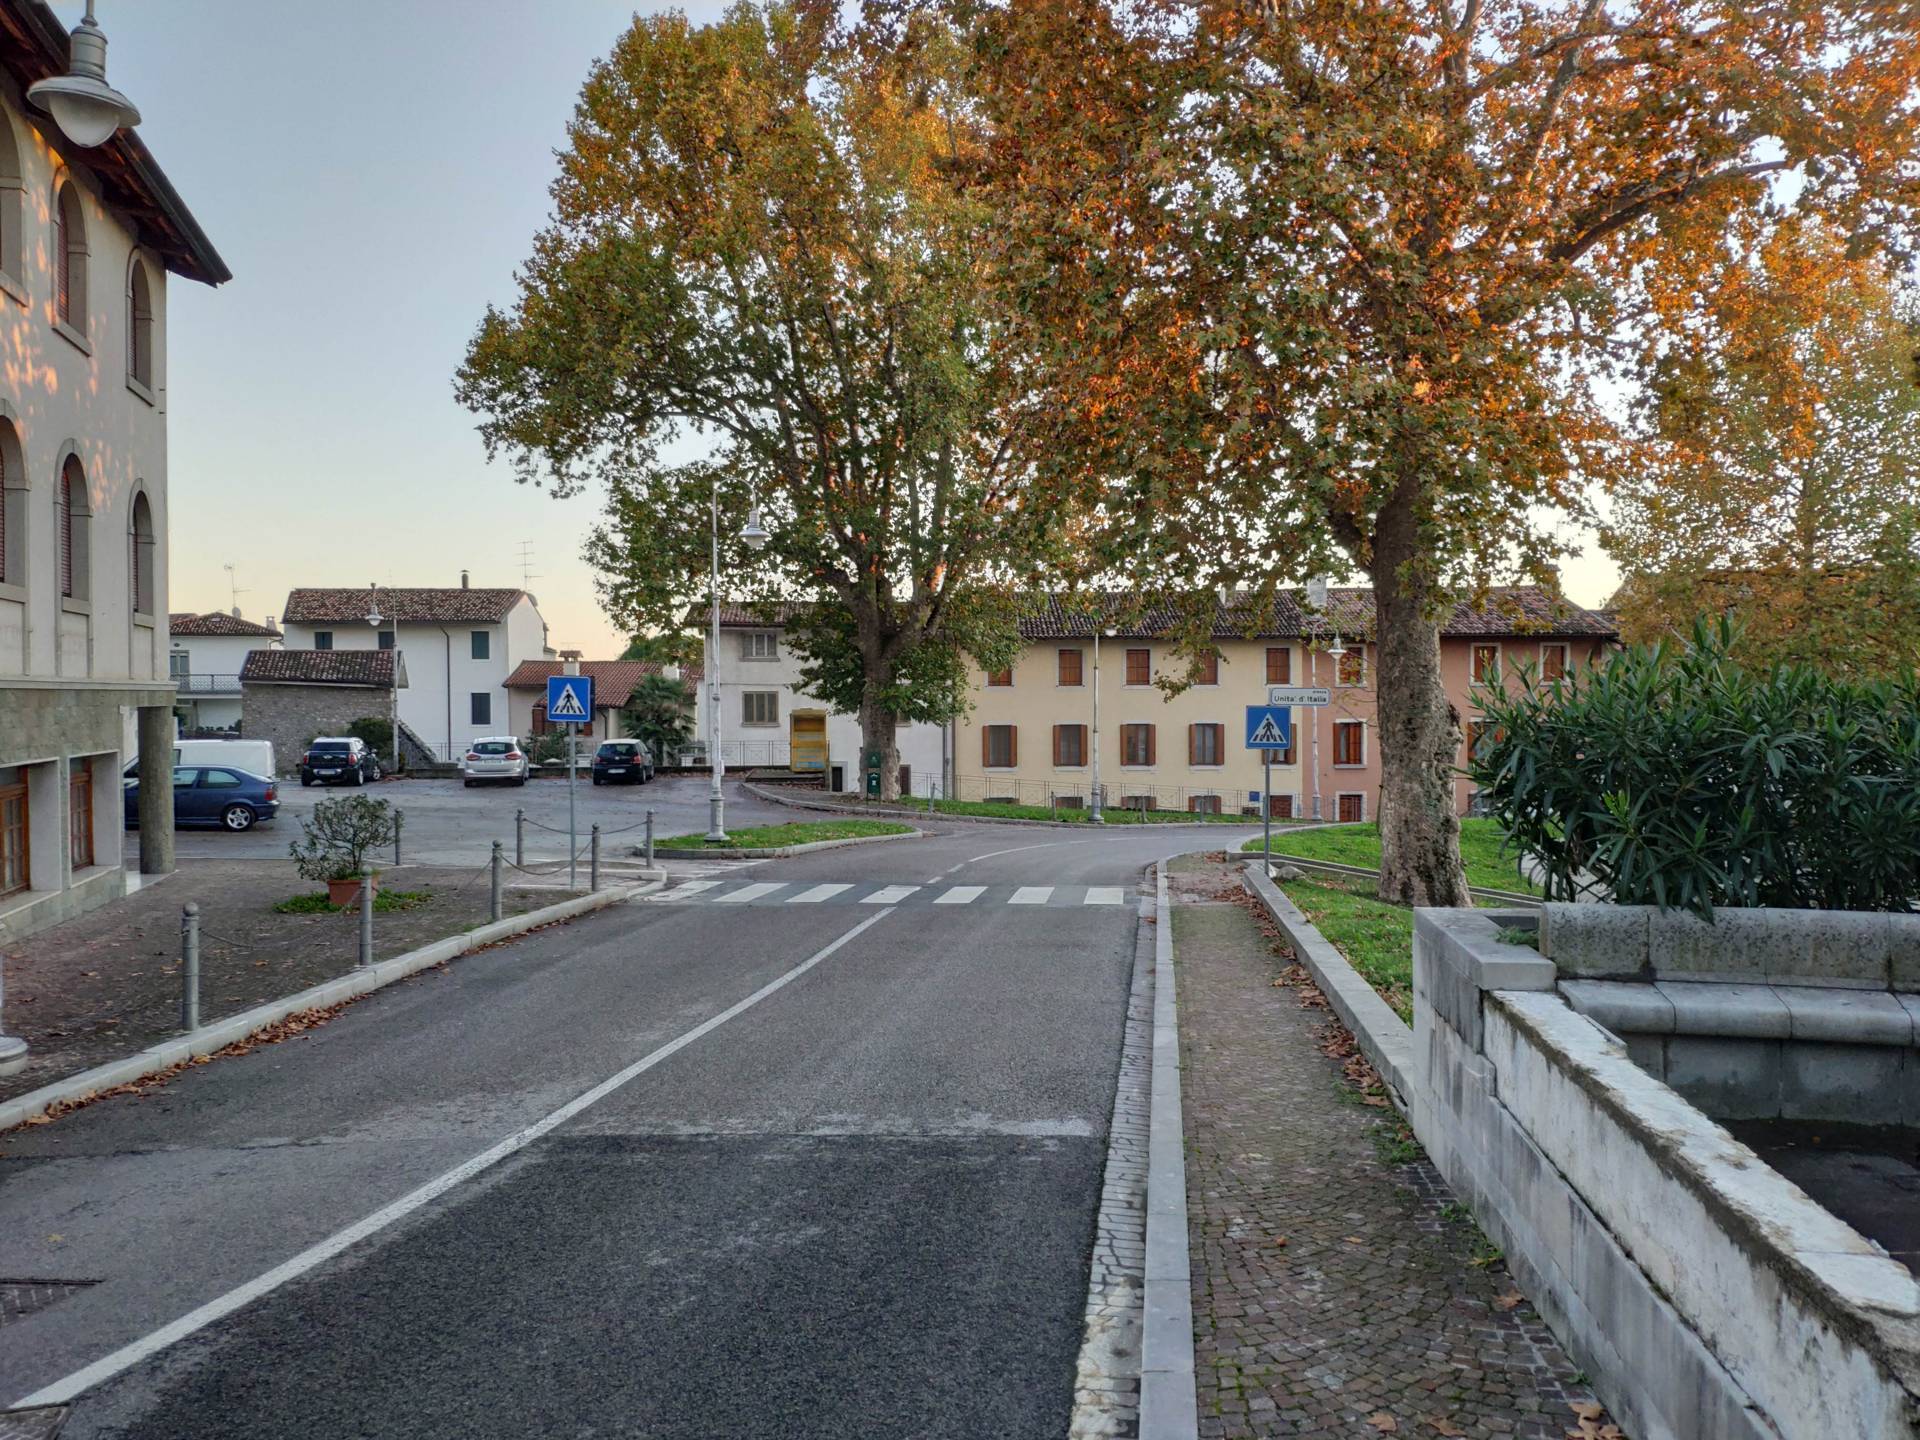
Photo 20 - path on porphyry pavement

Photo 21 - pedestrian crossing
The central section of Piazza Unità d'Italia, a large parking area paved in piasentina stone, with a regular and uniform surface, is inaccessible because it has access steps (approximately 15 steps), approximately 1.50 metres in width, paved in porphyry slabs and cubes, and the car access ramp, in alternating bands of porphyry slabs and piasentina stone, with good chromatic contrast, has a 12% slope, particularly high for wheelchair users (Photographs 22-23-24). The pavement, which descends to the level of the Town Hall, is made of porphyry cubes, with a regular and uniform surface, but the slope downwards is particularly steep as far as the connecting ramp for the entrance of cars into the square, then the pavement is level and it is easy to reach the Town Hall and the Infopoint (Photograph 25).To the right of the Town Hall, there is a parking space reserved for people with disability.

Photo 22 - view of the square
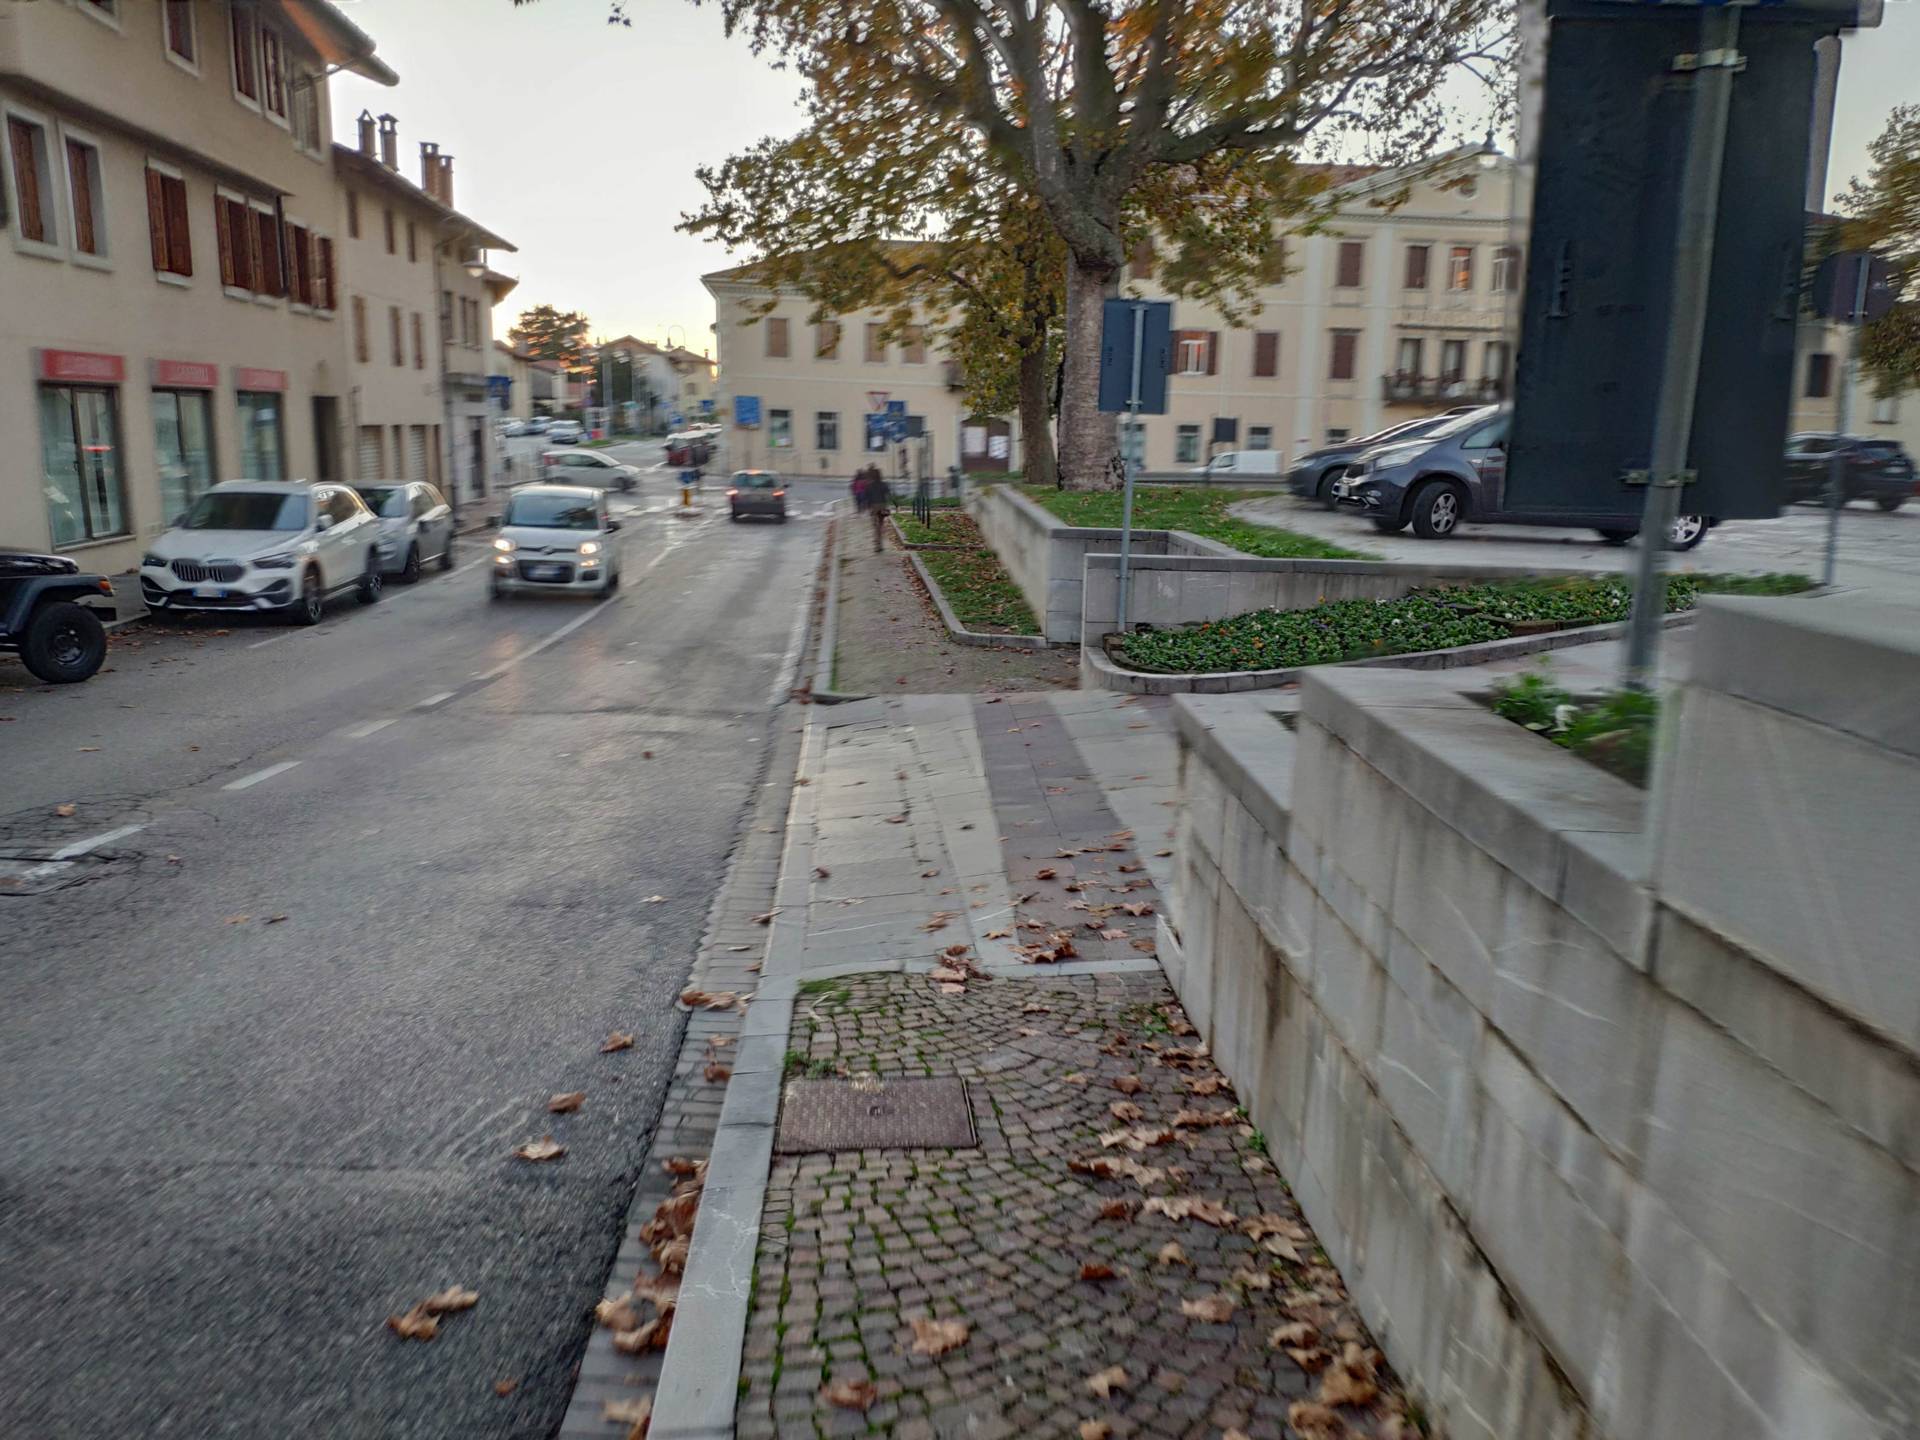
Photo 23 - itinerary on right-hand pavement
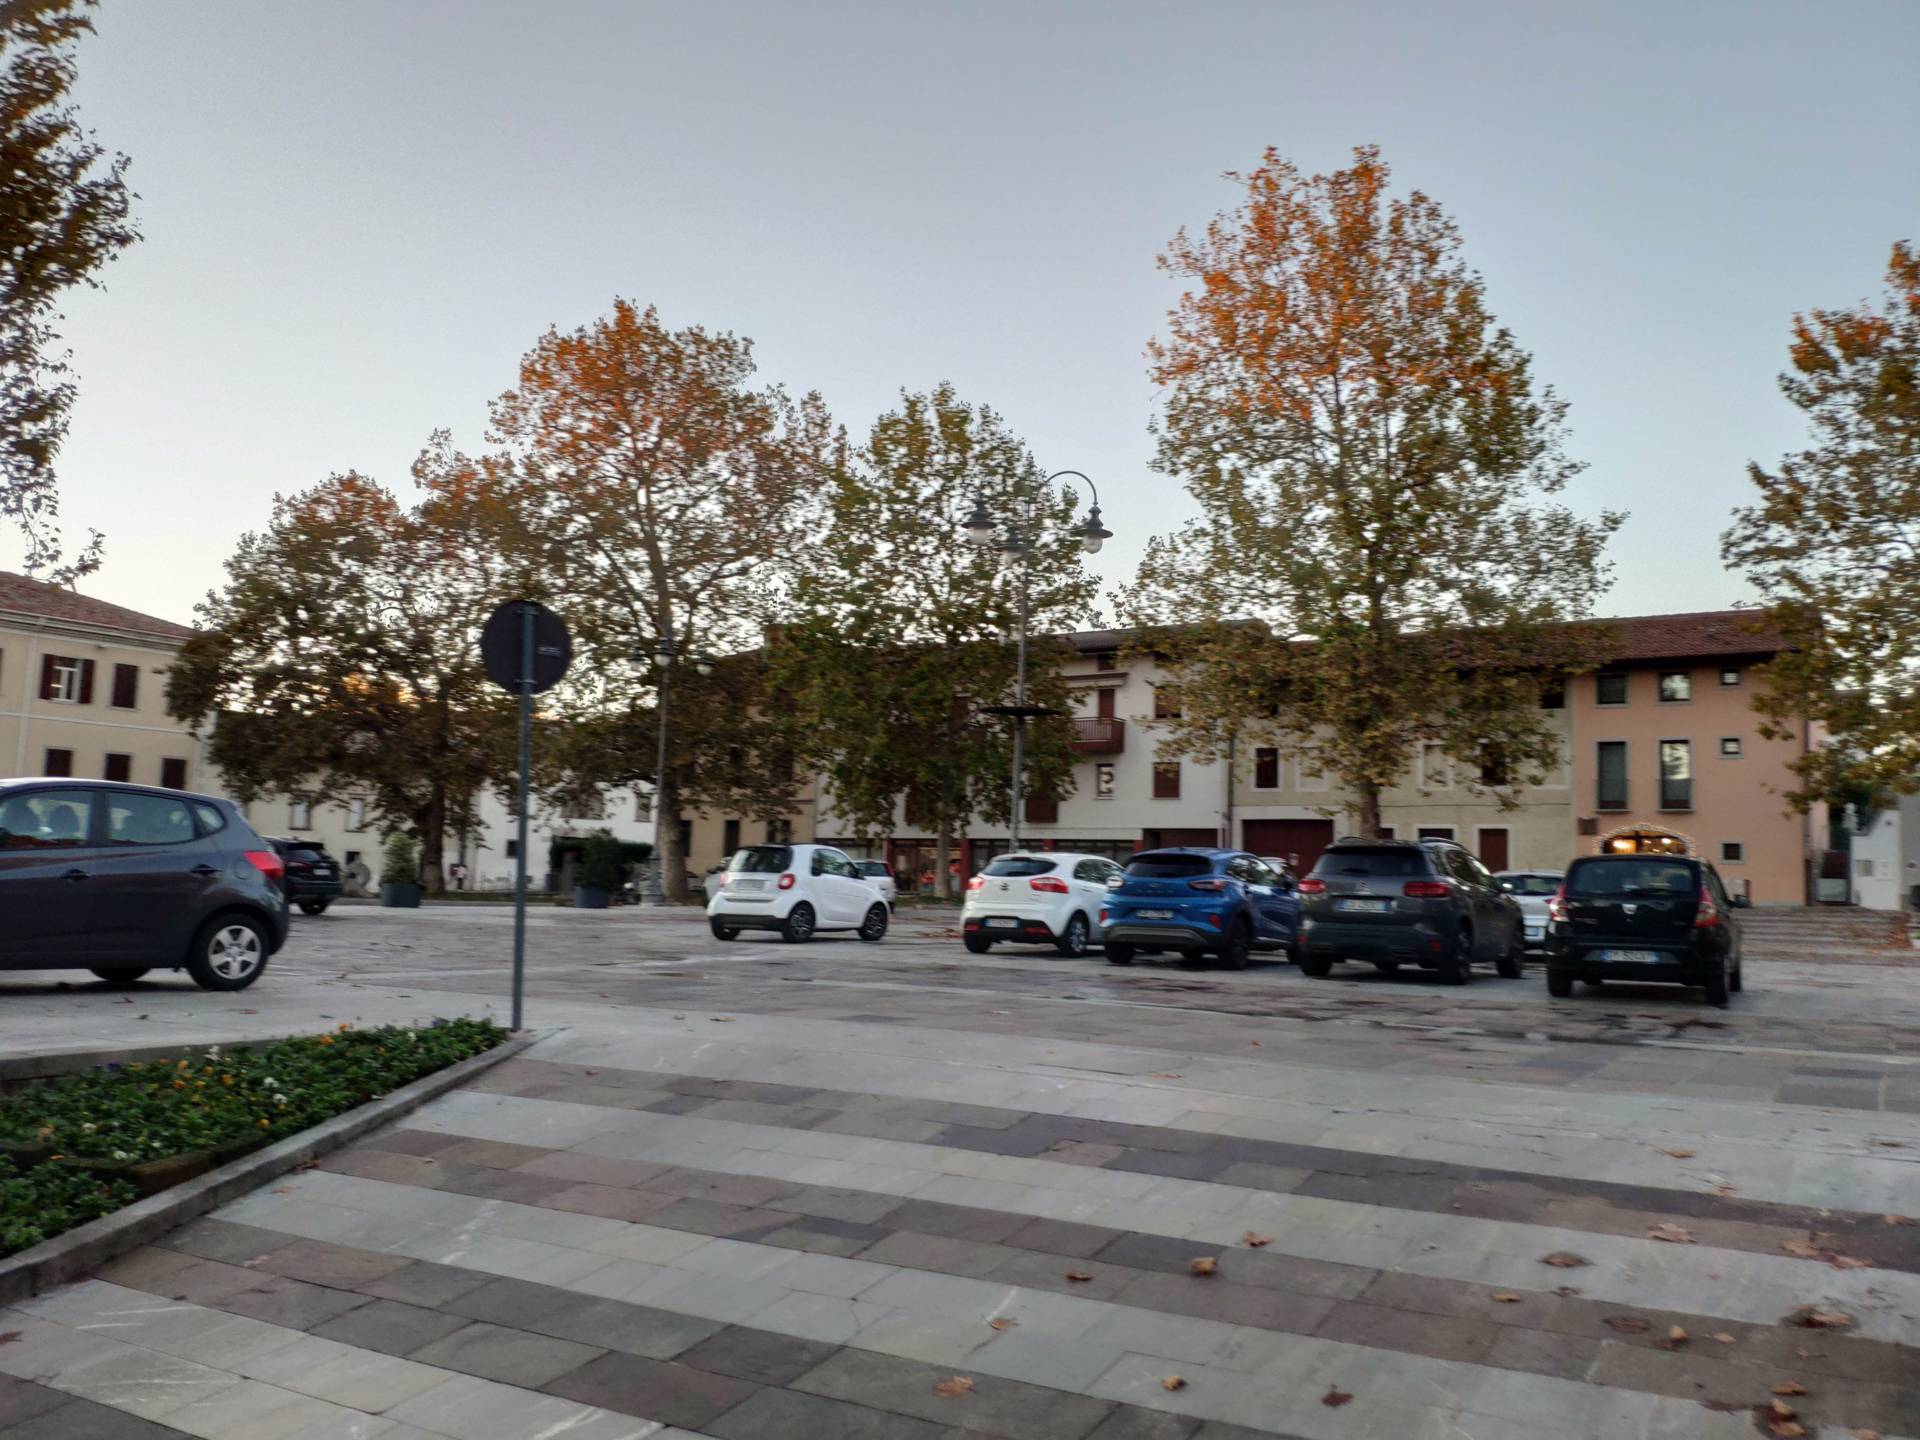
Photo 24 - Access ramp to the square
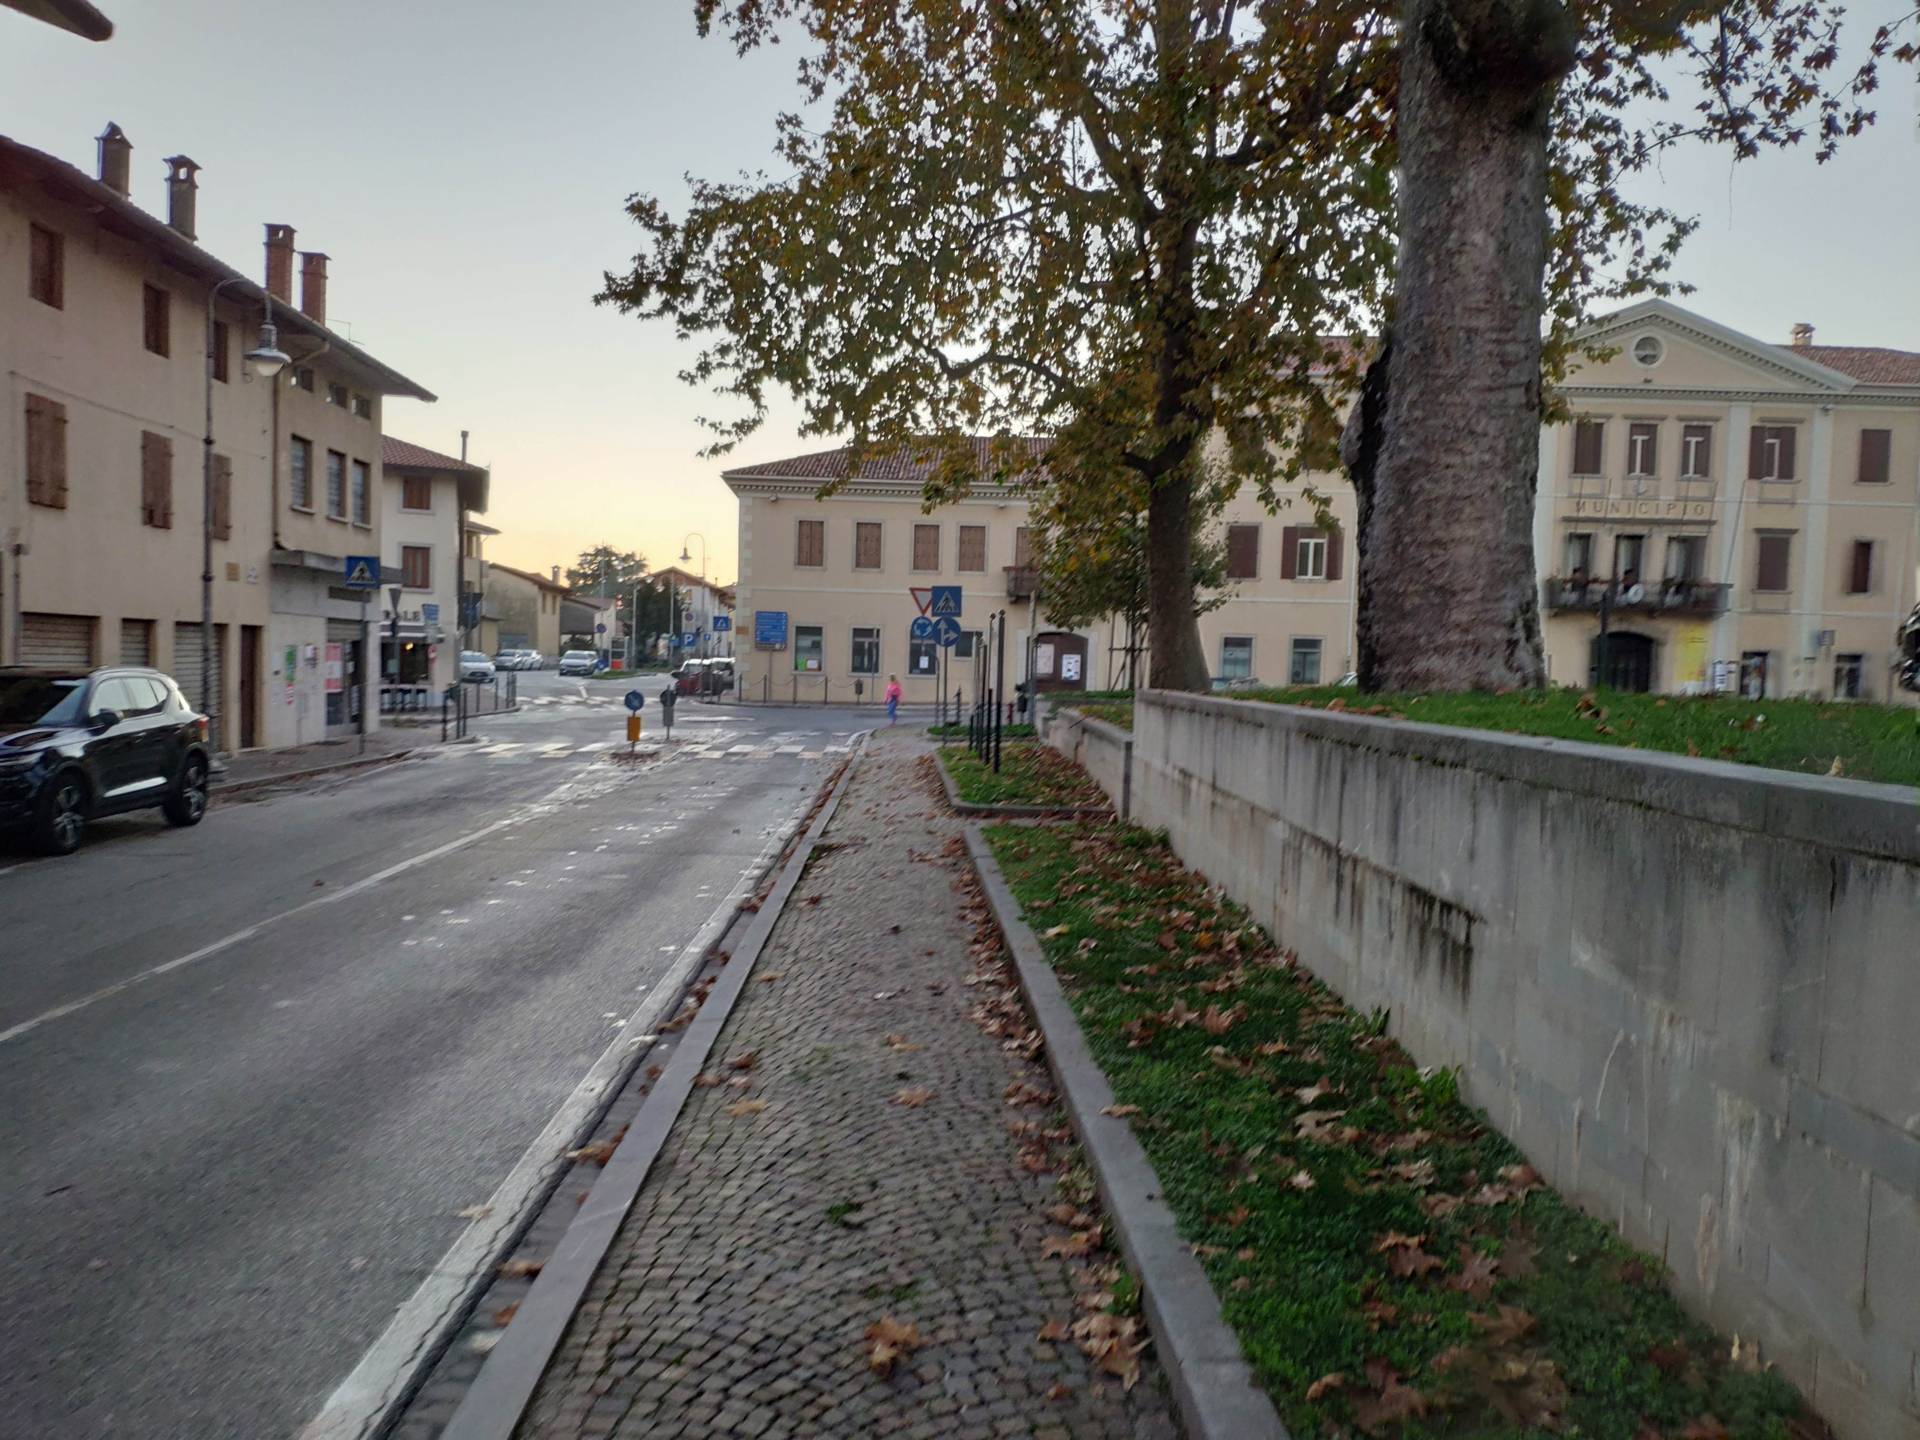
Photo 25 - pavement path to the town hall
From Via dei Colli, arriving at Piazza Unità d'Italia, there is an open space on the east side of the square (Photograph 29) with vehicle parking; accessible sanitary facilities for people with disability are located on the level below (Photograph 30). To reach the clearing, it is necessary to take the pedestrian crossing, which is connected to the pavements (regular paved surface, white stripes). Crossing this section of road is extremely dangerous as well as difficult because of the downhill slope. On the day of the inspection the sanitary facilities were locked and therefore it was not possible to survey them. In order to access the services, it is necessary to descend a flight of steps to overcome a difference in height of approximately 3 metres and reach the opposite driveway (Photographs 31-32). On the left side of the street, there are no pavements, while on the right side, there is a wide pavement made of grey tiles with a width of 140 centimetres, raised above the road surface by 10 centimetres. There are no junctions with the street level, and therefore in order to access the pavement, it is necessary to reach the first accessible driveway. Piazza Unità is once again reached at the end of the street.
Photo 29 - clearing with parking
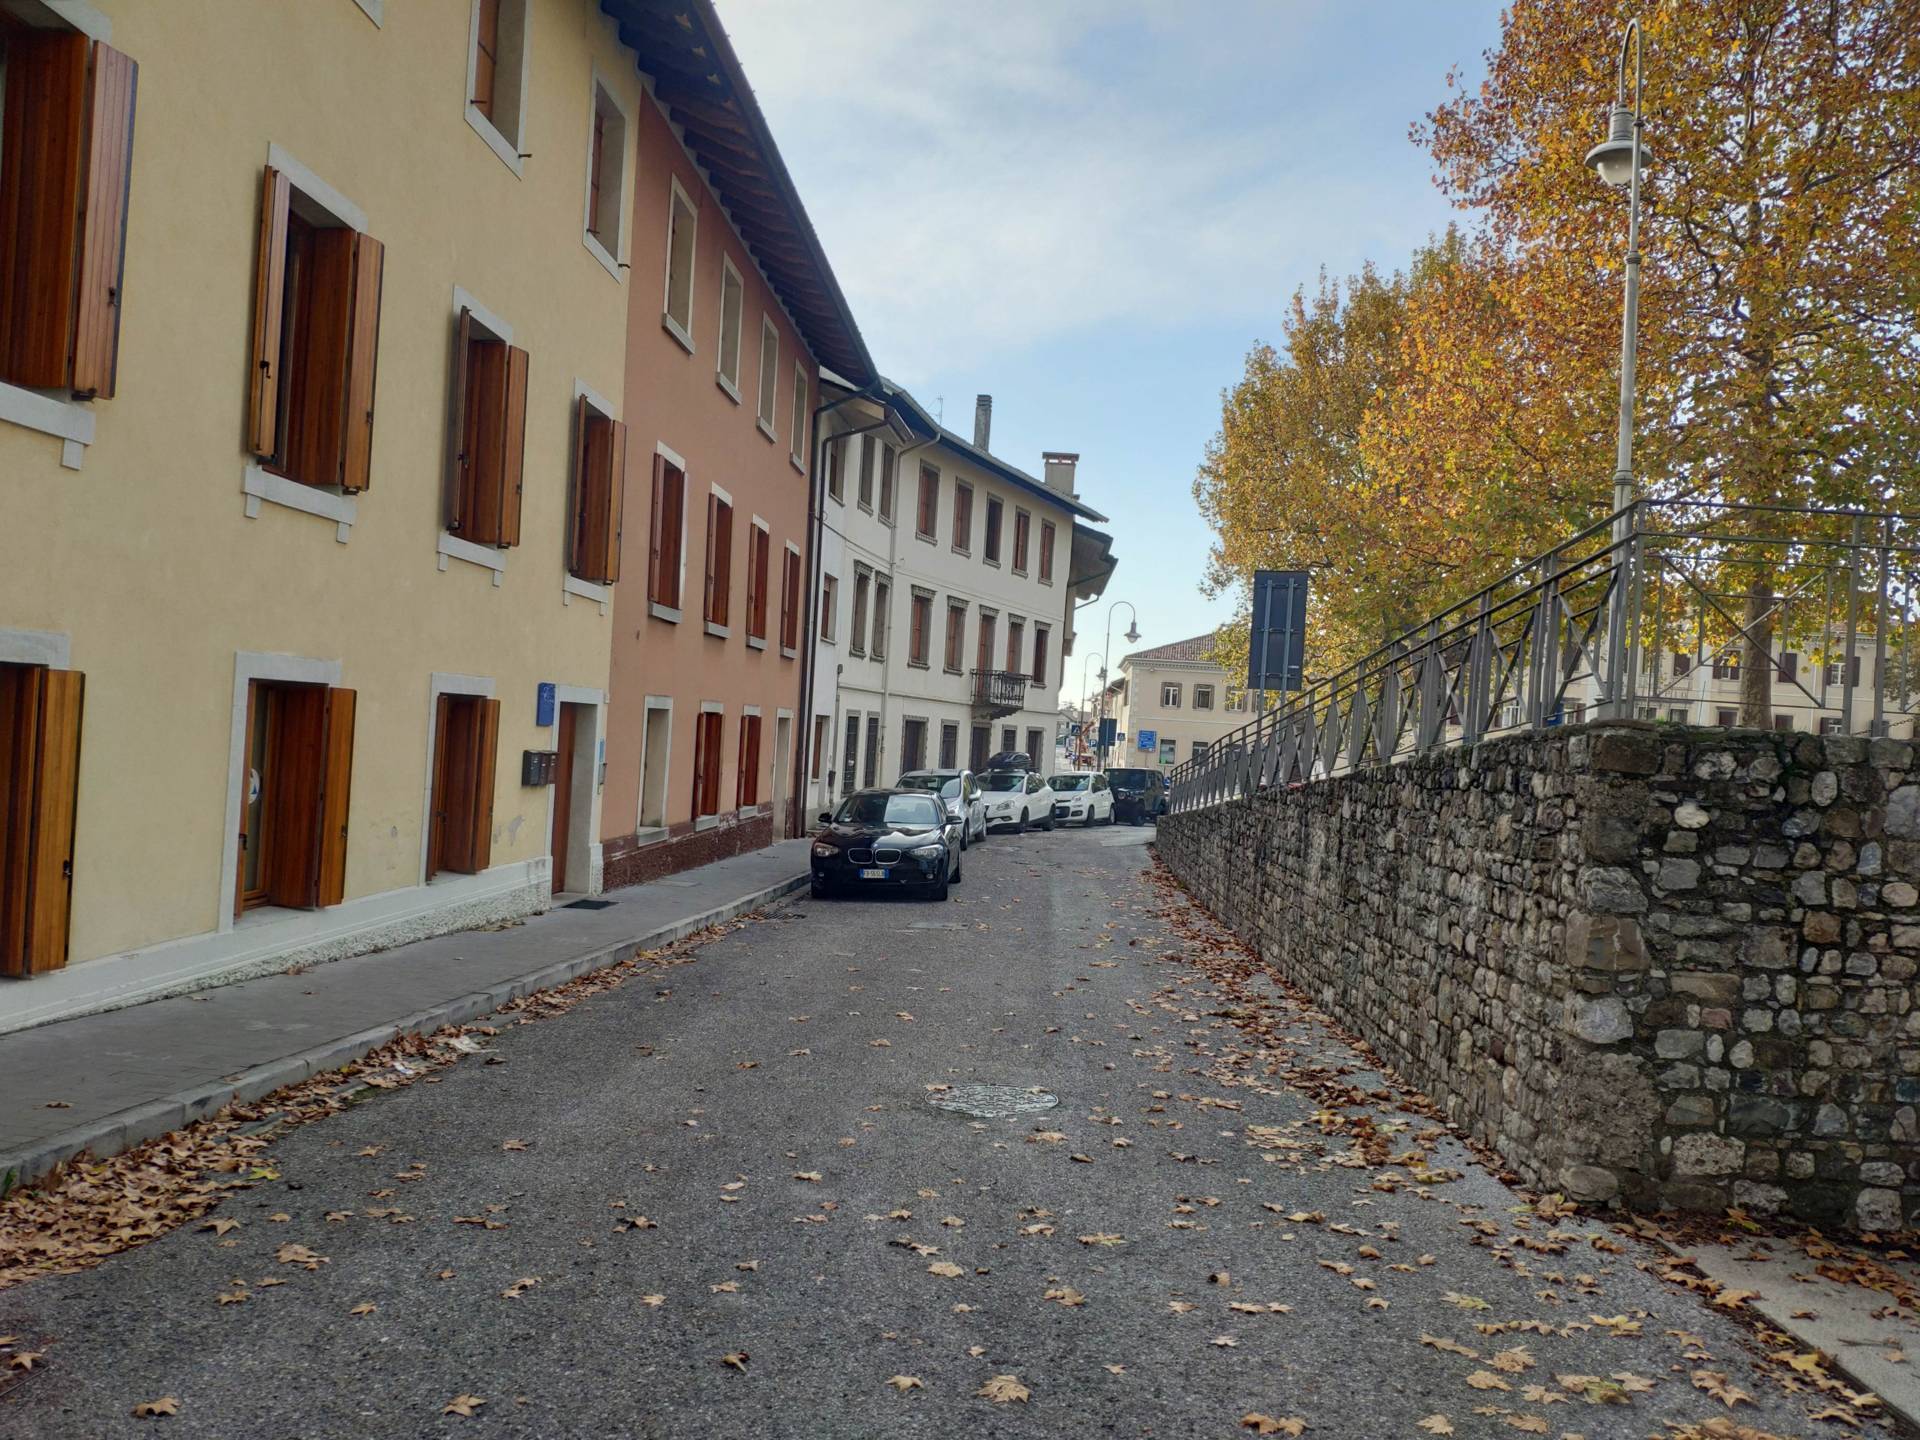
Photo 30 - level below

Photo 31 - access stairs to the toilets

Photo 32 - toilets
Around the square, there are shops, the Town Hall, the Infopoint and public sanitary facilities. The Infopoint is located inside the Municipal building, on the ground floor. For access, it is necessary to cross an approximately 5-metre long and 3-metre wide section of non-cracked cobblestones and the pedestrian crossing at Piazza Unità. The pedestrian crossing is raised above street level and level with the height of the pavements (Photograph 33). The entrance to the Infopoint is well signposted both on the road (Photograph 34) where there is a large white panel with black lettering near the pavement at the entrance to the Municipal building, and inside the entrance where information material dispensers are located and also a sign hanging on the wall that indicates the entrance to the office (Photographs 35 -36). To the side of the right pavement, in regular, homogeneous porphyry, are a series of parking spaces arranged in a line.
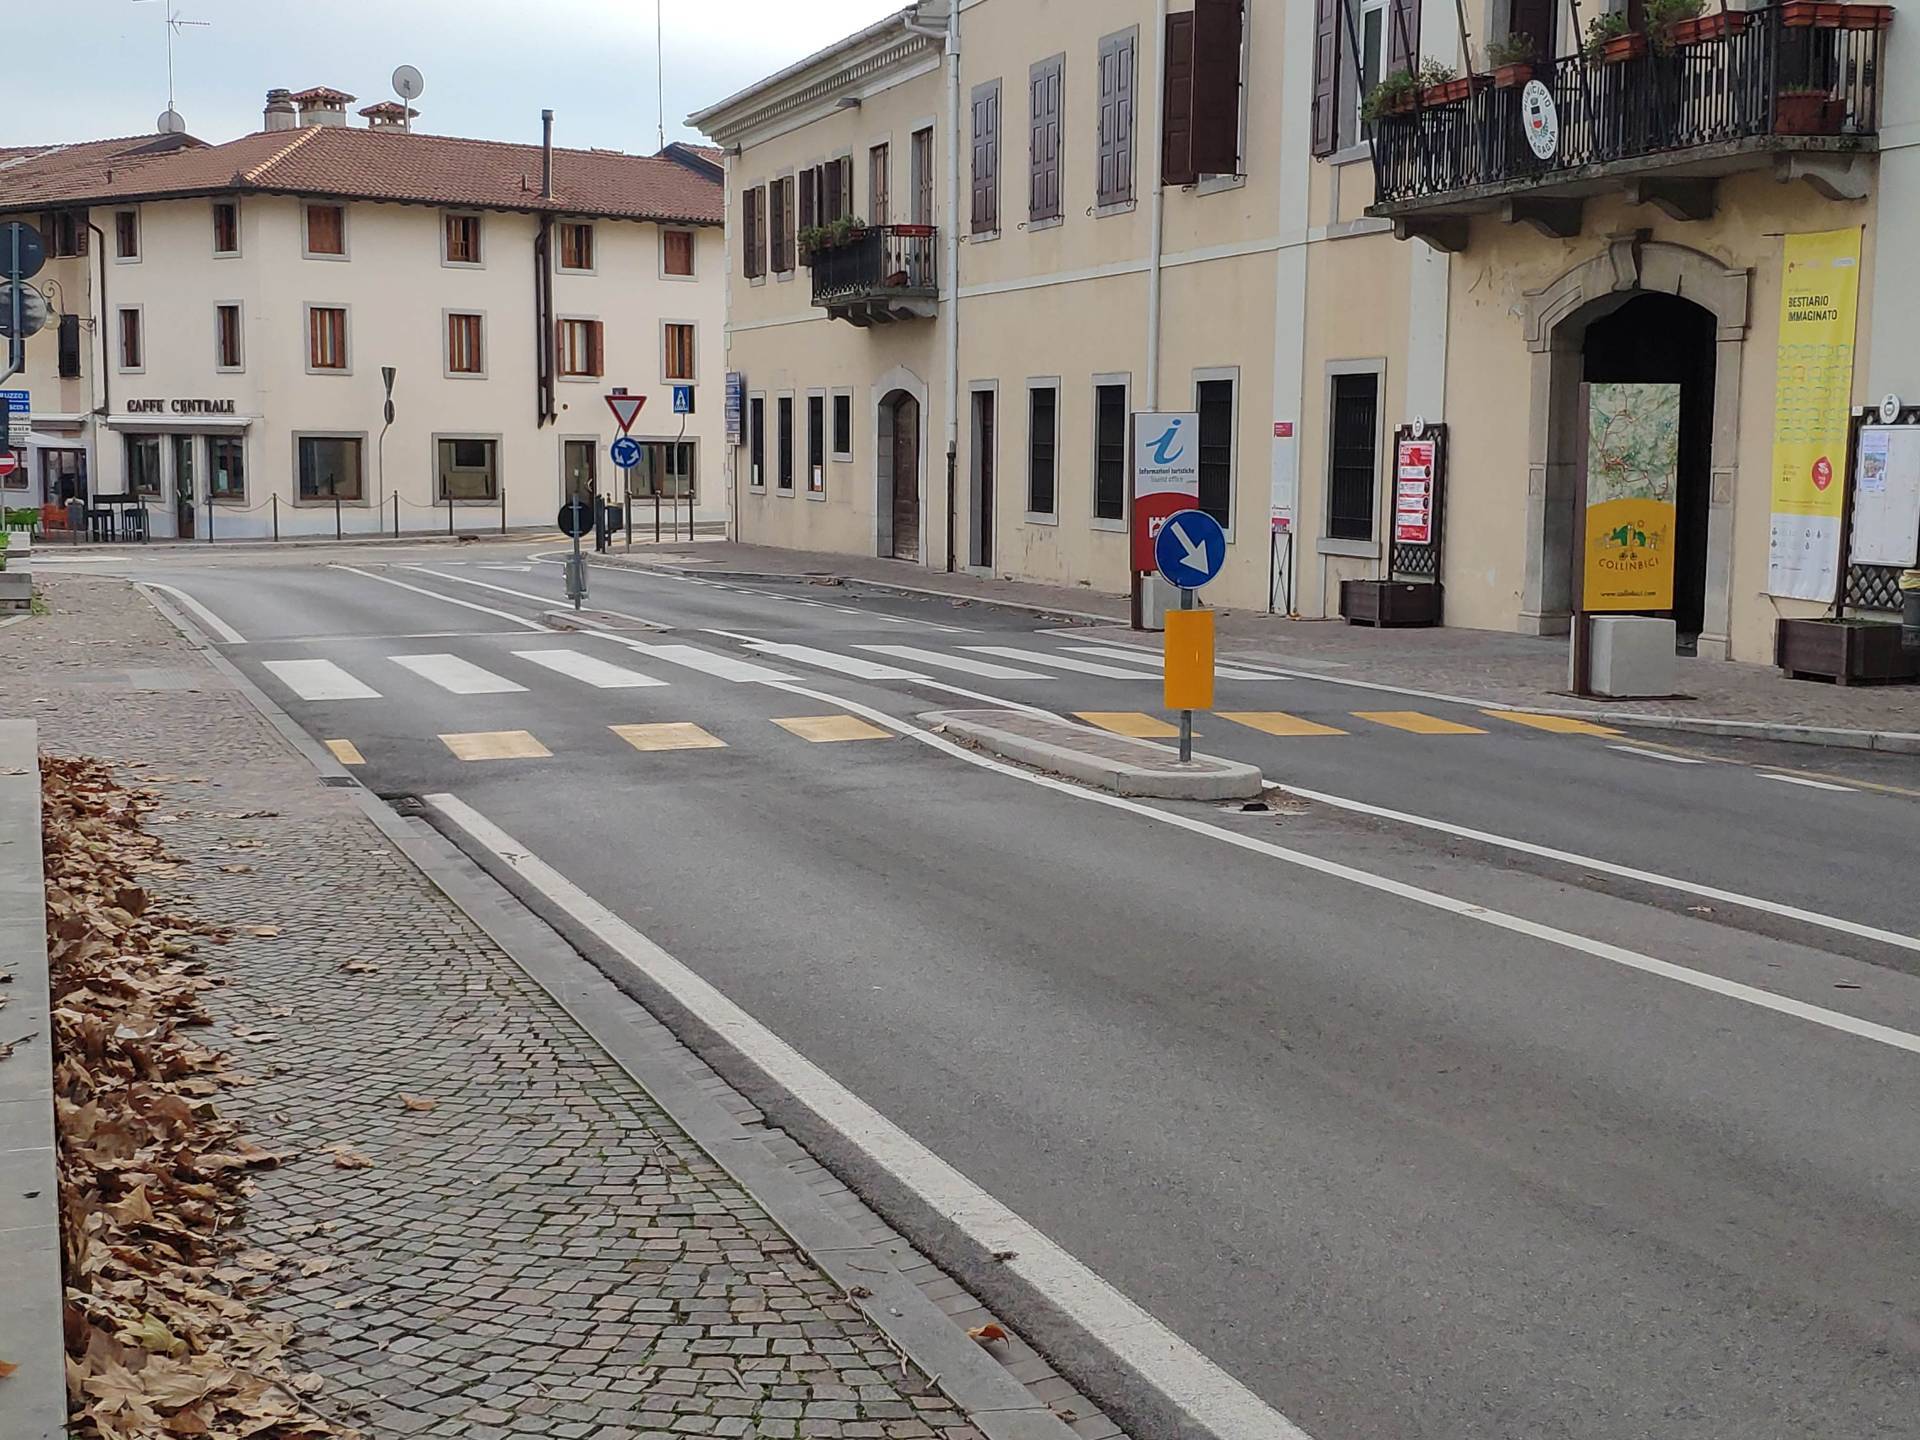
Photo 33 - Pedestrian crossing in front of the Infopoint

Photo 34 - Infopoint Signage
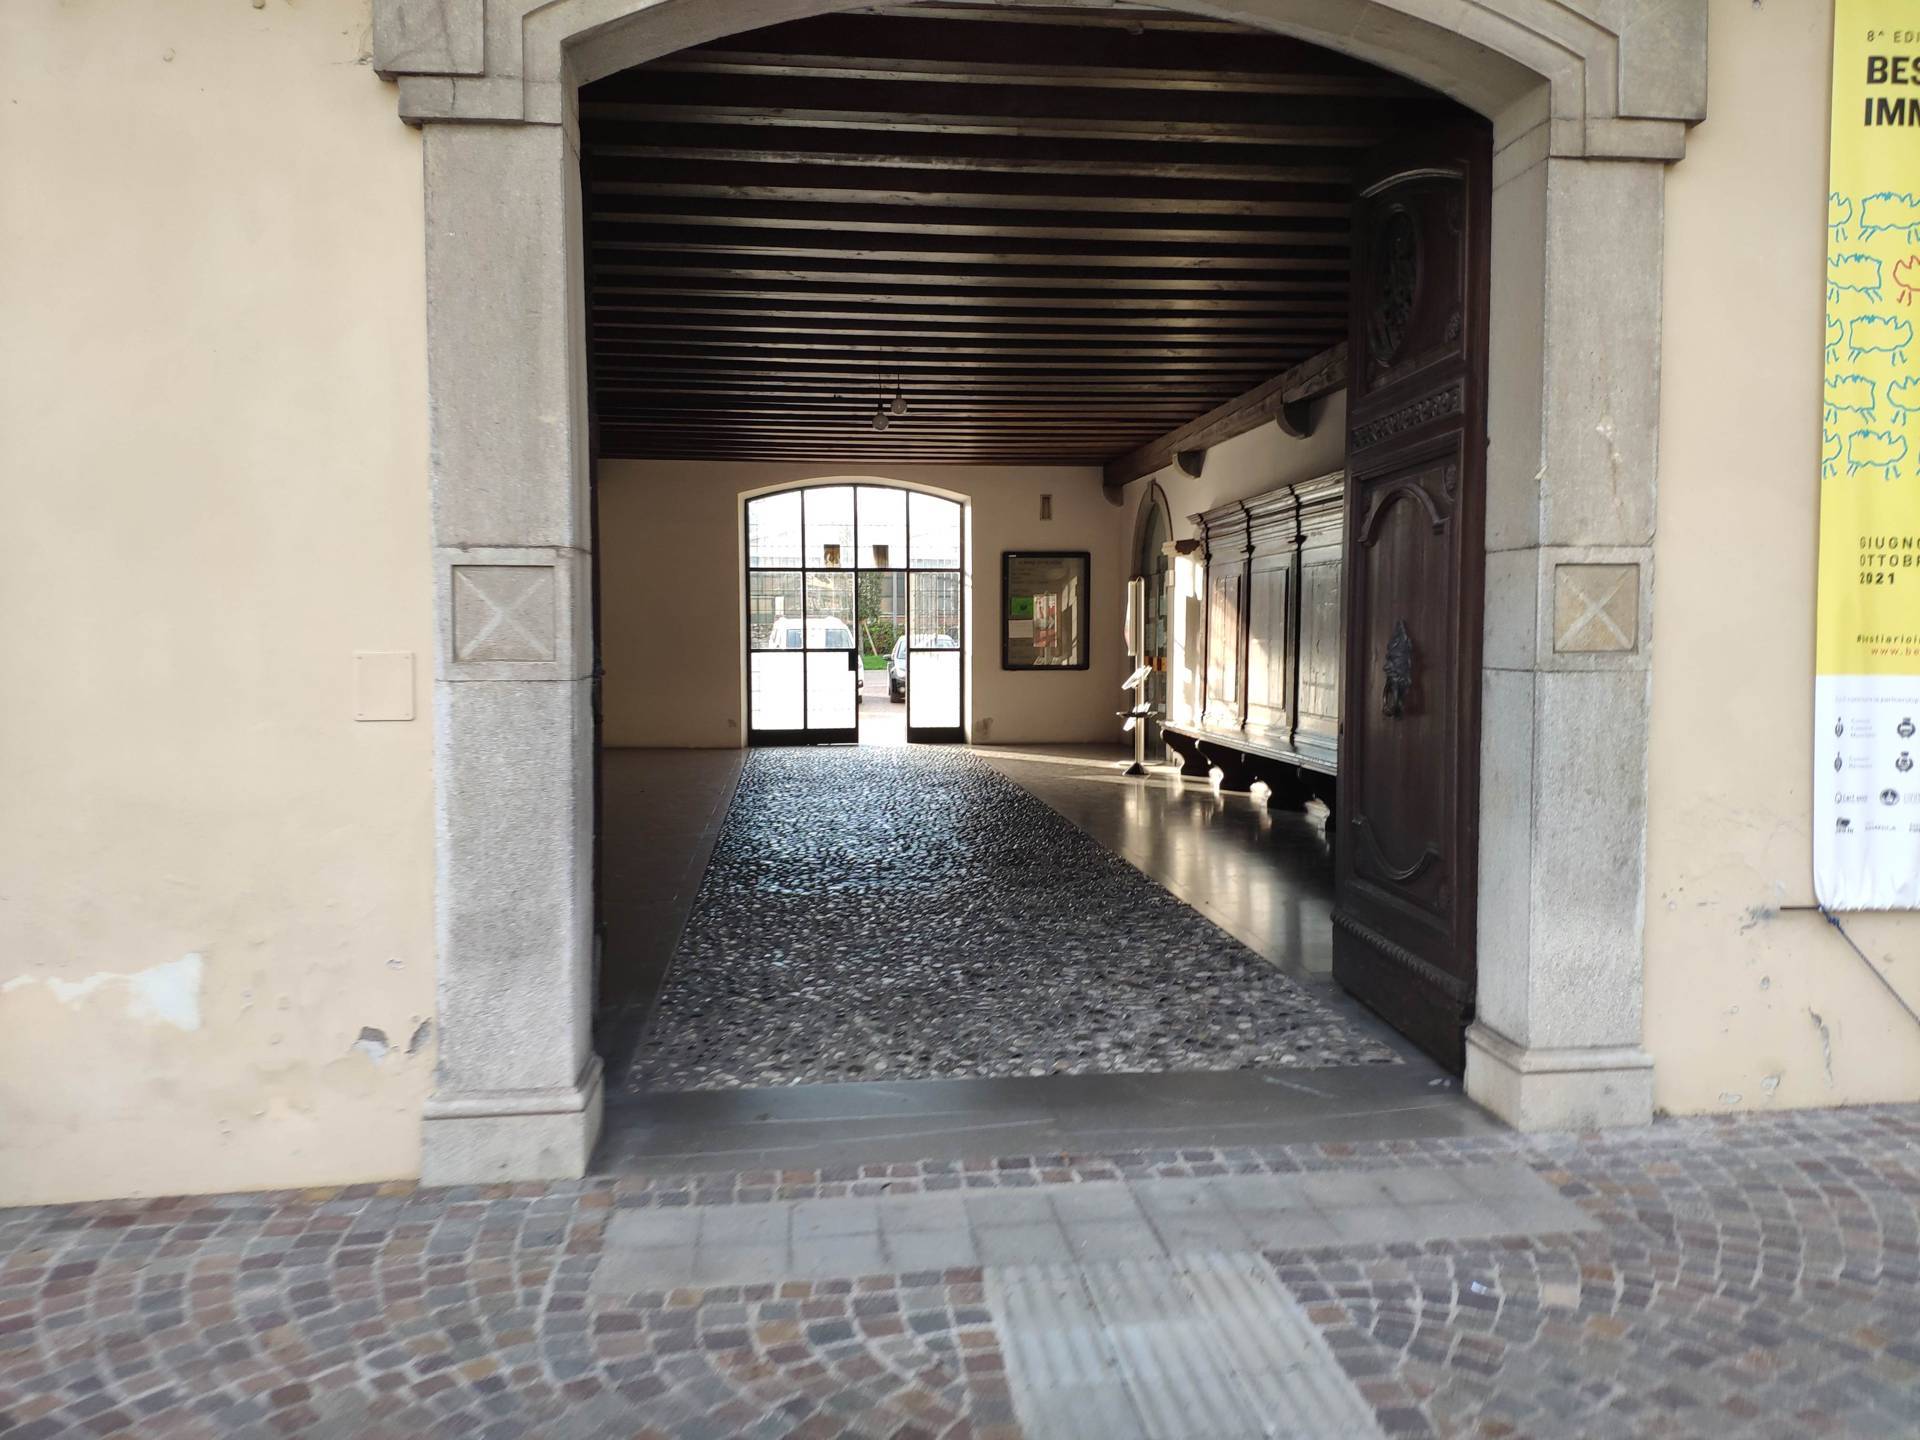
Photo 35 - itinerary on cobblestones

Photo 36 - Entrance of the Infopoint
On the south side of the square, there are three information panels: a large, vertical one, describing the provincial points of interest, which is in a very poor state of repair and has become illegible (there is a map and historical indications on a white background and written in black). Next to this is another information board, in dark-coloured tubing, with a white background and black lettering, complete with map and pictures, which is also now almost illegible. These panels are placed inside the flowerbed, so it is enough to step onto the pavement to read their information. Next to these two panels is an additional panel mounted on steel tubing illustrating the bicycle tourism project in the Friulian hills: white background, black lettering, and excellent legibility (Photographs 37-38). Instead, on the west side of the square, on the side of the Town Hall - Infopoint, there are two panels: one displaying information relative to the Most Beautiful Villages in Italy (Photograph 39), vertical, white background with red background contrasts, complete with a map and images, and another with details of the Town Hall building, slightly faded, with a white background and black lettering (Photograph 40).
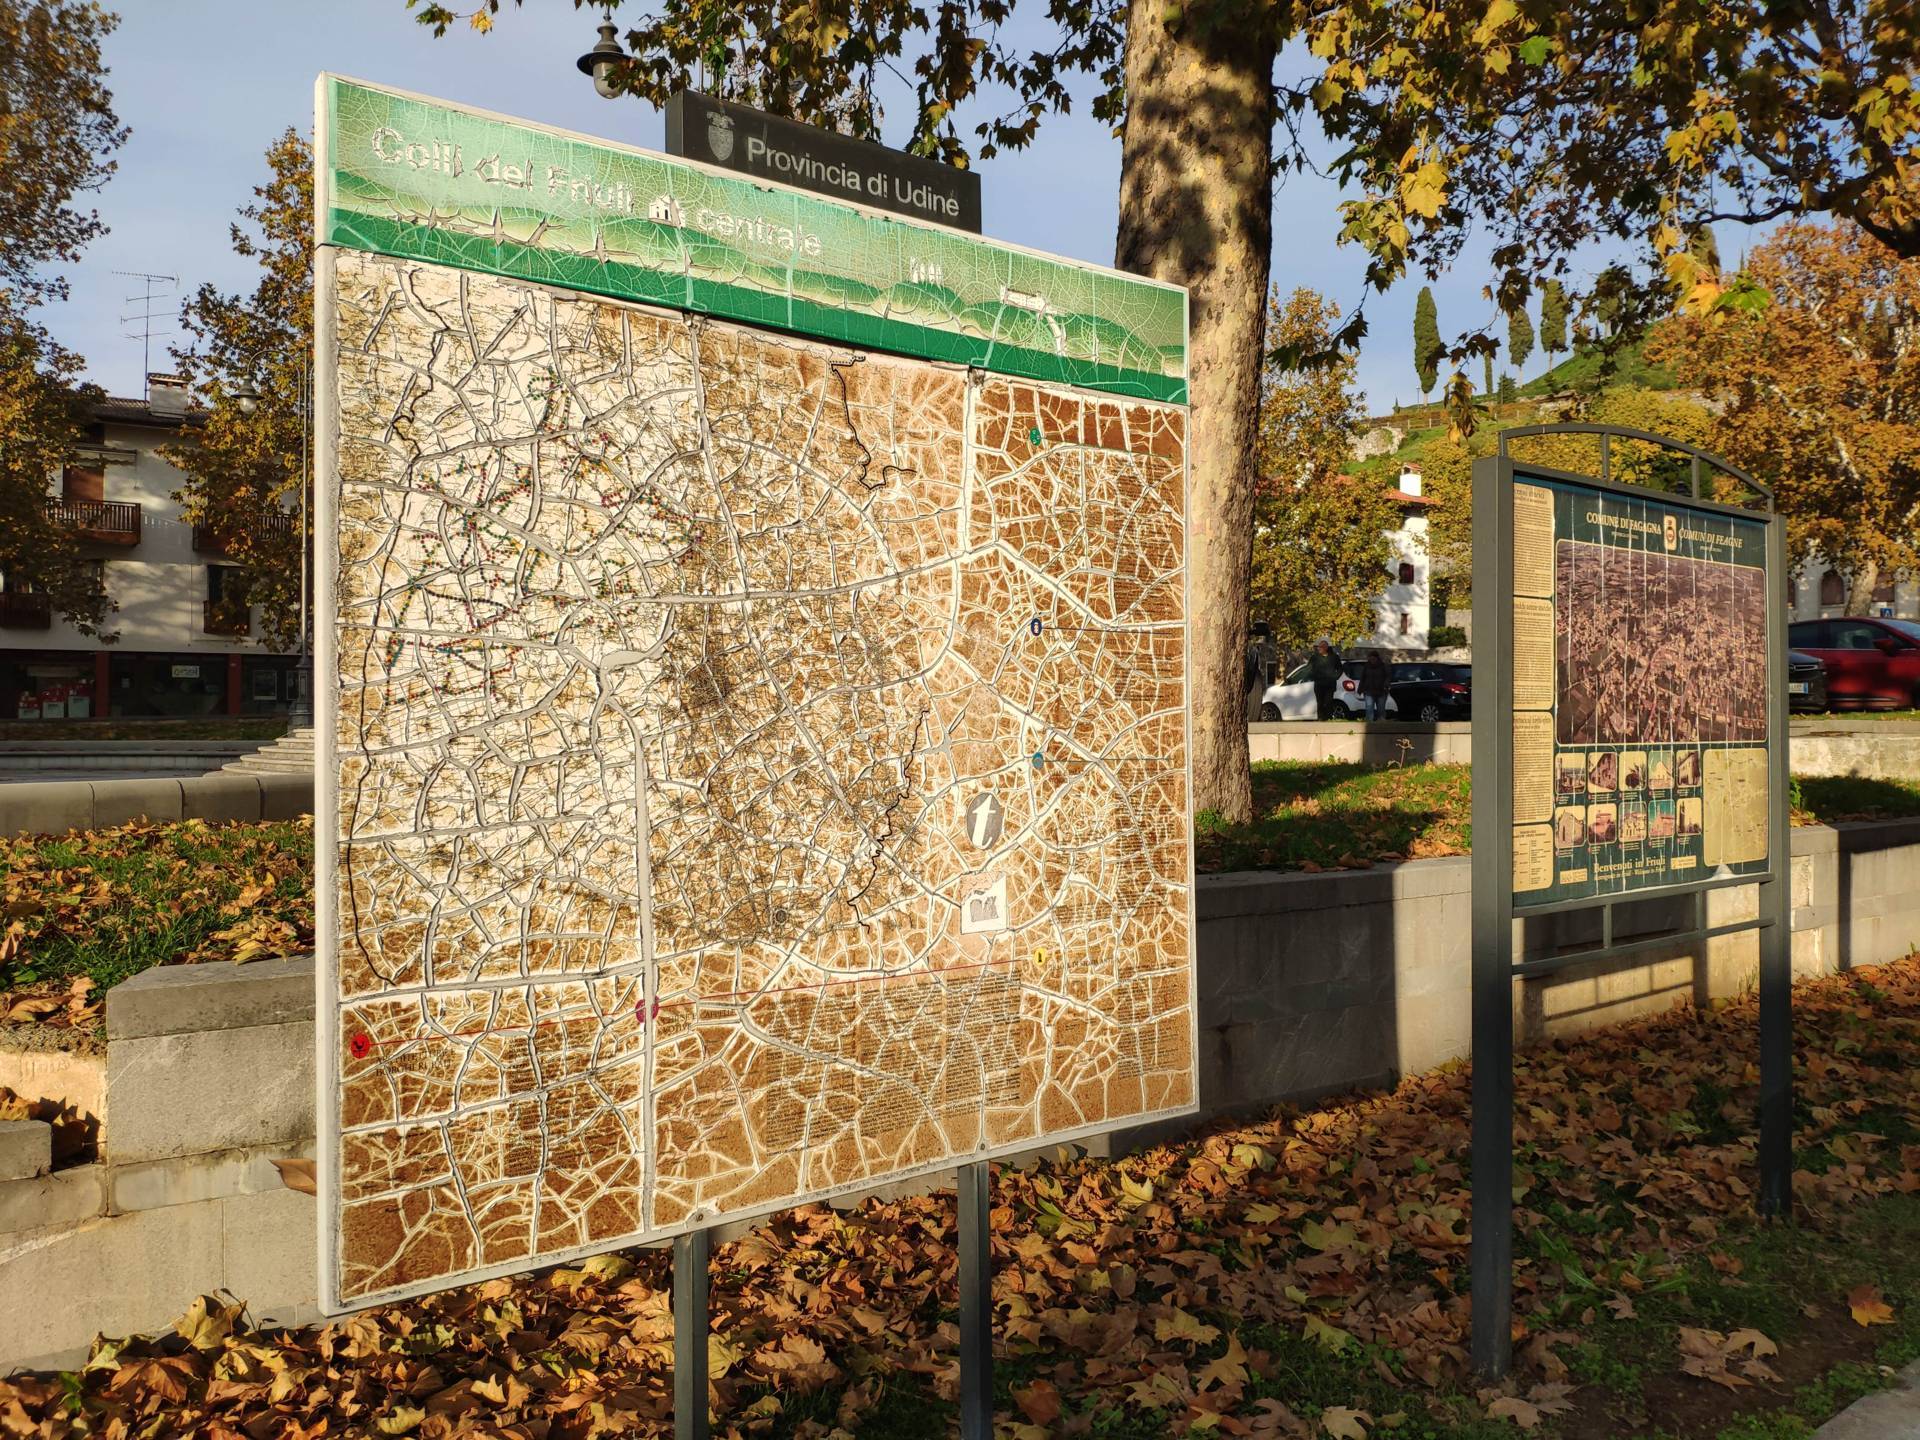
Photo 37 - information panels

Photo 38 - cycling project panel

Photo 39 - panel in front of the town hall

Photo 40 - panel in front of the town hall
Near the pedestrian crossing on the side of the Municipal building, there is a parking space reserved for people with disability. The pavement in front of the Town Hall is made of porphyry, a regular and even surface, with a width equal to 1.60 metres (Photograph 41). After approximately twenty metres to the north-west, the pavement on the city hall side is interrupted and there is no possibility of crossing safely to reach the other side of the street. In fact, there are no pedestrian crossings or any tapering of the pavement to allow access to the pavement (Photograph 42). The pavement on the right side is covered with porphyry cubes and presents a height difference of 13 centimetres in relation to the surface of the road (Photograph 43). In this section, there is also a pedestrian path with steps connecting to the upper level of the square (Via dei Colli) (Photograph 44). From this point onwards, it is possible to continue for a stretch on the right-hand side of the pavement, passing under a series of arcades (a protected and safe route, which is connected with ramps and features an extensive width) (Photographs 45 and 46).

Photo 41 - porphyry path

Photo 42 - pavement on left side

Photo 43 - pavement on the right-hand side

Photo 44 - itinerary with stairs from the upper level of the square

Photo 45 - itinerary on right-hand pavement
Photo 46 - itinerary under the arcades
Considering the poor accessibility of the route in general, it is advisable to take this route by vehicle and stop at points of interest. Given the conditions, it should be noted that the route on Fagagna can also include other sites that are not accessible by wheelchair but are easily accessible while driving a vehicle (or in the worst cases, even if you do not visit the site you can enjoy the view). These include: the ruins of Fagagna Castle (Photograph 47), the Ancient Parish Church (Photograph 48), Cjastenar Hill (Photograph 49), the Stork Oasis (Photograph 50) and the Cjase Cocel Museum.
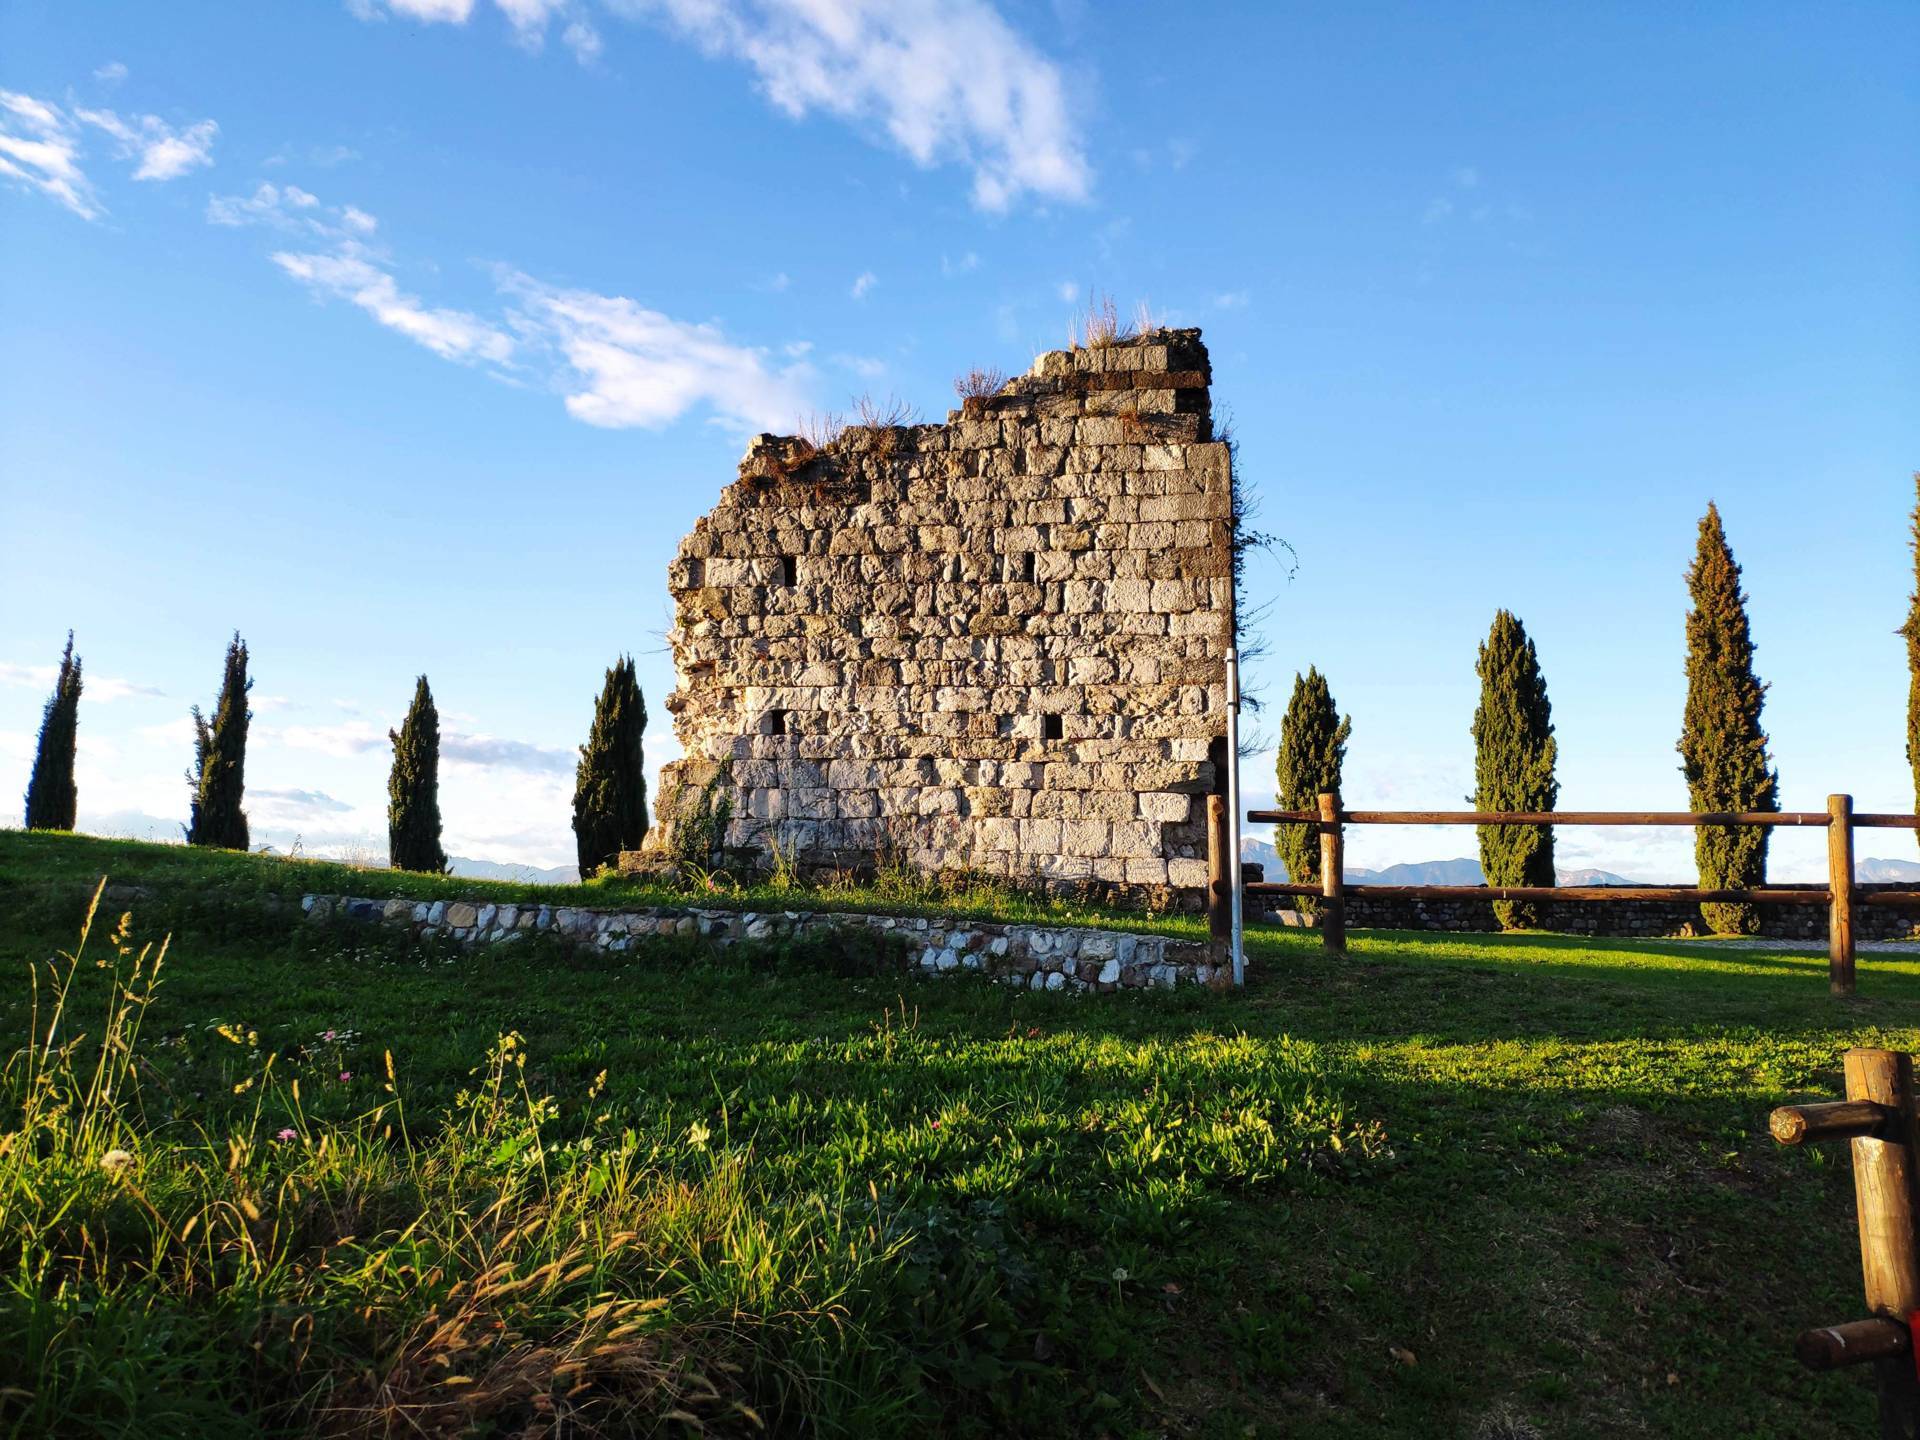
Photo 47 - castle ruins
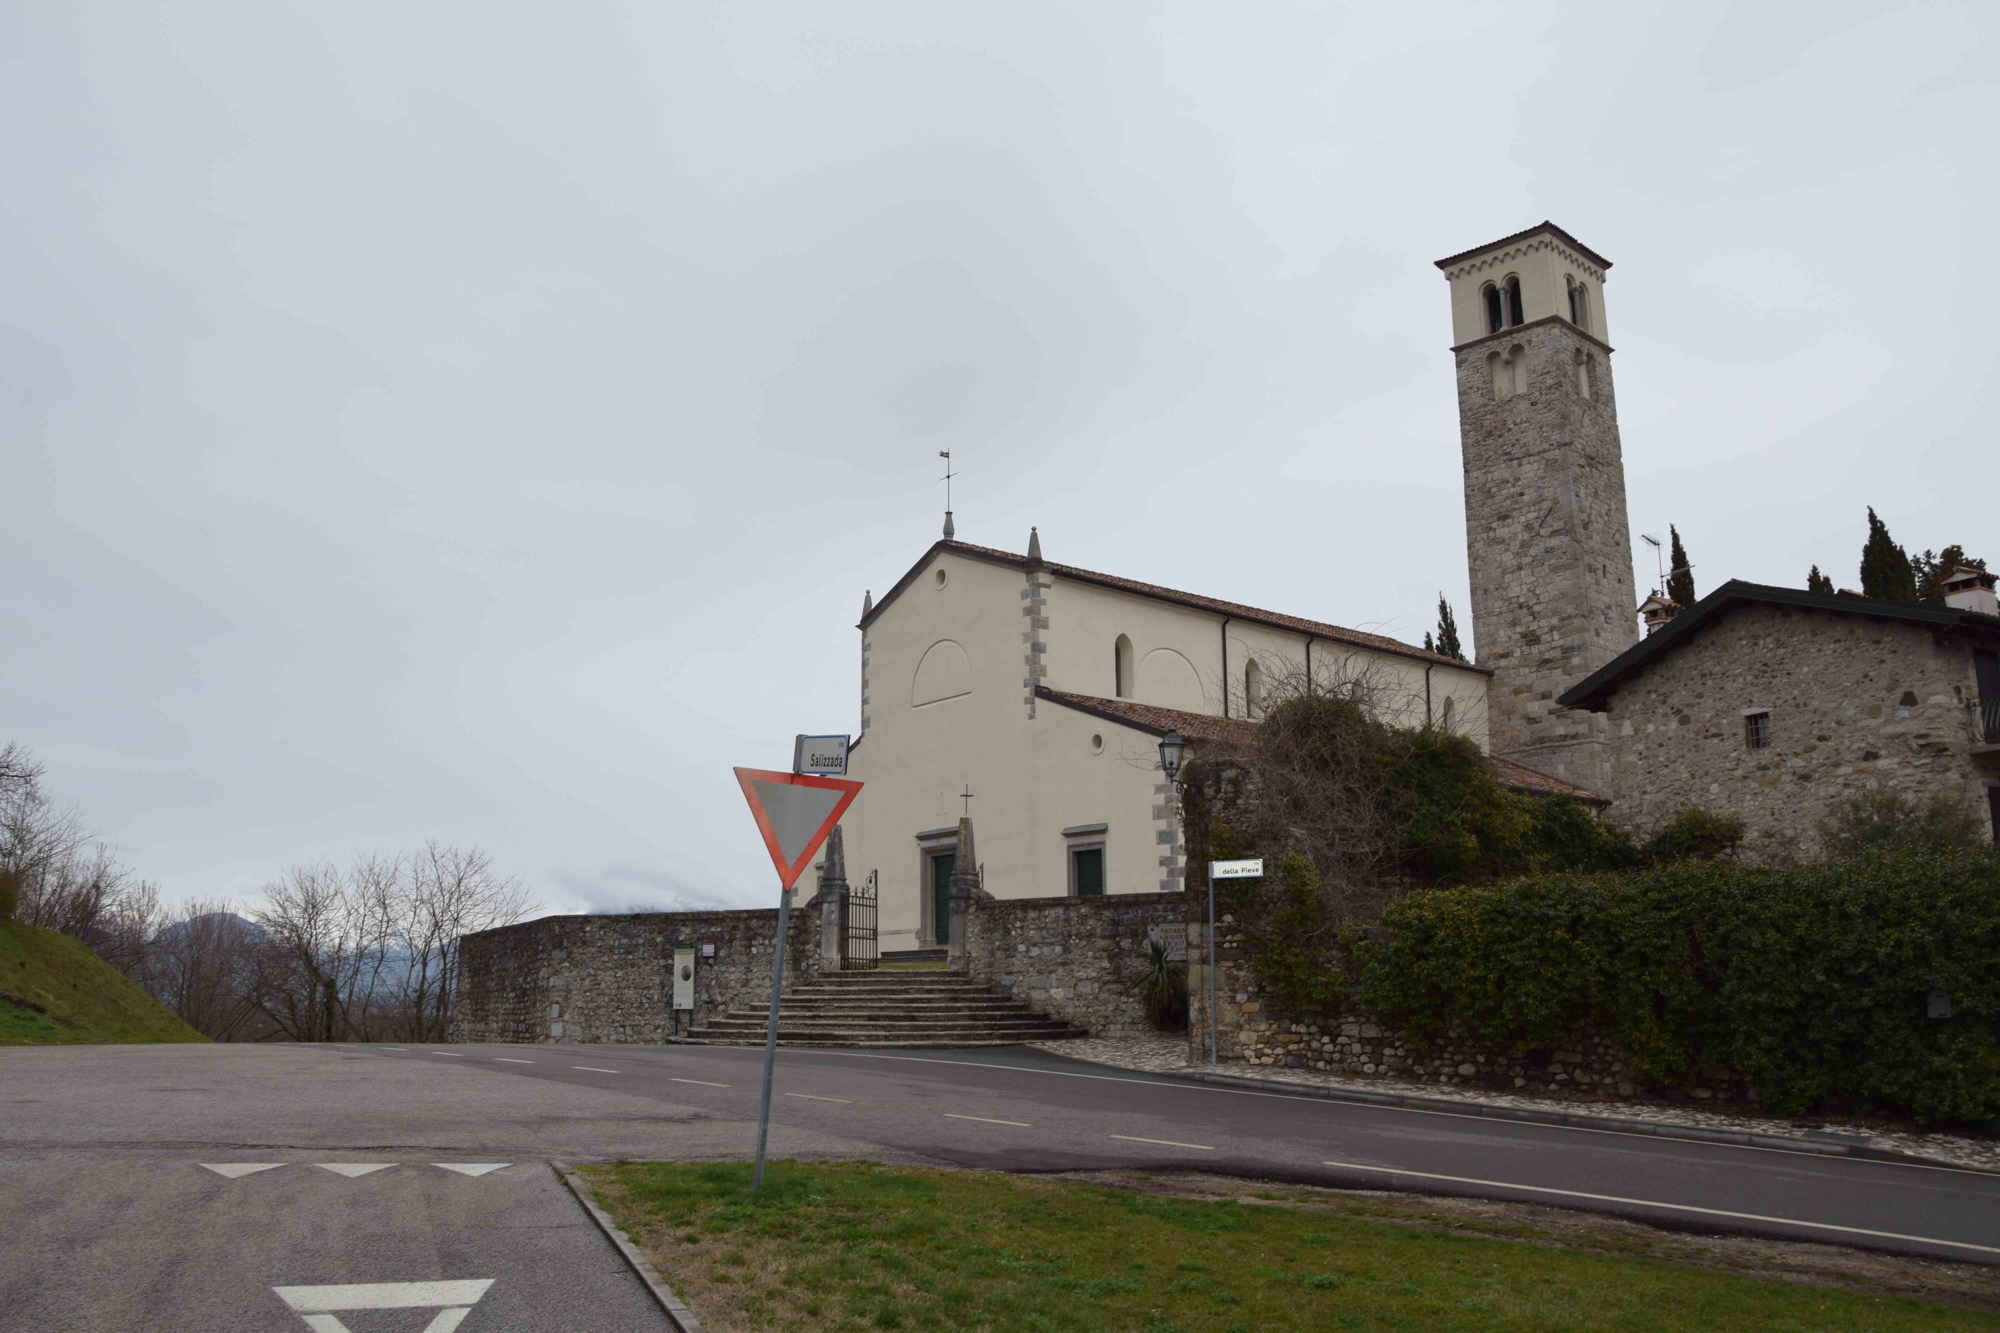
Photo 48 - Ancient Parish Church
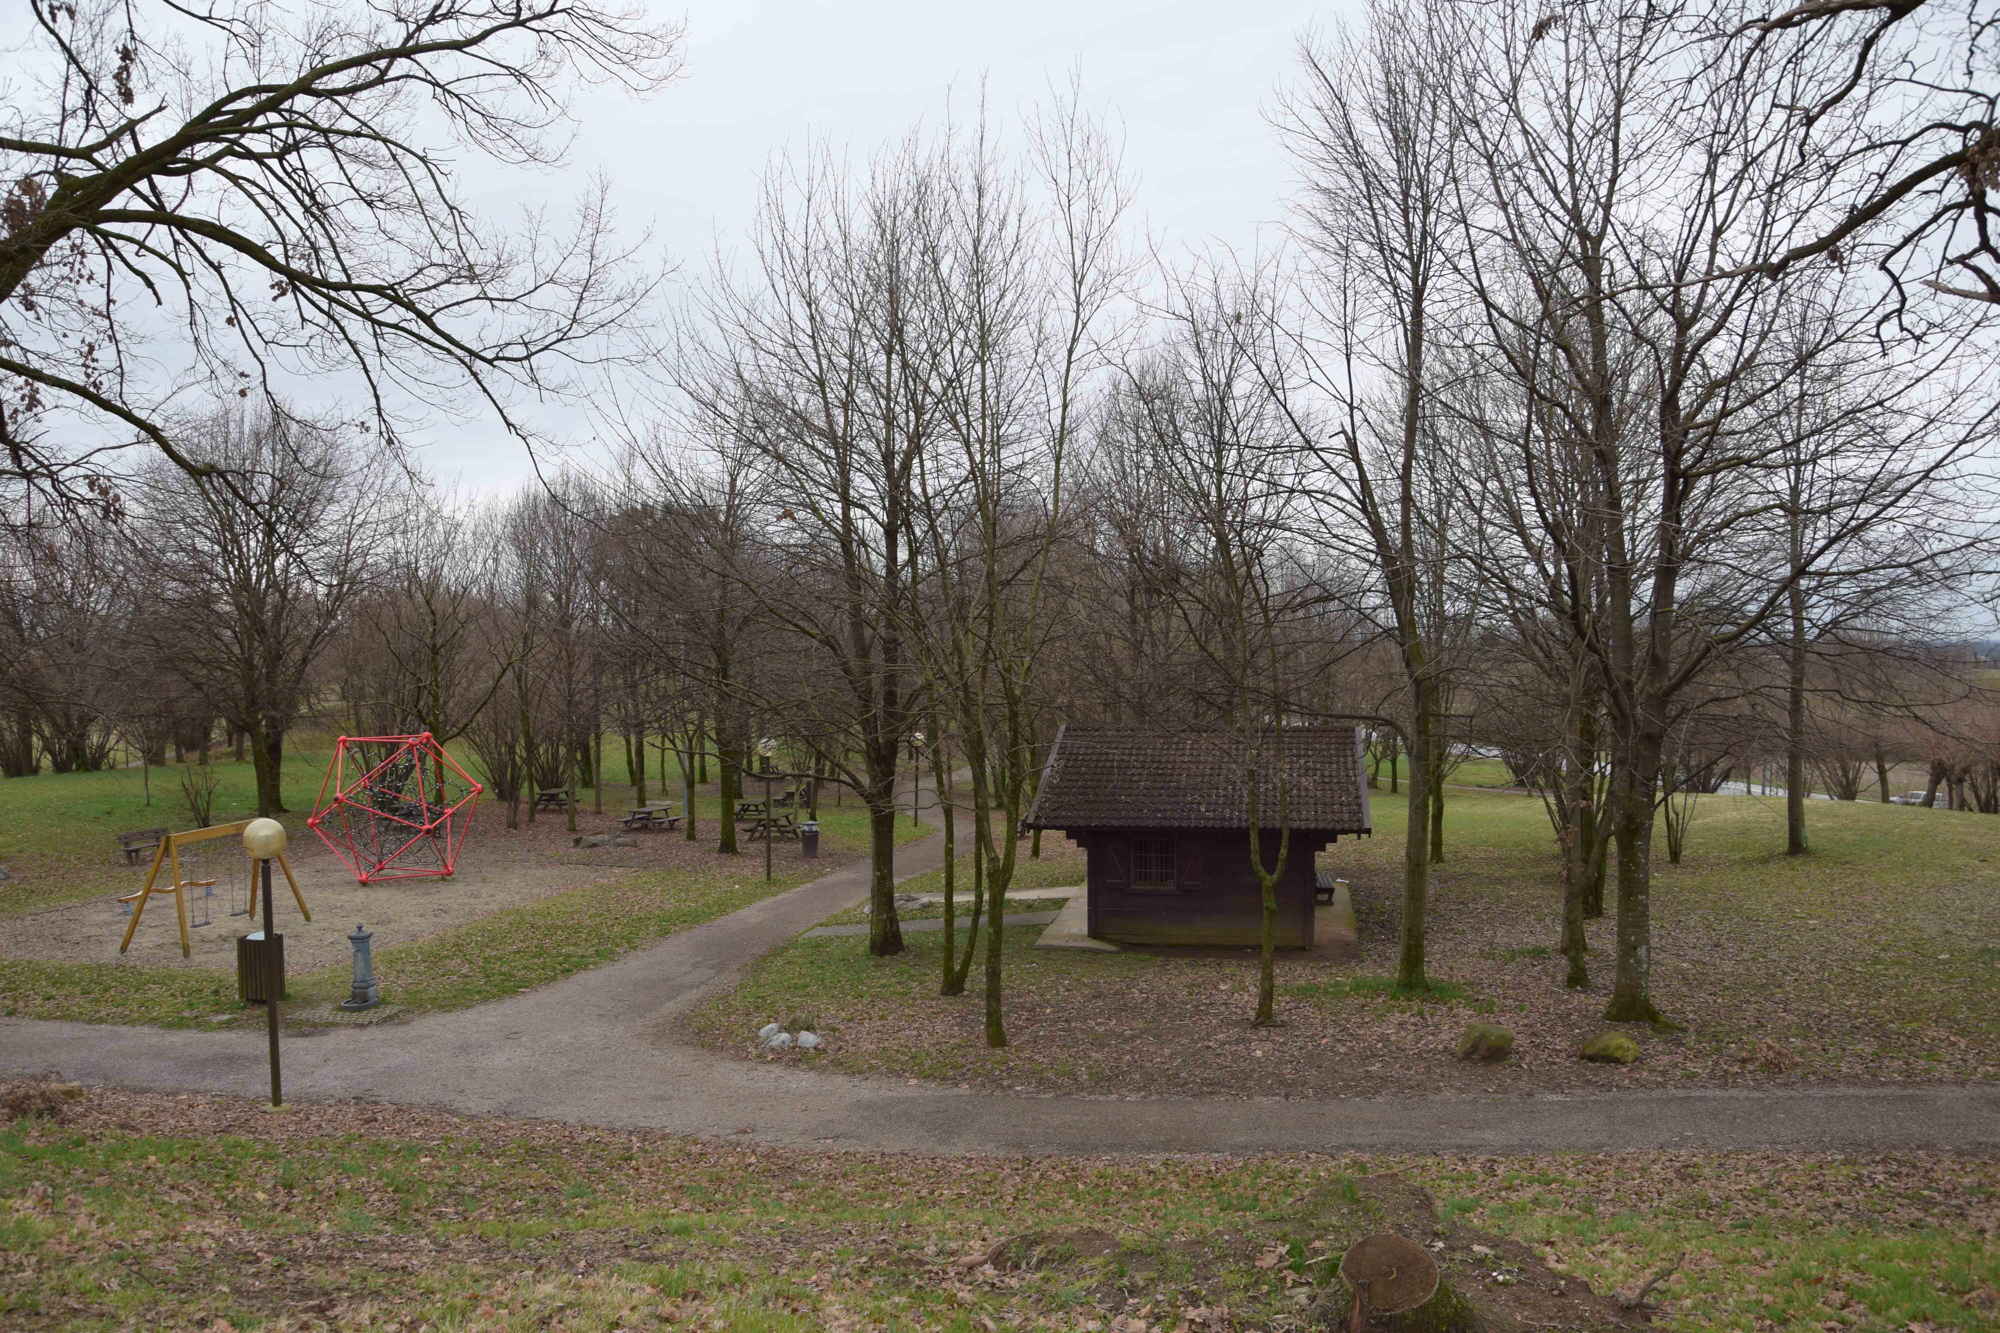
Photo 49 - Cjastenar Hill
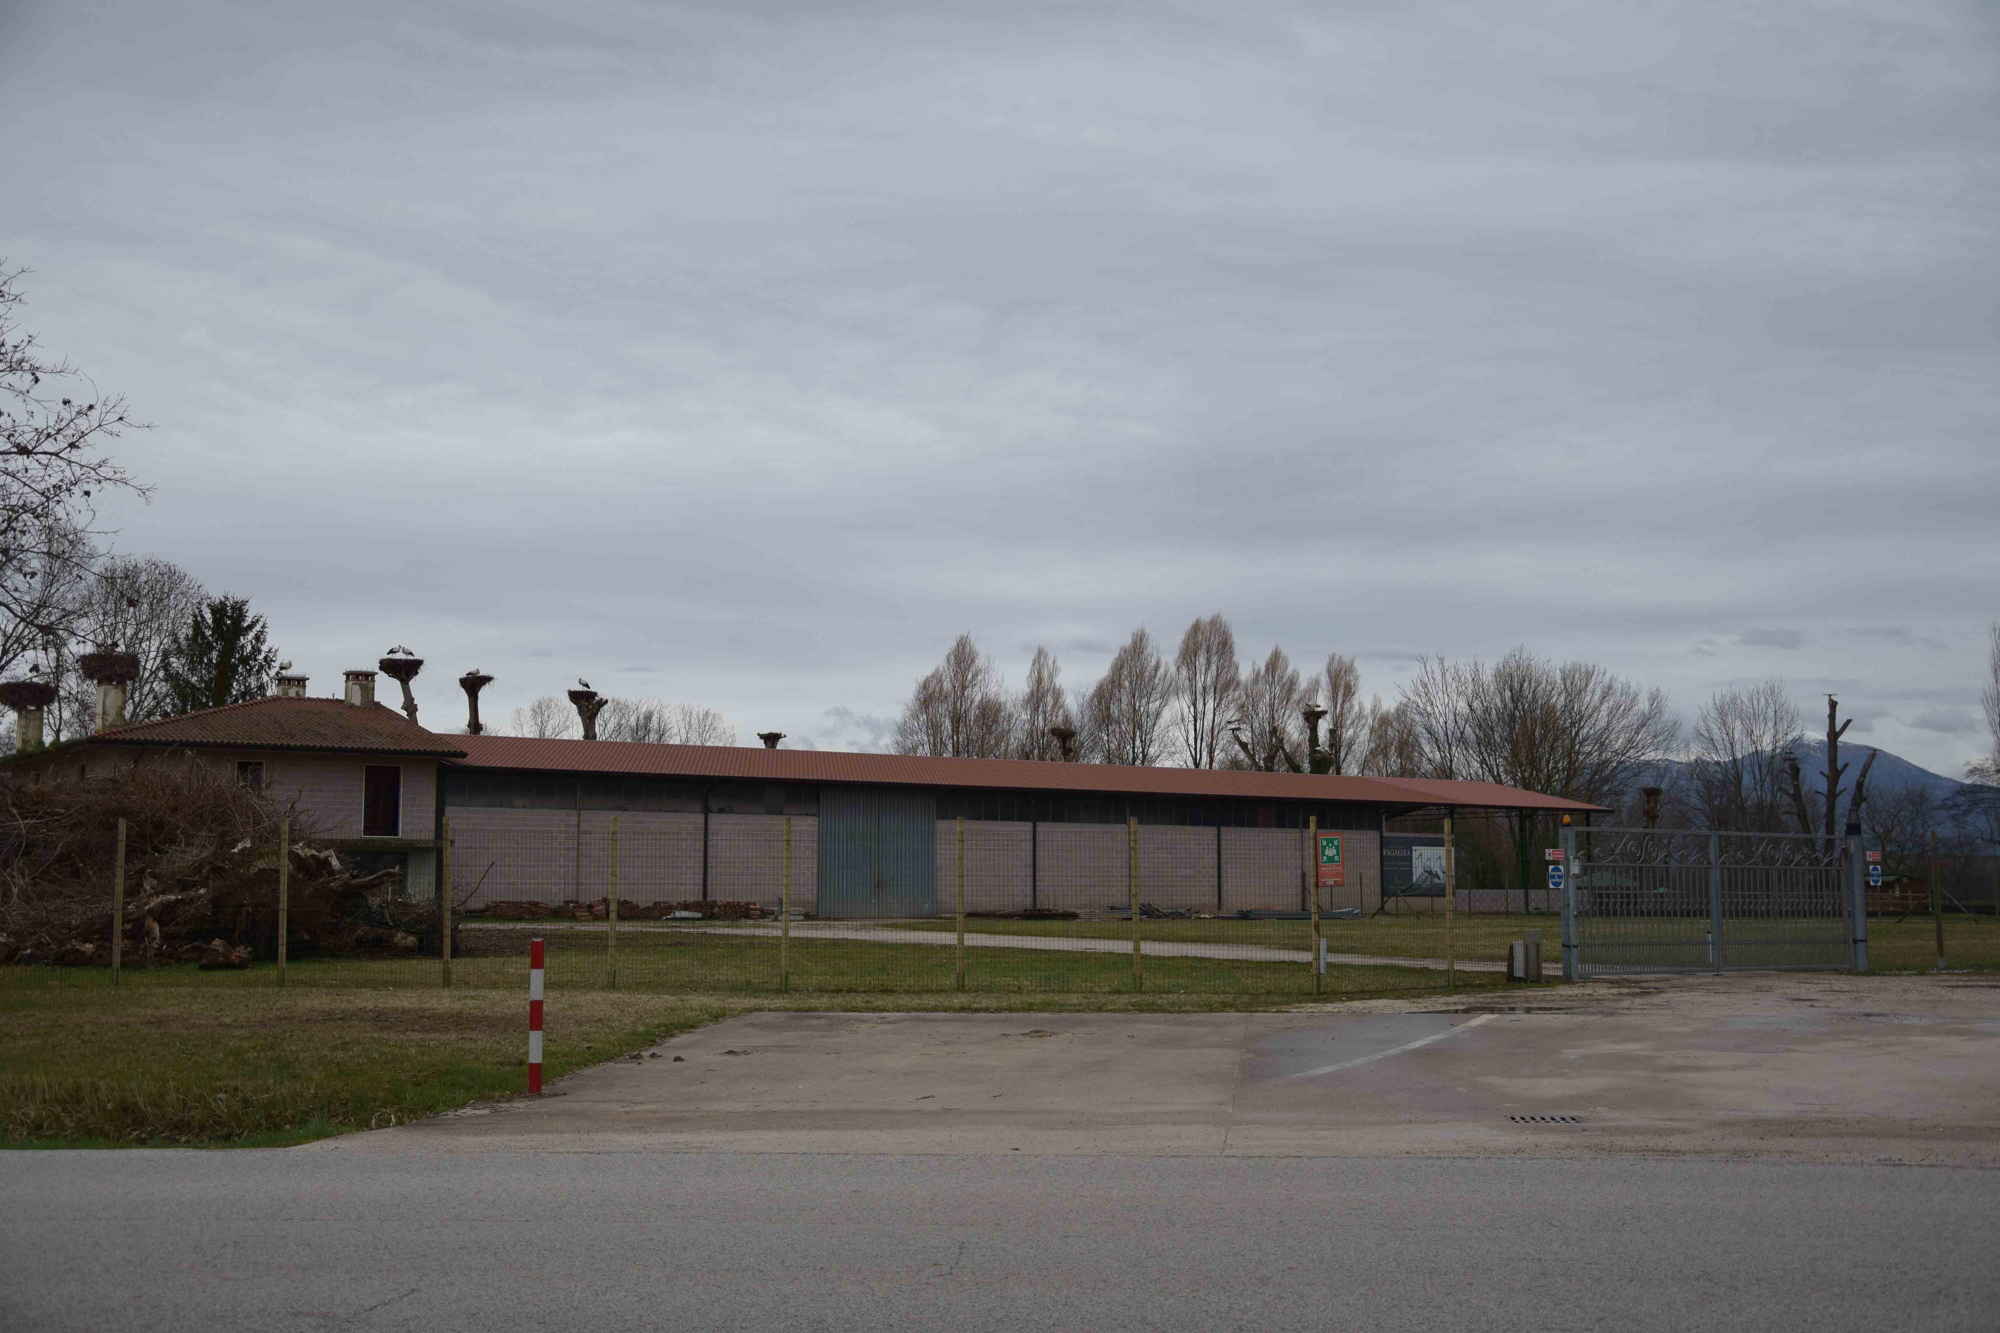
Photo 48 - Stork Oasis
2.7
/3
ENTRANCE
Entrance typology
TYPE:
MainACCESSIBLE:
YesTIPO:
PrincipaleHeight difference (> 2.5 cm)
PRESENT:
NoThreshold (< 2.5 cm)
PRESENT:
YesHEIGHT:
2Entrance door
TYPE:
With two doors or with two opening elementsOPENING:
InsideAUTOMATED OPENING:
NoNET DOOR CLEARANCE:
With two doors or with two opening elementsOVERALL BORE (CM):
260MAIN DOOR (CM):
130DOOR AND BACK DOOR COPLANARITY (NOT ASSESSED HEIGHT DIFFERENCE UP TO 2.5 CM):
YesZERBINI/CARPETS:
PRESENTS:
NoINTERCOM/BELL:
PRESENT:
NoGlass doors: window decals to indicate their presence
PRESENTS:
NoGeneral note
COMPARTMENT
Compartment name
TYPE:
Generic, of the structureIDENTIFIER:
V1Door
ACCESS:
From internal common partsDOOR TYPE:
Single leafOPENING:
InsideNET DOOR CLEARANCE:
Single or sliding doorMEASURE (CM):
85Dimensions
ROTATION DIAMETER 140 CM:
YesPREVAILING CLEAR WIDTH:
> 75 cmPaving
TYPE:
TilesColour contrast floors/walls
TYPE:
YesFLOOR COLOUR:
Red brickWALL COLOUR:
WhiteSignage
TACTILE-PLANTAR PATHS:
NoTOUCH MAP:
NoINFORMATION SIGNAGE:
YesFurniture
COUNTER:
-
HEIGHT:
UniqueGROUND CLEARANCE (CM):
75EMPTY UNDER:
No
EXHIBITOR:
-
HEIGHT:
Dispenser/ShelfMINIMUM HEIGHT FROM THE GROUND (CM):
80MAXIMUM HEIGHT FROM THE GROUND (CM):
150